• Home
  • Handcrafted Cards
    • Challenge Cards
    • Quick Tips
  • About Me
  • Shop
  • More Creative Stuff
    • 3D Printing
    • Home Decor
    • Model Railroading
    • Preparedness
    • Sims 4 Builds
  • Recognition

Cricketleg Creative

“Beautiful Blossoms” Challenge

March 9, 2021 Challenge Cards, Handcrafted Cards

Look what’s blooming in the latest Simon Says Stamp challenge with “Beautiful Blossoms”!
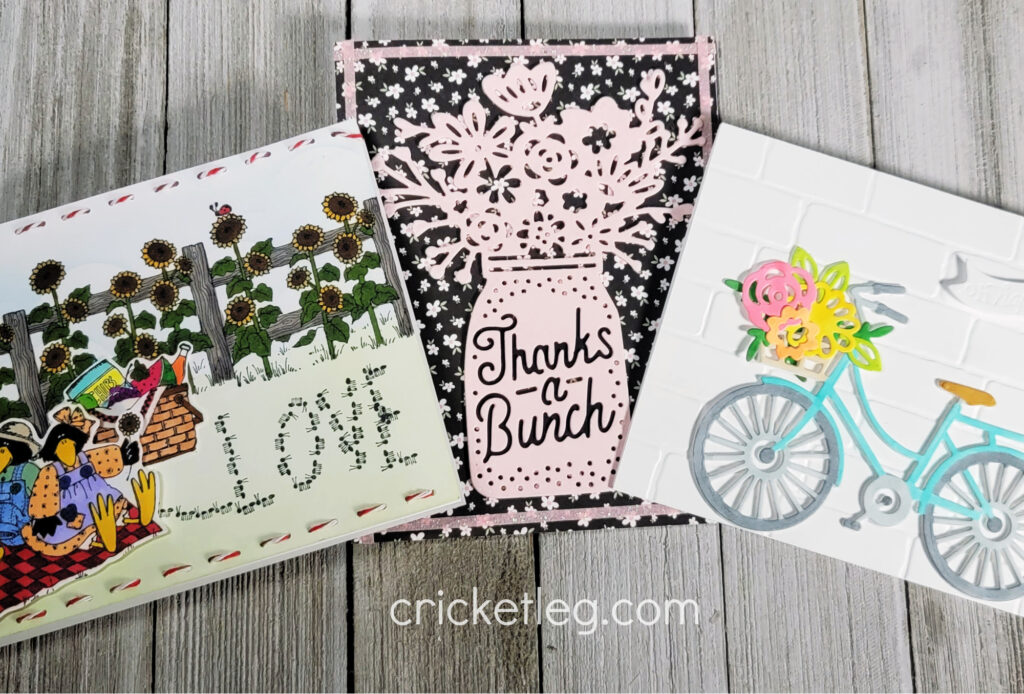
beautiful blossoms challenge

Well, hi!

Spring is just around the corner (thank, goodness) so I’m grateful for some bright, floral fun with this “Beautiful Blossoms” card challenge. I used some new and some old to make three very different cards to enter the challenge.

Let’s take a closer look, shall we?

Crow Picnic Card

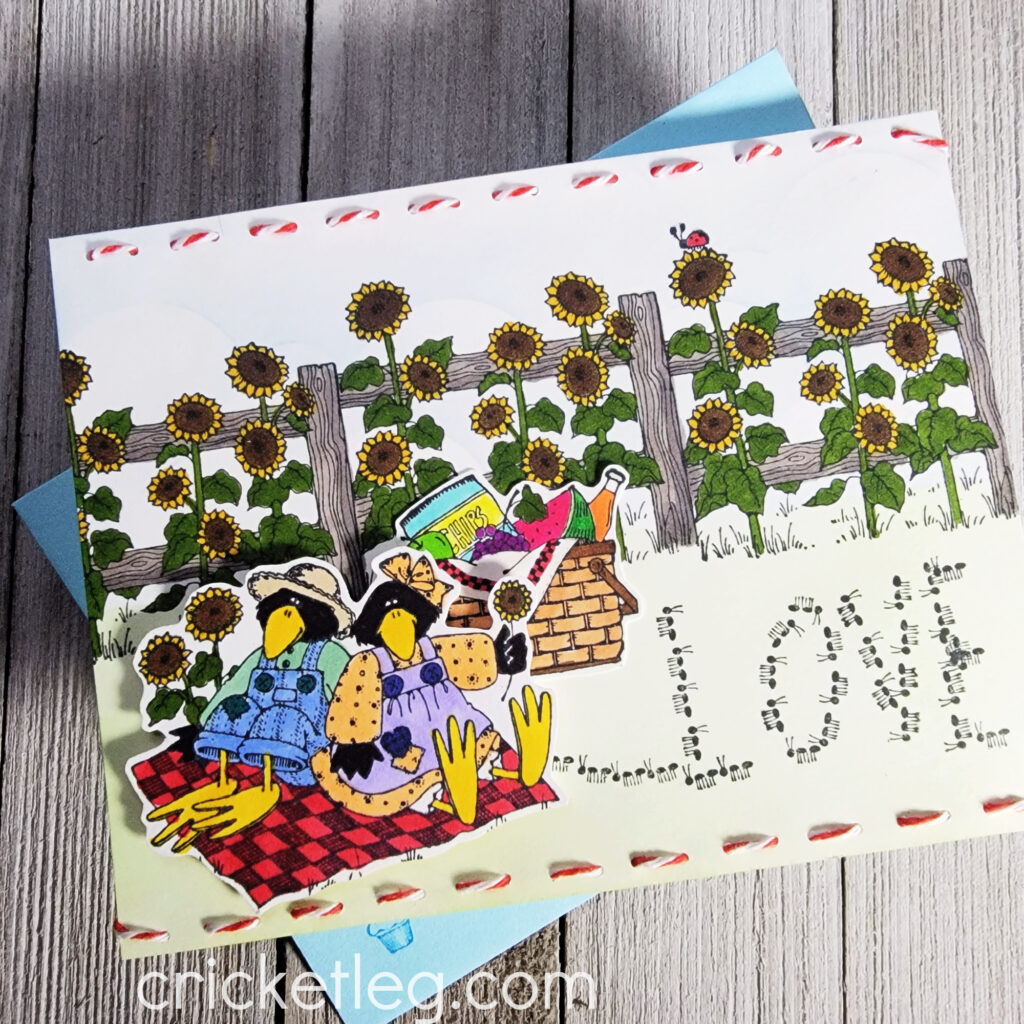
For this “Beautiful Blossoms” Challenge entry I dove into my old Stampin’ Up! stash of stamps for this crow and sunflower set. I remember making tons of cards using this set back in the day. But I always used colored pencils. Now that I have Copic markers I find I use them as much or even more than colored pencils!

This is an anniversary card for a family member so I decided to use the ant stamp to stamp the word “LOVE” in the grass. It’s a little wonky, but hey, they’re ants…they’re not perfect!

I also used some red and white baker’s twine to add some interest at the top and bottom.
beautiful blossoms picnic card

Thanks a Bunch Card

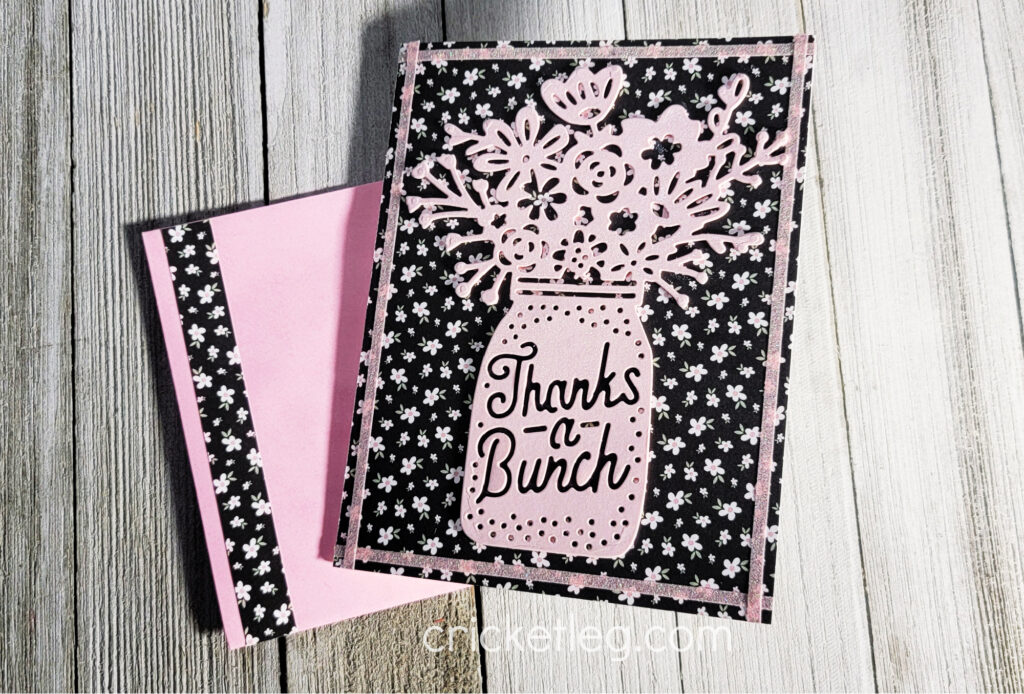
While I do love stamping, sometimes I just want to crank out a card with only paper and no stamps. So I used this Sizzix die cut in pink (four layers) to create the main focus of the card.

The background paper is from a Simon Says Stamp card kit. I used my Spectrum Noir glitter brush to cover the entire front of the jar of flowers. You can’t see it in the picture, and no matter how I angled the camera I just couldn’t capture the shimmer. But it’s there! You can see how it looks on another one of my pink/black floral cards here.

I love pink and black together!
pink and black card

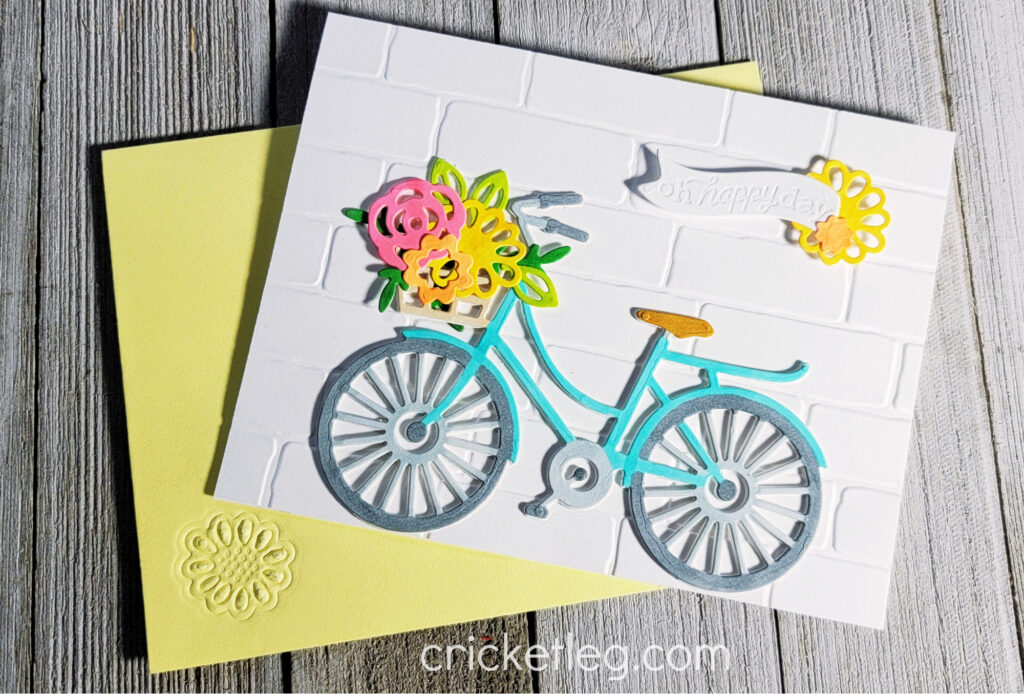
Floral Bike Card

I’ve been wanting to use this die set from Sizzix since my daughter gave it to me recently as a gift. (The floral jar in the Thanks a Bunch Card is also from her! Thanks, dear!) What is it about bikes and flowers?

Anyway, everything was die cut in white cardstock. The bike has four layers for dimension. I used Copic markers to color in the bike and flowers. The background is made using an embossing folder.

I used an embossing mat in my Big Shot to press a flower image onto the matching envelope. Loving the look of this clean and bright card!
floral bike card

Alright, spring. I’m ready. You can come now. I guess while I wait I’ll just have to hope that Simon Says Stamp will do more spring-y challenges!

Y’all take care!
Leave a Comment Categories: Challenge Cards, Handcrafted Cards
Share :

“Something New” Challenge

January 12, 2021 Challenge Cards, Handcrafted Cards

Well, hi! And welcome to the entries for the most recent Simon Says Stamp Wednesday Challenge theme of “Something New.”

Fortunately, I have a good amount of “something new” items to choose from as Christmas and my birthday are pretty close on the calendar. I’ve been able to receive and hand pick a few juicy items!

So without further ado, here are my four entries into this “Something New” Challenge. Let’s go!

Sunshine

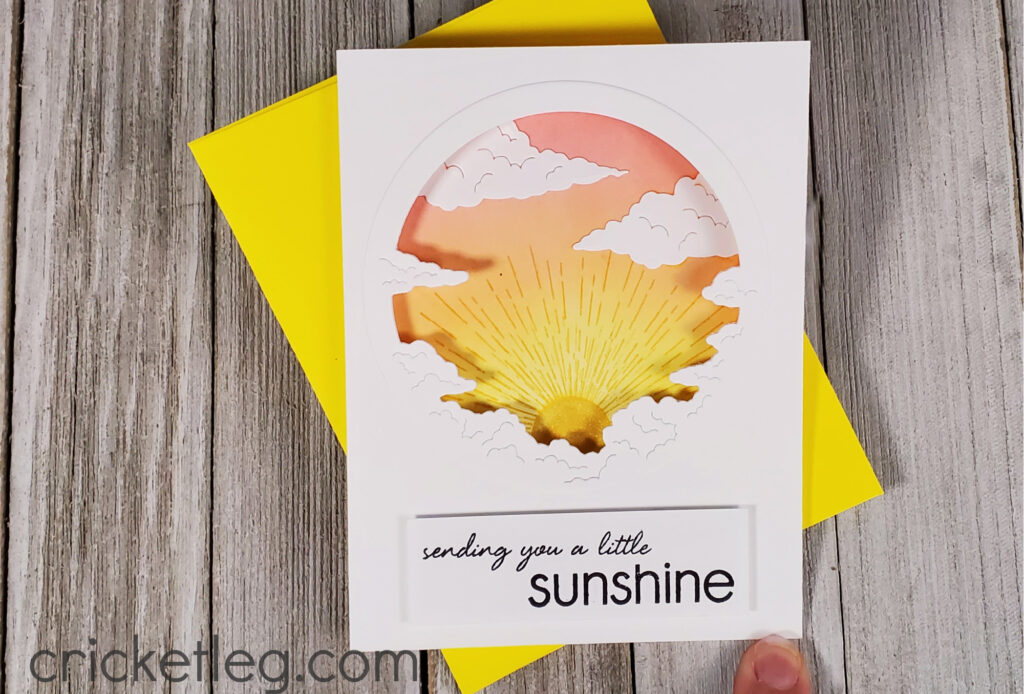
While it wasn’t a Christmas or birthday gift, it is nonetheless new. What am I talking about? The December Hero Arts kit items used to make this sunshine card. I just barely blogged about this card, so if you’d like to read up on it, you can check it out here.

I love how this card turned out. Very simple and clean and features one of my very favorite subjects to create……SKIES!!!

sunshine card

Snowflakes

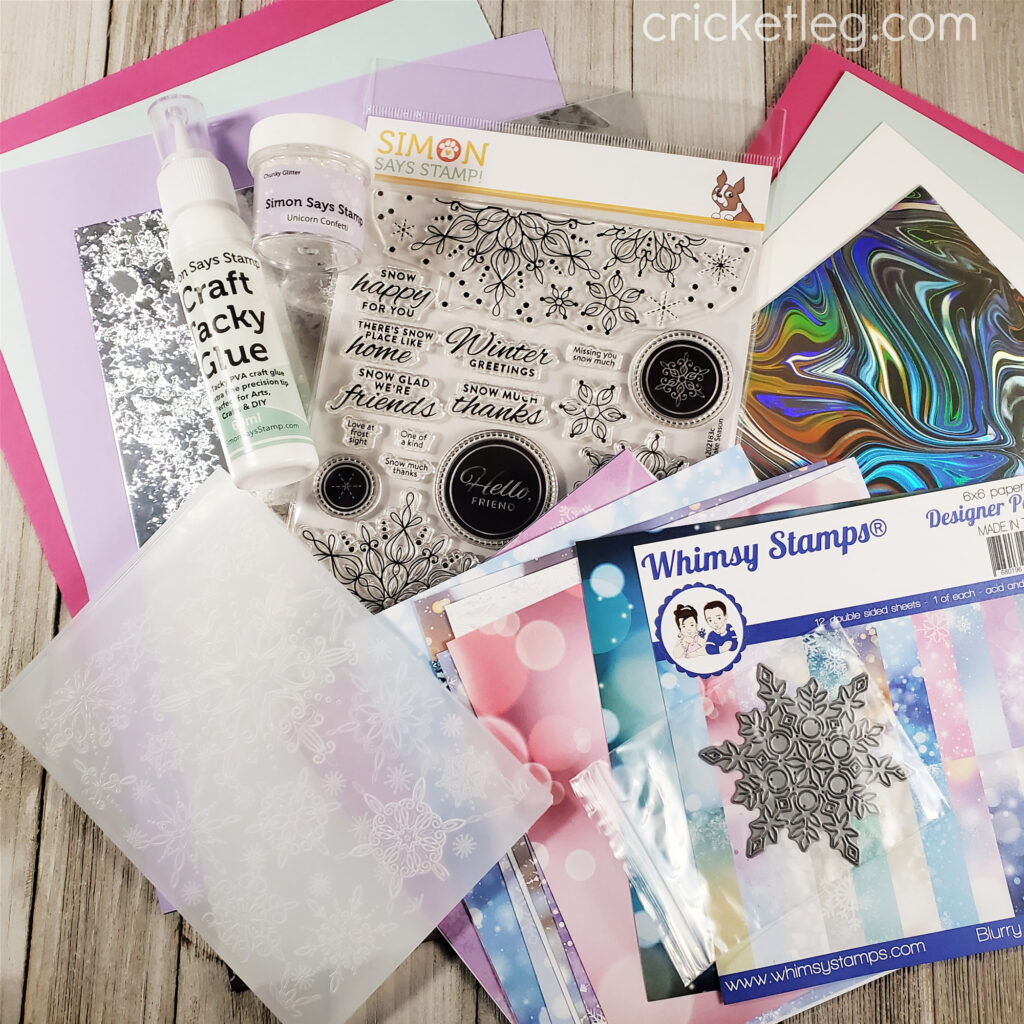
Another recent kit treasure is from Simon Says Stamp. It’s the January card kit of the month and it’s sold out! No wonder, as it’s pretty awesome.

It came with all sorts of juicy stuff, as you can see below.

simon says stamp january card kit

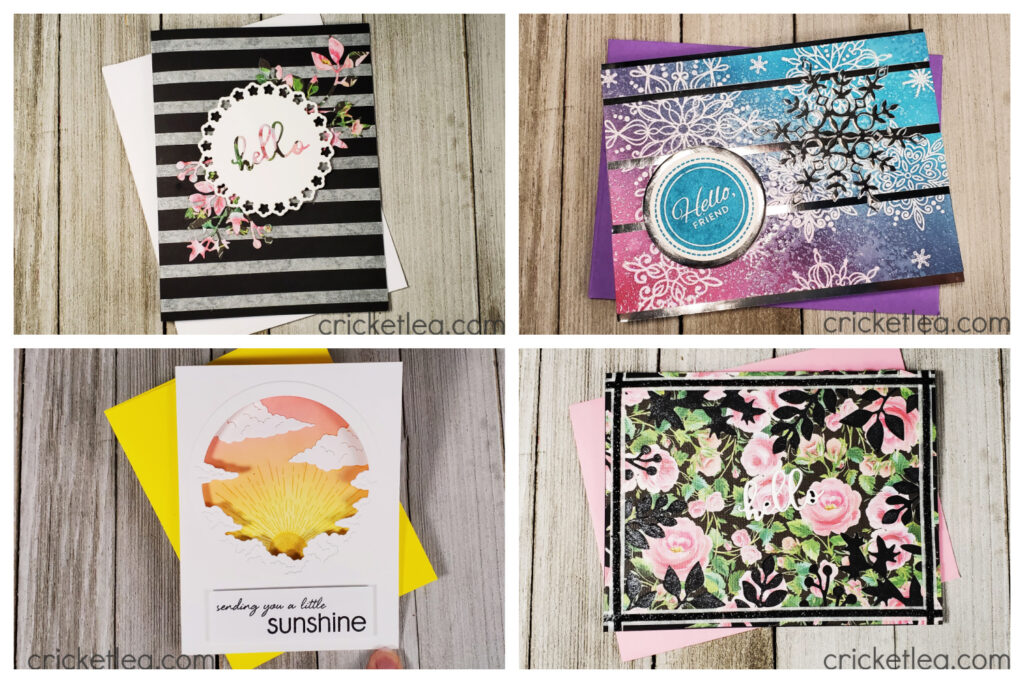
For this card I used some of the stamps from the stamp set as well as the snowflake die. I stamped some of the snowflakes with Versamark ink and used white sparkle embossing powder (I believe from Hero Arts) to finish them off.

The background is made using ink blending brushes and blue, pink, and purple ink. To give the background a mottled appearance I sprayed it with a fine water mist. But that didn’t give me quite enough texture. So I sprayed it with Distress Resist Spray and let that dry. I then reapplied some of the ink blending to intensify the color and contrast. Love it.

To give it some interest, I cut up the card and mounted it onto metallic silver paper. The sentiment and the die cut snowflake have that same paper. Kind of fun.

something new challenge

Hello Floral I

My daughter gave me some lovely patterned paper for my birthday the other day, along with some other paper crafting goodies! (Thanks, Audrey!) So I thought for my “Something New” Challenge I could use that paper.

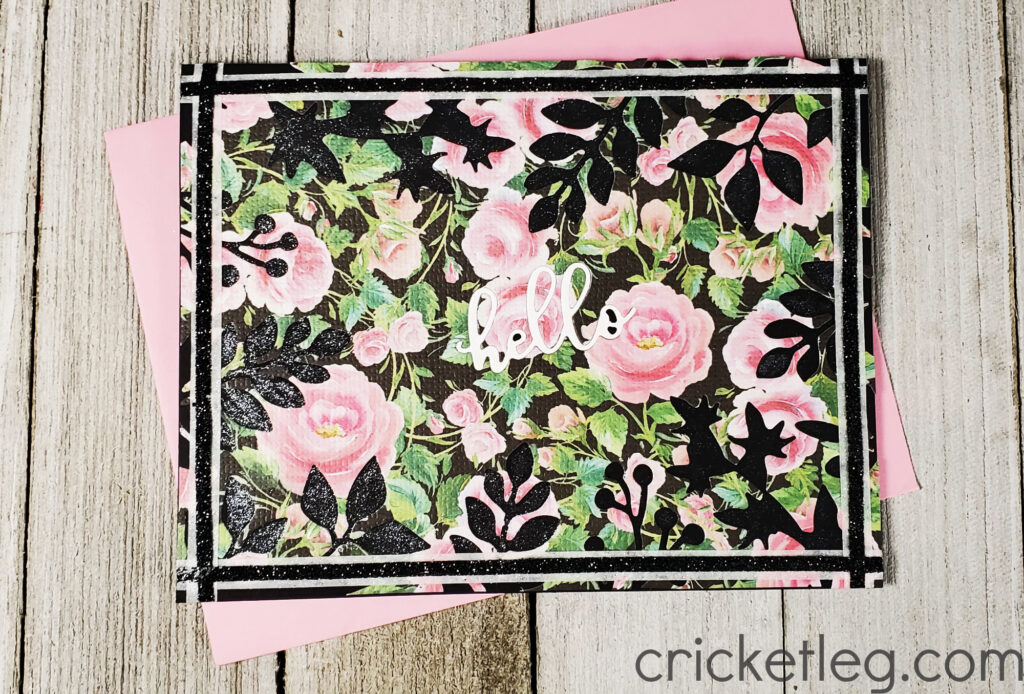
The floral pack of paper is just gorgeous and also has a texture to it. I love black and floral, so I paired some black cardstock with this black and pink floral. Wanting to do something a little different, I decided to use some greenery die cuts and use the negative space left behind as the design.

The “hello” is die cut from the center and then filled back in with a white cardstock die cut. To give it some shimmer, I used my Spectrum Noir glitter brush both on the greeting and on the negative space die cuts.

To finish off the card, I used white and black glitter tapes to create a border around the card. Paired with a lovely pink envelope I think it makes a charming card.

something new challenge

Hello Floral II

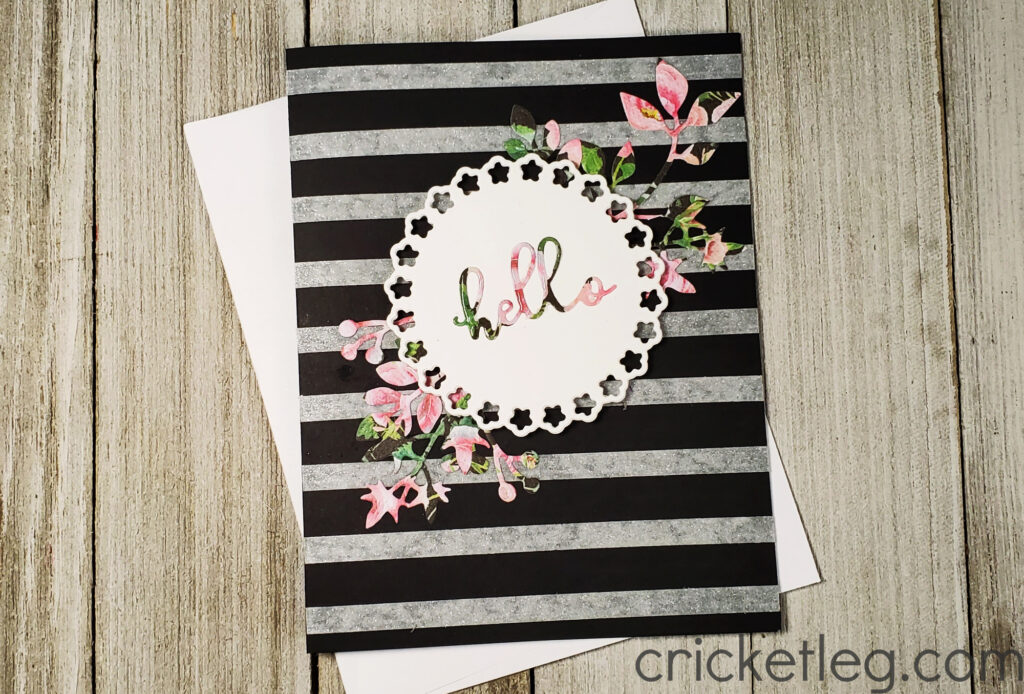
After all that die cutting, I didn’t want to waste what came off the above card. So I decided to use those “scraps” to make another card. A sister card to the one above.

After playing around with it for a while, I decided to use that white glitter tape to make horizontal stripes on the card. That scalloped circle makes a nice backdrop for the sentiment from the first card. I mounted that with foam tape so it sits above the paper.

The greenery die cuts from the first card are glued and tucked under that circle. Also charming.

And fast. I love using scraps from one card to make another. It’s a great tip!

something new challenge

Okay, there you have it. Four entries this time for the “Something New” Challenge. And now I’m off to work on a custom client order. I don’t do those often. You can see what premade cards I have for sale in my Etsy shop.

Y’all take care!

Leave a Comment Categories: Challenge Cards, Handcrafted Cards
Share :

“Fun with Dies” Challenge

December 8, 2020 Challenge Cards, Handcrafted Cards

Hey, this “Fun with Dies” Challenge is the part 2 from the “Alcohol Inks” Challenge, basically. Two birds, one stone.

We last left our heroine (me) with lightheadedness and some kind of ugly first tries at alcohol inks. But now you get….the rest of the story!

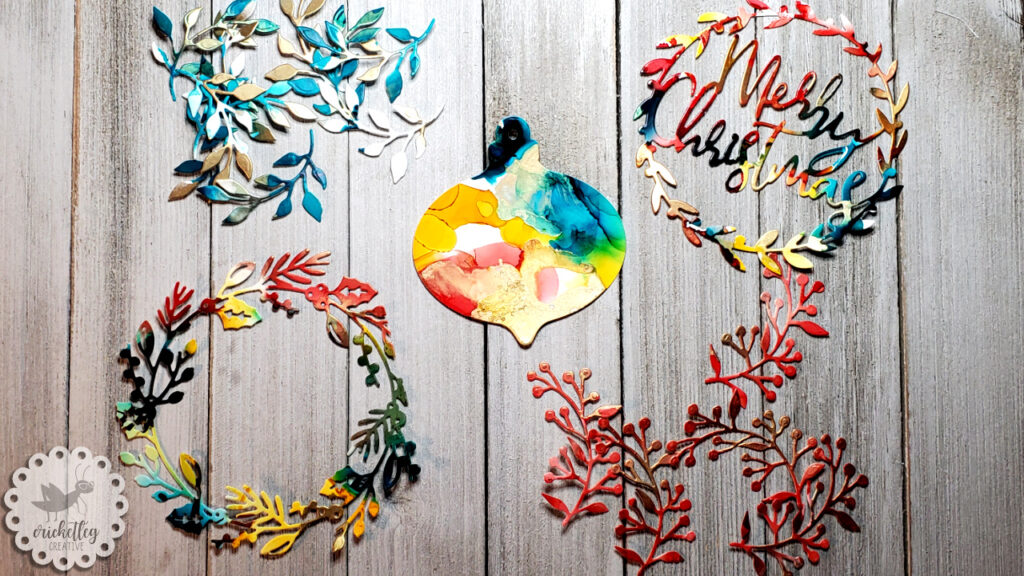
If you read that last post, you’ll know that I decided to die cut my rather unsightly first alcohol ink attempts hoping that this would make them usable.

And it did!

fun with dies challenge

I much prefer the look of the one color plus gold mixative, but the others aren’t too bad. Artsy fartsy and all that. So after die cutting them, I chose background papers and built then cards based on the mood and colors in the die cuts.

Here are my double-duty entries into both the “Alcohol Inks” Challenge and the “Fun with Dies” Challenge. And since ’tis the season, I made them all Christmas themed.

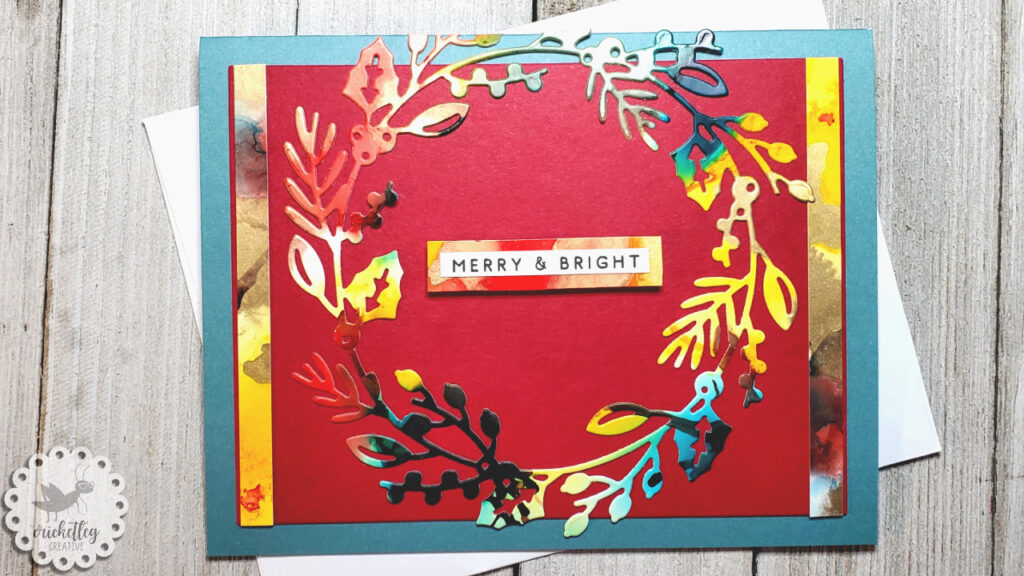
Merry & Bright Wreath

This is my least favorite of the five. I love the die itself, but it’s larger than a standard A2 size so I don’t use it very often. I allowed it to be trimmed short on one side and just positioned it flush with the card top fold as if I had always intended it to be that way.

Hey, work with what you got!

The colors on this one ran together so much that it made for a rather busy color combo so I kept the background papers simple and solid. I did, however, use trim the red cardstock with some scraps from the experiment. I also used those scraps to back the sentiment.

merry and bright wreath

The Ornament

Using a die from a recent Hero Arts kit, I made one of the alcohol inked cards into an ornament shape. This was pretty busy too, but looked kind of high end and glam so I paired it with a gold and white patterned paper and a simple gold trimmed sentiment.

ornament card

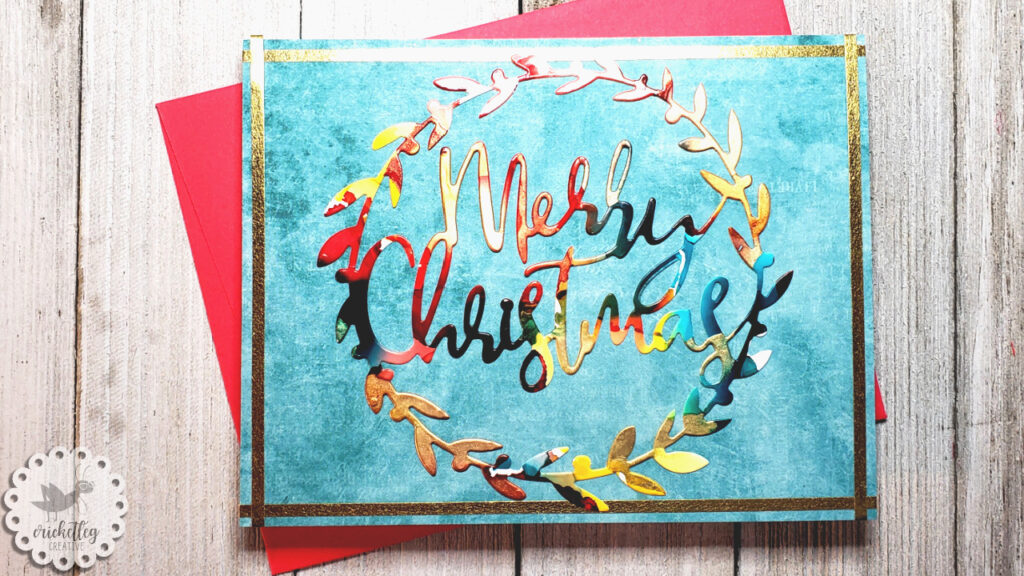
Merry Christmas Wreath

This wreath die cut, unlike its cousin in the first example, actually does fit the A2 card size! Huzzah! I thought this one looked nice on some cardstock from a recent Simon Says Stamp kit that I then trimmed with gold metallic tape.

merry christmas wreath

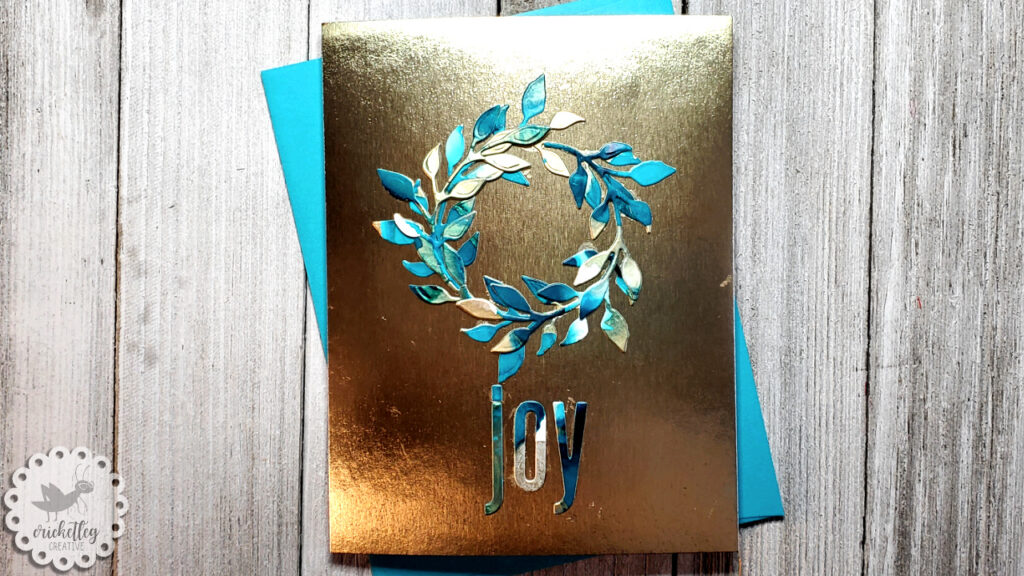
Joy

This card turned out just lovely. I used one simple leaf die to cut the cardstock at random places that had a lot of color variation in the teal ink. I arranged them into a wreath shape onto gold metallic cardstock.

Using an alphabet die set, I cut out the letters for the word “joy” from the leftover scraps. The overall effect is so much prettier and more elegant in person. Hard to photograph the metallic papers for me.

joy wreath

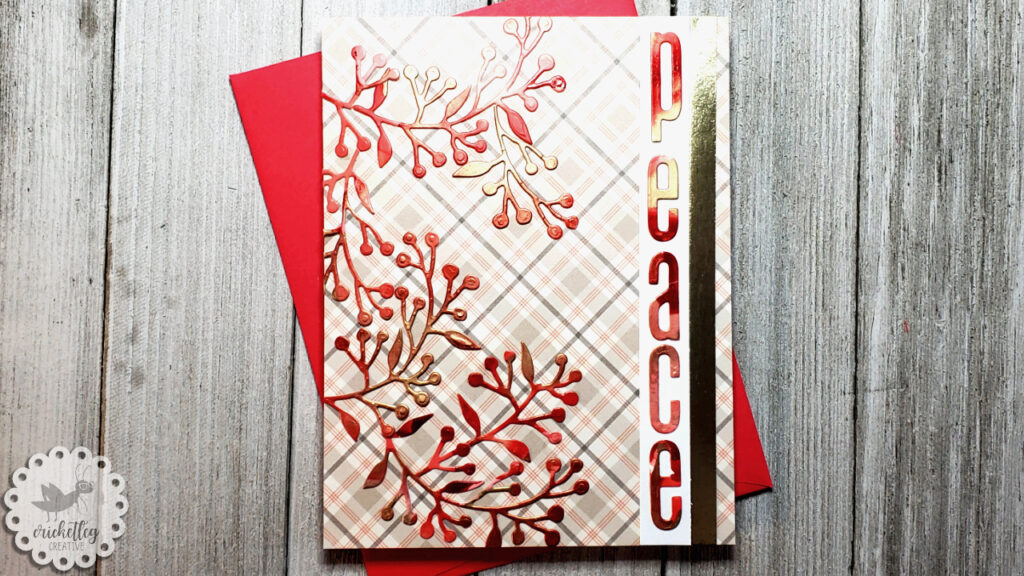
Peace

My favorite one. It’s not what I would normally design. But the overall look of this card….yeah, I just really love it.

I paired this orange-red and metallic gold alcohol ink experiment with some patterned paper from a Simon Says Stamp card kit. Die cuts were used to create the branches and the word “peace.” And I used some gold scrap from the Joy card to trim the edge by the word “peace.”

And that’s it, y’all. I flirted with death (why am I so dramatic about the fumes?), lived to stamp another day, and now have five entries into both the “Alcohol Inks” and “Fun with Dies” challenges.

Now, I’m off to write my memoirs about my near-death experience. Pretty sure I’ll be on a TED talk soon, so be on the lookout for that.

Y’all take care!

Leave a Comment Categories: Challenge Cards, Handcrafted Cards
Share :

“Anything Goes” Challenge

December 1, 2020 Challenge Cards, Handcrafted Cards

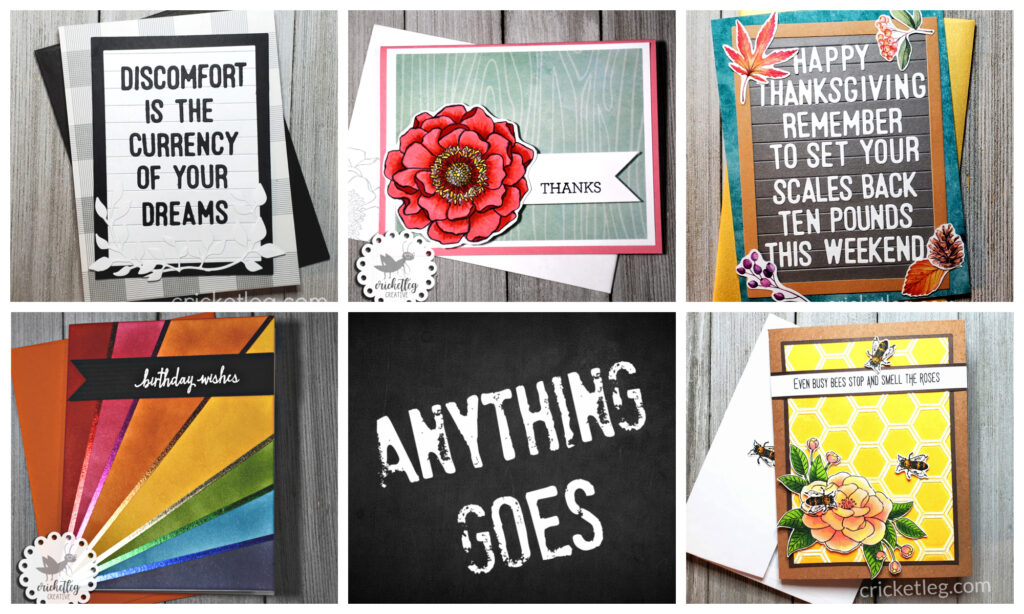
Simon Says Stamp Wednesday Challenge this time is no rules–just anything goes!

anything goes challenge

As much as I love freedom, you’d think I’d cheer with an “Anything Goes” challenge theme. But what I’ve found is that I actually enjoy some light parameters within which to work. Still, I do love me a challenge, parameters or no.

So, without further ado, here are my five entries into this “Anything Goes” challenge.

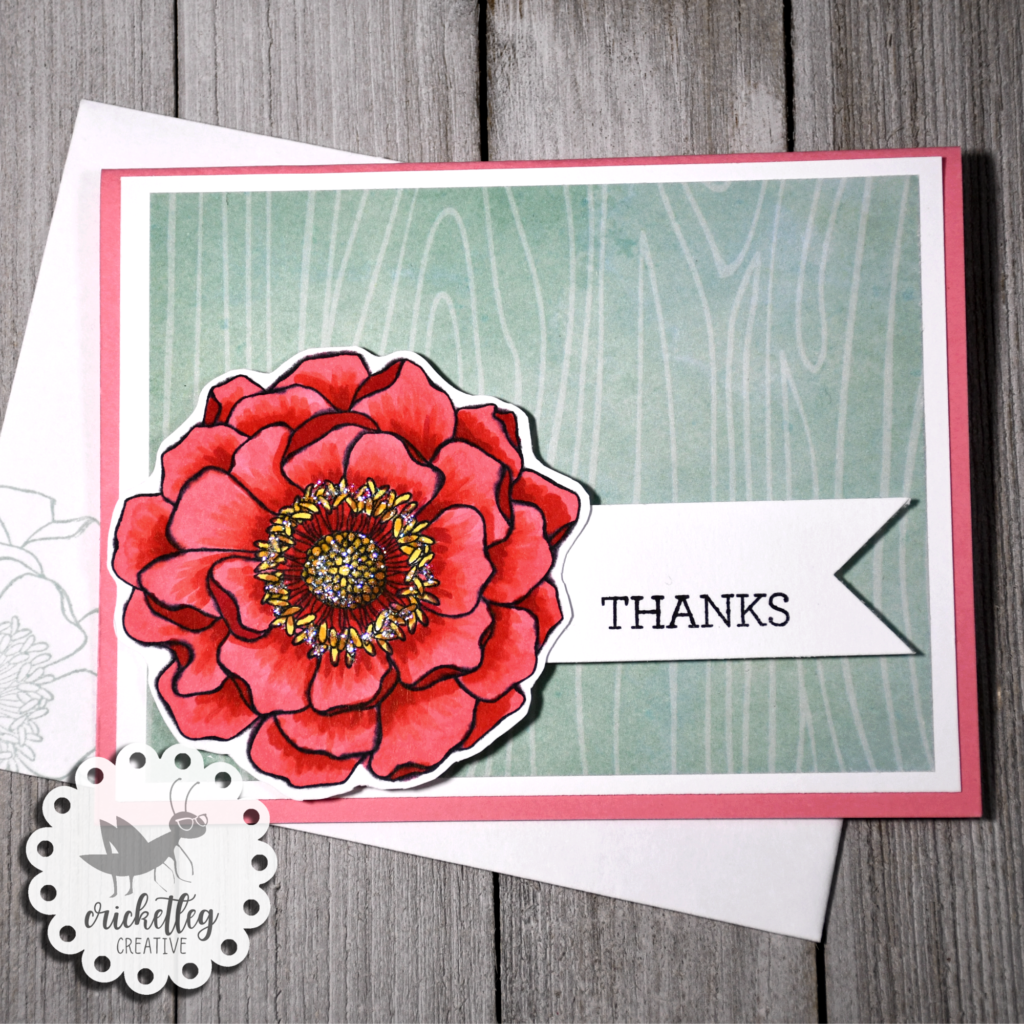
Camellia Thanks

Well, I don’t really know if it’s a camellia, but it looks like one to me! I stamped it on cardstock, colored it in with Copic markers, fussy cut it out, and mounted it onto patterned paper.

You can’t tell it from the picture but there’s also super fine glitter on the center parts of the flower.

Simple card, but the camellia is the star of the show!

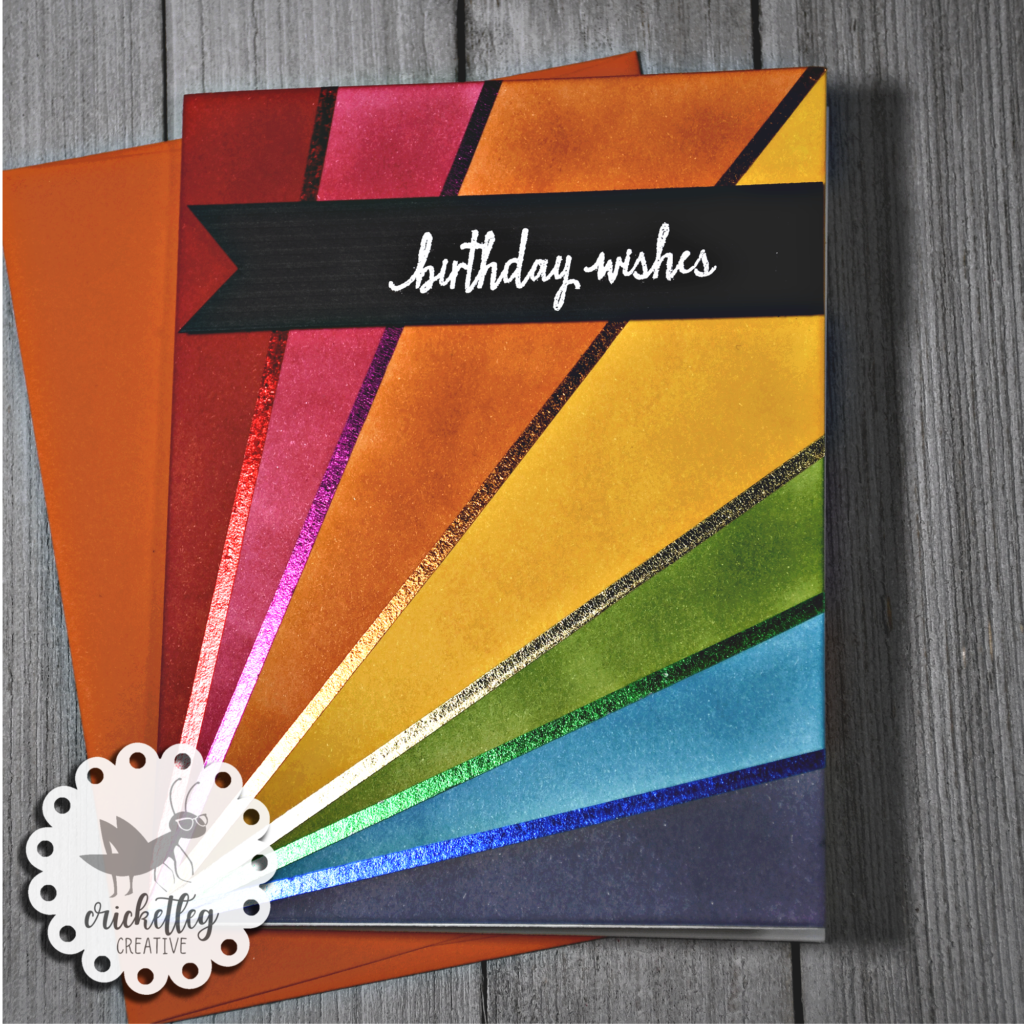
Birthday Wishes

I have really come to love ink blending. That’s the technique I used to make this rainbow starburst card. Post It notes were used to section off the “rays” and I ink blended between them.

The lines were not as crisp as I’d like so I used different colors of metallic tape to cover them. I love that look!

A simple white-embossed sentiment finishes off the card.

birthday wishes

Busy Bees

The star of this card, in my opinion, is the inked and embossed background. It was touch-and-go for a while there as I got the hang of which colors seemed to work best, as well as which embossing folders worked best.

Simply put, you ink up one side of an embossing folder, carefully lay a notecard down on that inked side, close it, and run it through your die cut machine.

Sometimes it comes out looking like a fail, but once the ink dries, the color usually evens out.

anything goes challenge

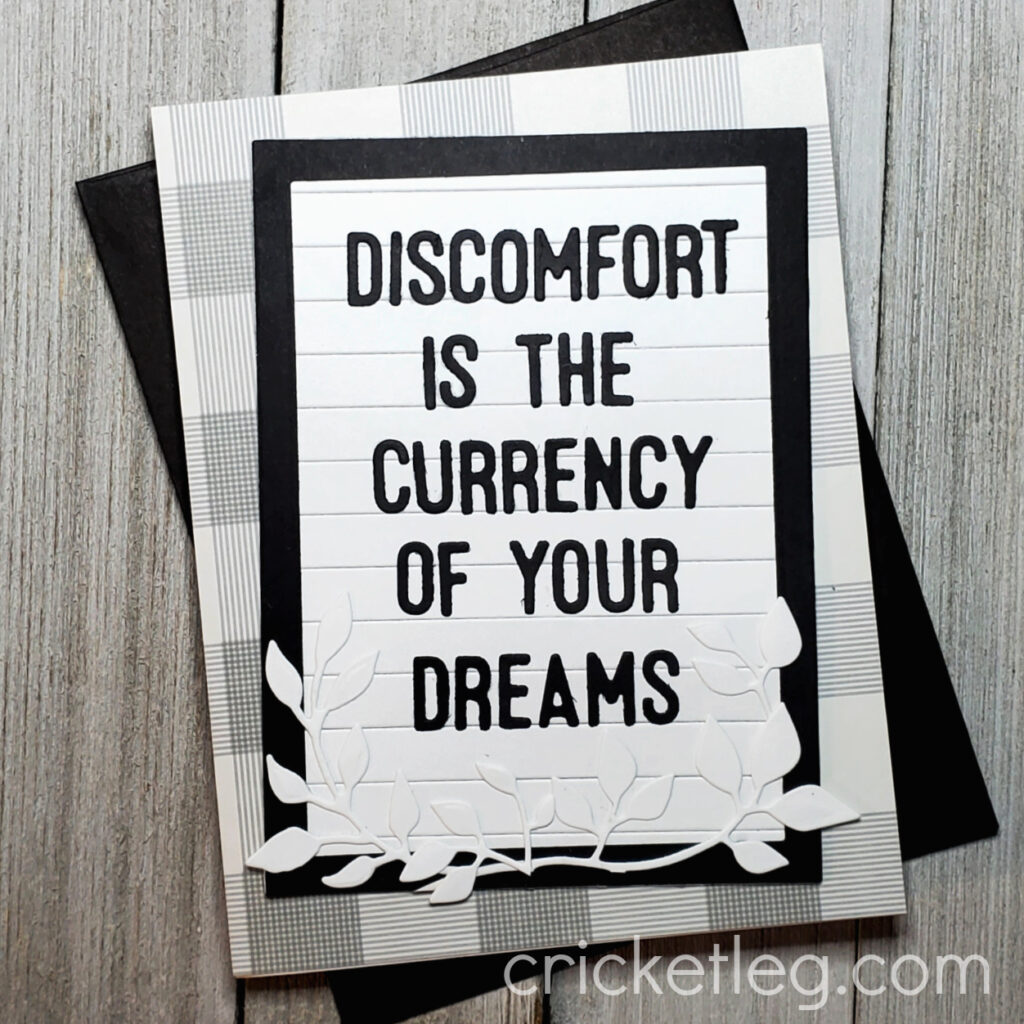
Discomfort

This may seem like a strange quote to put on the front of a card, but I sent this specifically to the author of the quote, Brooke Castillo. She’s a life coach, trains other life coaches, and is the host of my favorite podcast (The Life Coach School Podcast).

I just wanted to send her a note of thanks for all the good she puts into the world! And I thought that using this letterboard die set from Sugar Pea Designs was a perfect way to highlight her contributions.

brooke castillo card

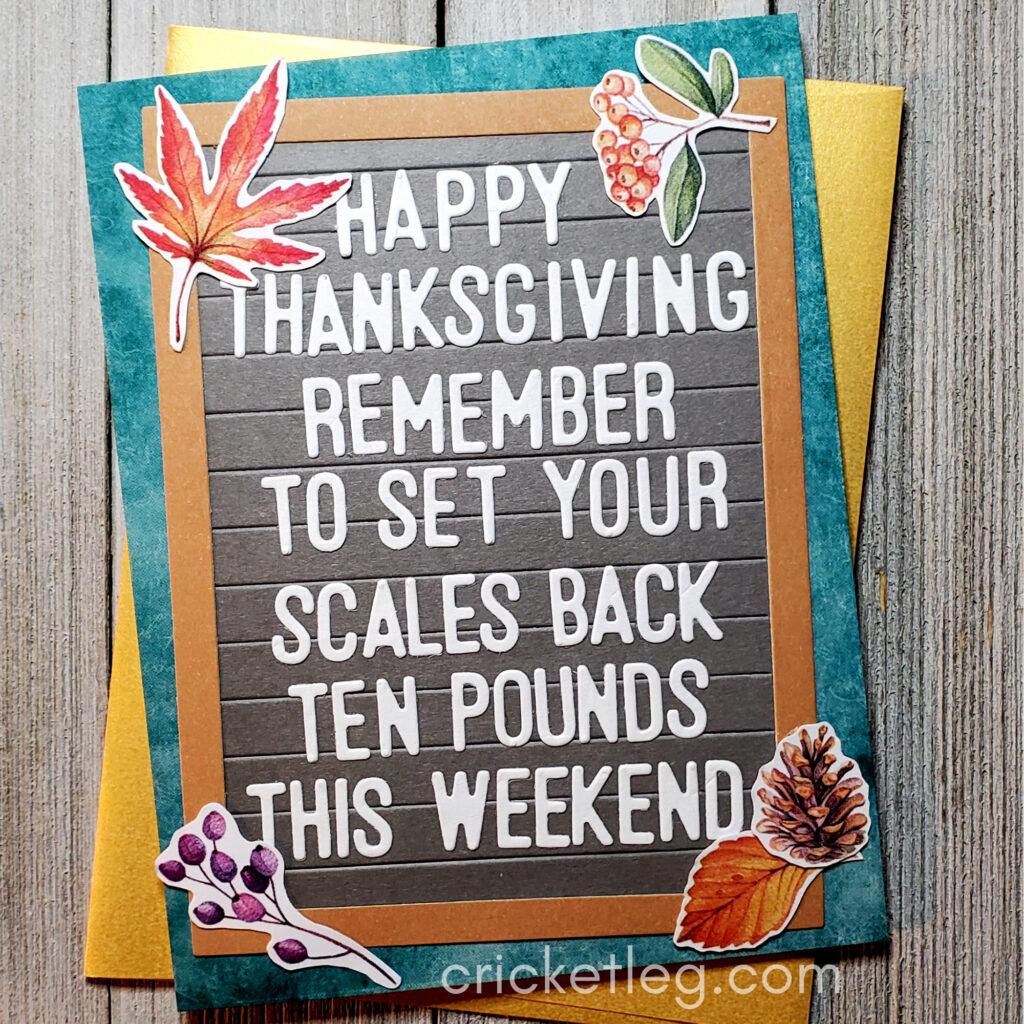
Happy Thanksgiving

Look how versatile that letterboard die set is! I get to use it on another card!

The possibilities are somewhat endless for this set as it can be used for any season, any (short) saying, any mood. I love it!

And I think we all know that the vibe of this particular card is especially true. I don’t know about y’all but those Thanksgiving leftovers…..phew. They ’bout did me in.

Embellishments are from a recent Simon Says Stamp card kit of the month (items from that kit also used on this card).

thanksgiving card

Leave a Comment Categories: Challenge Cards, Handcrafted Cards
Share :

Thanksgiving Challenge

November 17, 2020 Challenge Cards, Handcrafted Cards, Holiday Cards

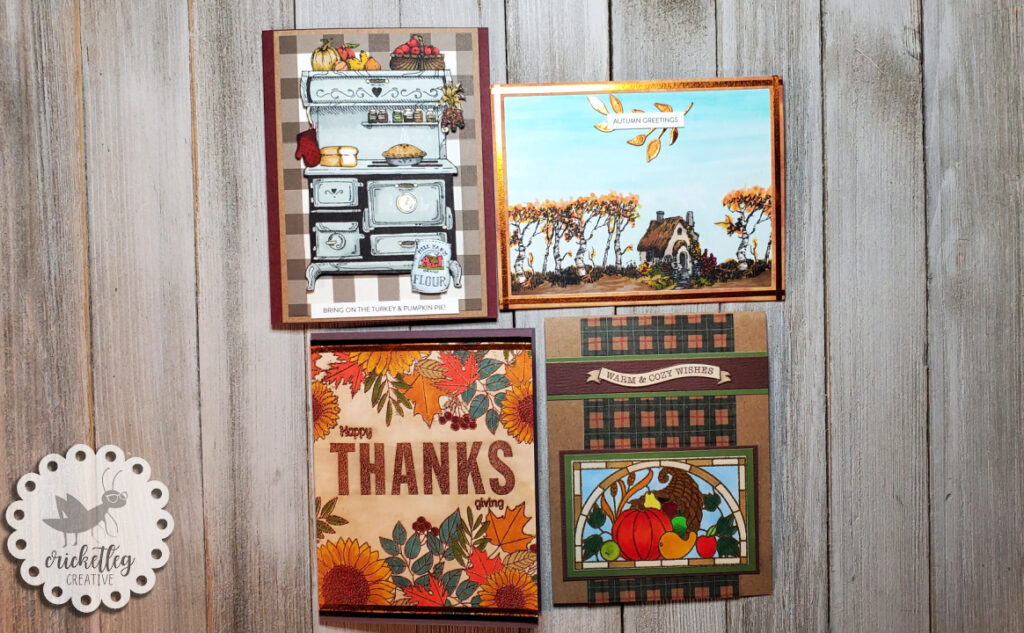
Simon Says Stamp has offered the Thanks/Thanksgiving theme for the most recent Wednesday Challenge.

Because I’ve done a bunch of “thanks” cards lately, I chose to focus on Thanksgiving for the theme. I typically don’t make Thanksgiving specific cards.

I’m still working on building up my supply of stamps, dies, and supplies from a loooooong cardmaking break. And one of the challenges for me with these, um, challenges is that I have to be extra creative to figure out how to use what I already have. Or use what little I have recently accumulated.

So this week’s entries are a combo of old and new. Old and new papers, stamps, and supplies.

Autumn Thanks Stacked Card

So this one was posted earlier this week (which is why it’s not in the group pic above) along with more info and a YouTube video. I’ll post the picture here, but to learn more about the card, check out the blog post.

I used paper and stamps from Simon Says Stamp.

autumn thanksgiving challenge

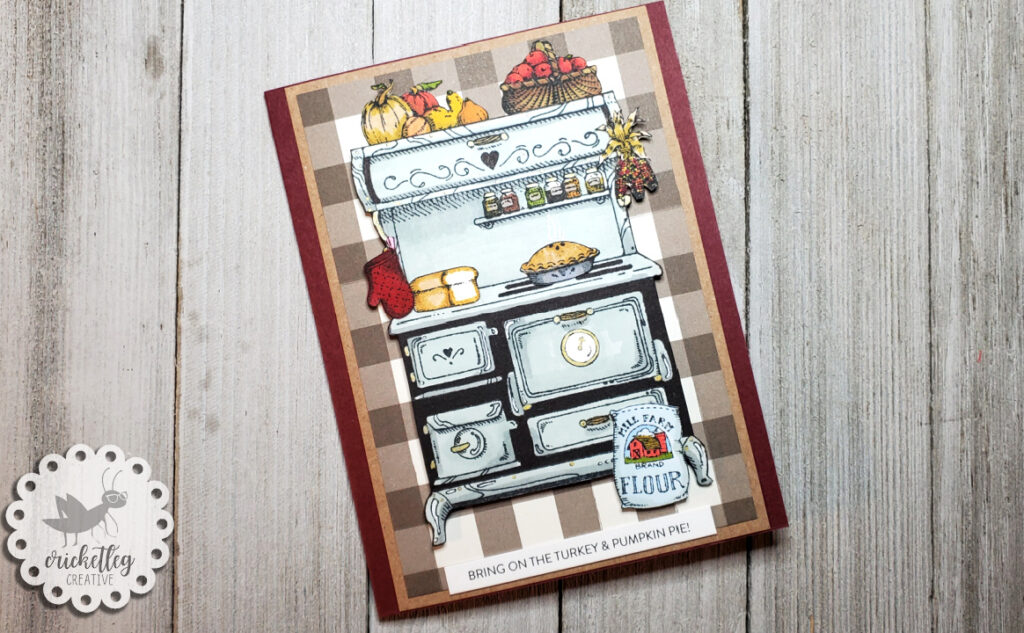
Old Fashioned Stove

If you’ve read my About Me page you’ll know that I used to be a Stampin’ Up! demonstrator. Hence, the majority of my stamps are from that company. Not only that, but the majority are from back in the 90s!!

Back then, a cozy country feel was all the rage. I still love looking at this old fashioned stove stamp on my stamp shelves but find that I rarely use it.

But with Thanksgiving and all it’s turkey, dressing, pie, etc., I figured a cooking themed card would fit just right. It’s paired with lots of stamped and cut out accessories and food. A Simon Says Stamp background paper and sentiment complete the card.

old fashioned stove thanksgiving challenge

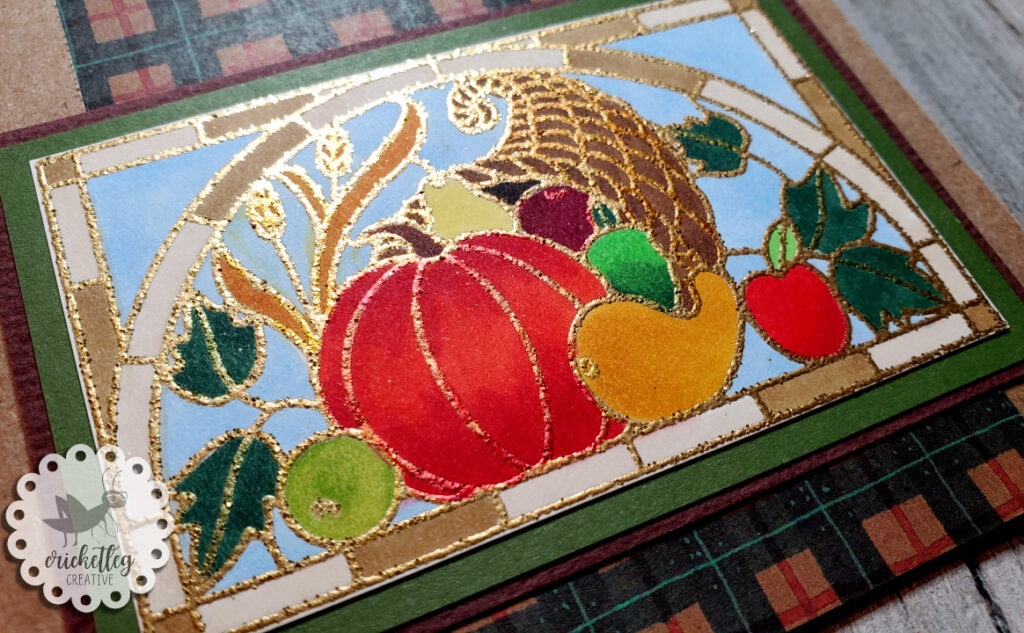
Stained Glass Cornucopia

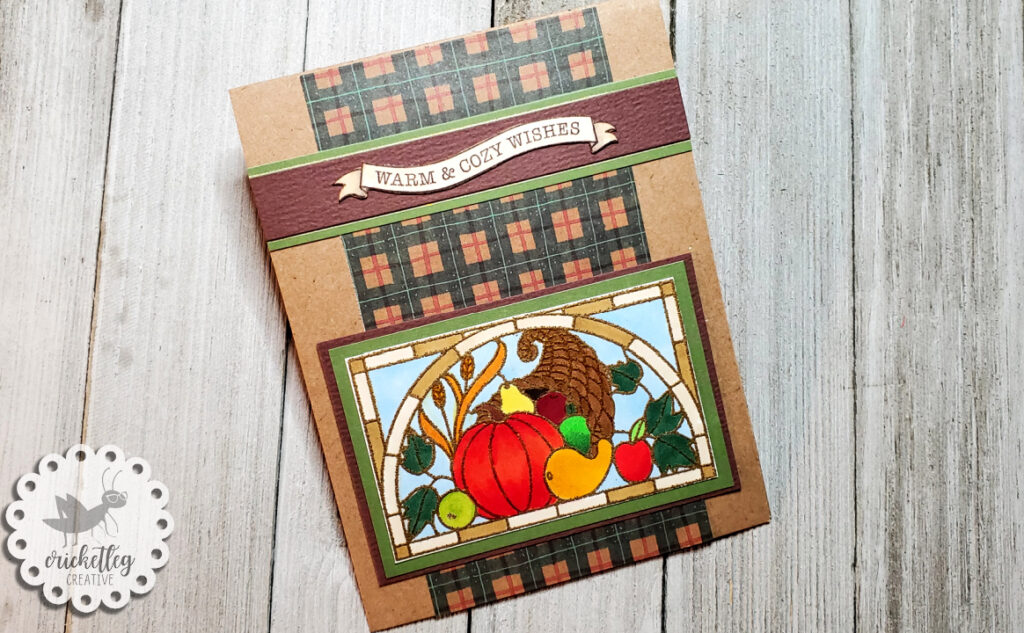
One thing that always bothered me about the set of stained glass stamps from Stampin’ Up! was that it wasn’t card sized. But I’ve solved that by pairing the embossed and colored image with some patterned paper and a sentiment.

I’ve shown a close up here so you can see that the gold embossing powder has glitter in it. That powder is still going strong from back in the 90s when I first bought it. It’s called Motherlode. Not sure if there’s an equivalent powder out there now.

stain glassed window

Here’s a close up of that glittery embossed image.

stained glass window

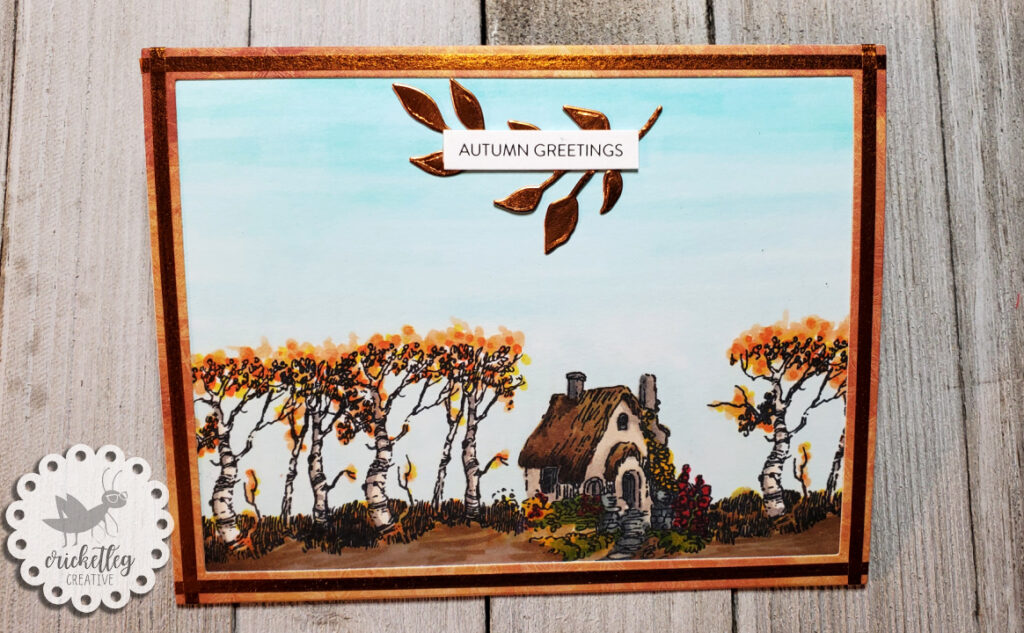
Autumn Scene

Back in my demonstrator days, I would often act as “hostess” for various groups of orders and would consequently earn hostess stamp sets. Sometimes this was great. Other times I was like, meh.

The two stamps used below are from a hostess set that I have NEVER USED. Nope, not even once. I just didn’t think they were very practical.

So–and this is one of the things I love about participating in challenges–I dared myself to use these stamps and make it pretty. Surely I could challenge my creativity here and look beyond the outline image on the stamp.

I have to say, I’m pretty happy with the result. I’d like to do this scene again but for a spring look. Hey, maybe they’ll do a spring challenge in a few months.

The card is framed with some new paper from the monthly Simon Says Stamp kit. I also trimmed it with some bronze metallic tape and a leaf die cut out of bronze metallic cardstock.

autumn scene

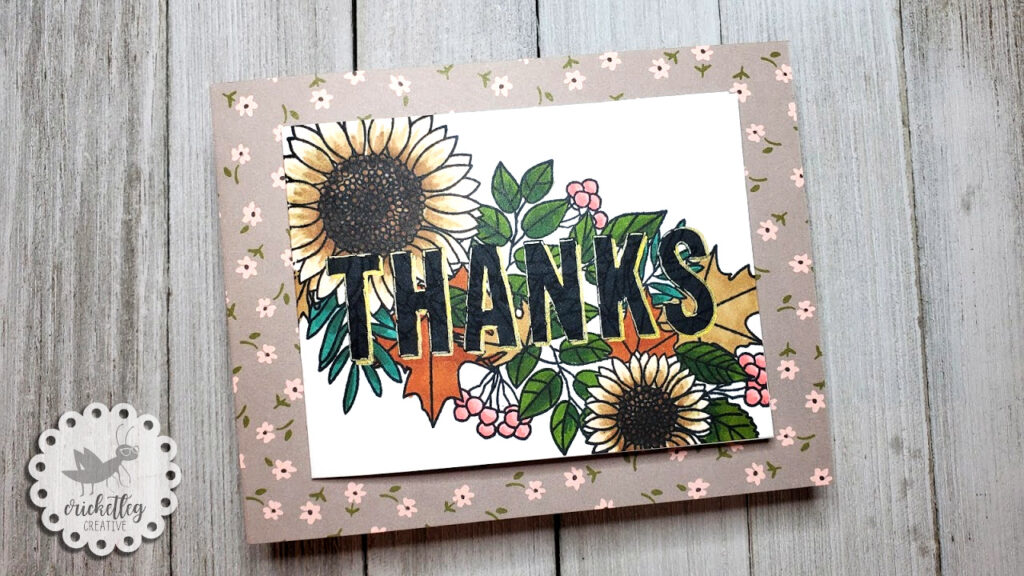
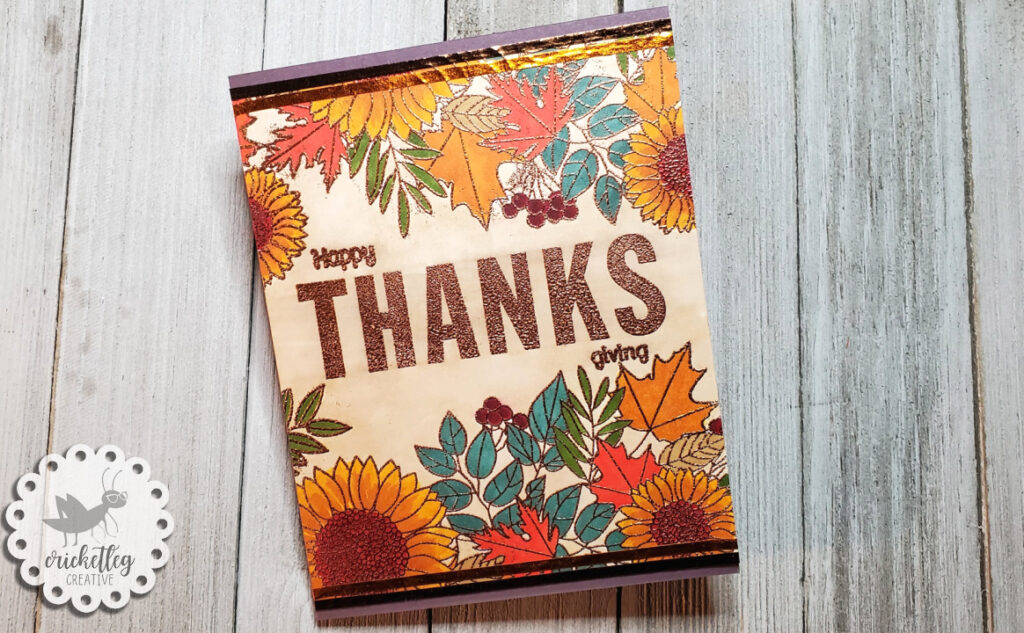
Autumn Floral

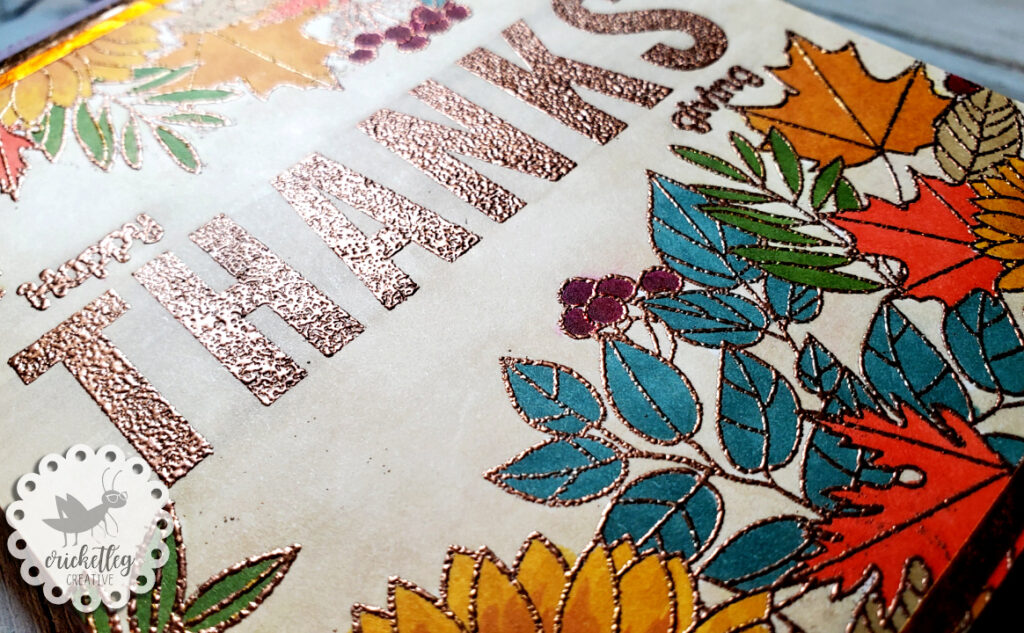
We’ve come full circle here as I’m using that sunflower and leaves floral stamp from the first card I’ve featured in this post. This is another embossing project. And I decided to do everything embossed in a copper powder.

I used alcohol markers to color in the embossed images. I’ve used a metallic brown and a metallic copper tape at the top and bottom to give some accent. I really love using this stamp but doing completely different color palettes each time. It’s a fun challenge in and of itself.

If I could start this card over, I think I would double or even triple emboss the big “thanks” stamp to give it a more even finish. But I think it still looks great.

thanks card
thanksgiving challenge

So there you go! These cards will be sent off soon to some ladies from church to wish them and their families a Happy Thanksgiving!

I’ll see you in the next challenge!

Y’all take care!
Leave a Comment Categories: Challenge Cards, Handcrafted Cards, Holiday Cards
Share :

Get My Latest Posts via Email!

Name

Email


designer spotlight
SSS Monday Challenge Winner

Recent Posts

  • Cards for Ukraine
  • Simple One-Layer Cards
  • Using Airtable to Inventory Your Stamps
  • Catching Up
  • “Beautiful Blossoms” Challenge

Categories

follow me on instagram

Follow on Instagram

Archives

  • March 2022
  • February 2022
  • May 2021
  • March 2021
  • February 2021
  • January 2021
  • December 2020
  • November 2020
  • October 2020

Meta

  • Log in
  • Entries feed
  • Comments feed
  • WordPress.org
Cricketleg Creative. All Rights Reserved.Design by SkyandStars.co
Back Top

Copyright © 2025 · LoveYourself on Genesis Framework · WordPress · Log in