• Home
  • Handcrafted Cards
    • Challenge Cards
    • Quick Tips
  • About Me
  • Shop
  • More Creative Stuff
    • 3D Printing
    • Home Decor
    • Model Railroading
    • Preparedness
    • Sims 4 Builds
  • Recognition

Cricketleg Creative

Archives for November 2020

“Food and/or Drink” Challenge

November 27, 2020 Challenge Cards, Handcrafted Cards

The most recent Monday challenge from Simon Says Stamp has the Food and/or Drink theme.

Food and or Drink challenge

Well, hi!

Hey, it’s a non-holiday challenge this time. Whaaaaat??

And, it’s one that I had to stretch a little for. Don’t have a ton of food related stamps. Luckily, I pulled it off! Five entries for the Food and/or Drink Challenge await you below!
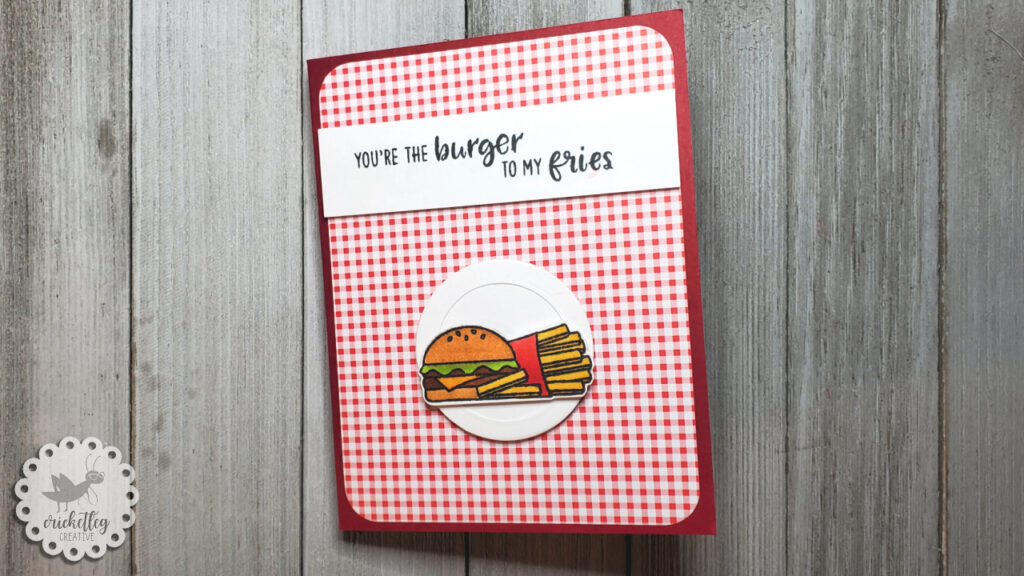
Burger and Fries

I like this simple card. I think sometimes I overcomplicate a card, or maybe it’s just that I like to do more complicated techniques. But a clean and simple card (CAS) is pretty satisfying when it’s done well.

And I think this one is.

I used stamps from this Sunny Studio set (the same one I used to make this card). To make the plate, I used circle dies. Some patterned paper and a stamped sentiment, and we done, y’all!

food and or drink challenge

You’re The Zest

While perusing Pinterest the other day, I saw a similar card and thought I would recreate it using what I happen to have on hand.

The orange stamp is from a Stampin’ Up! set from way back. You’ll see most of the set in a card further down in this post. I stamped it in a warm gray color but stamped it once in black and colored that in with Copic markers. I used a blue marker to color in the negative space. There’s no gradation in that blue background. It’s just the weird lighting!

I made a sentiment on Canva and printed it out onto cardstock.

you're the zest

Breakfast

This card features another Sunny Studio stamp set that I used to make this card as well. It comes with lots of fun sentiments that can be mixed and matched, but because of the size of this slimline card, I made my own sentiment on Canva and printed it out onto cardstock.

The foods are stamped in black, colored in with Copics, and fussy cut out. I mounted them onto patterned paper and mounted the sentiment above.

And whoever I give this to better believe that sentiment….if I say this to you, I freakin’ love you cuz I love me some breakfast foods!
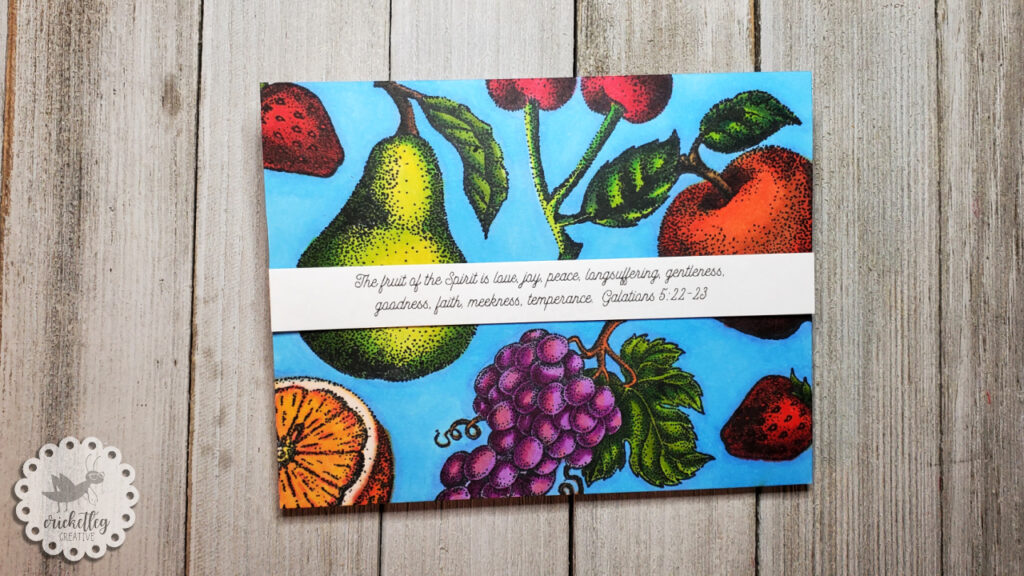
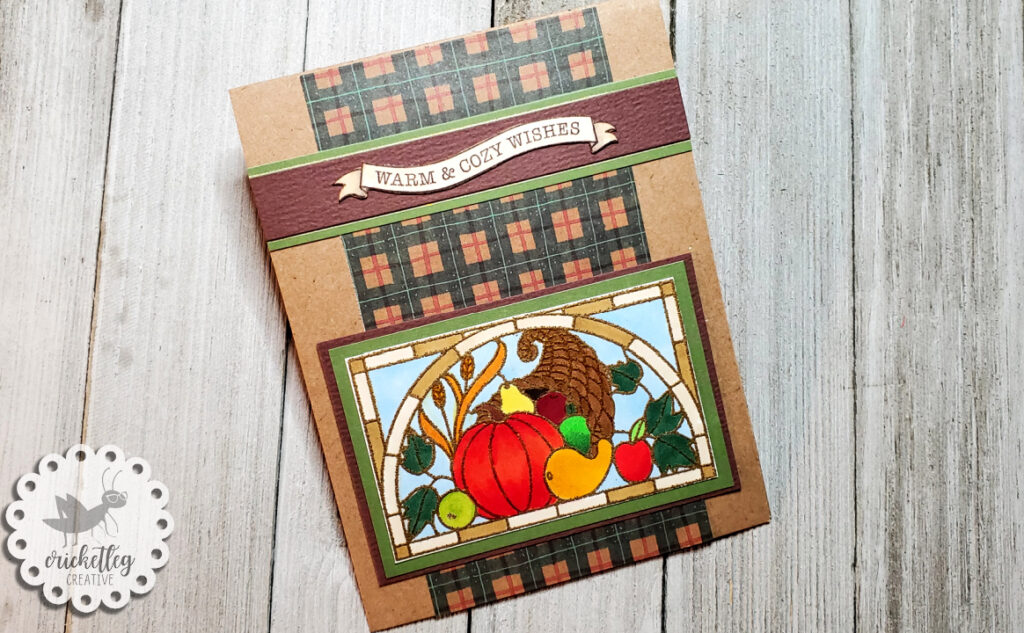
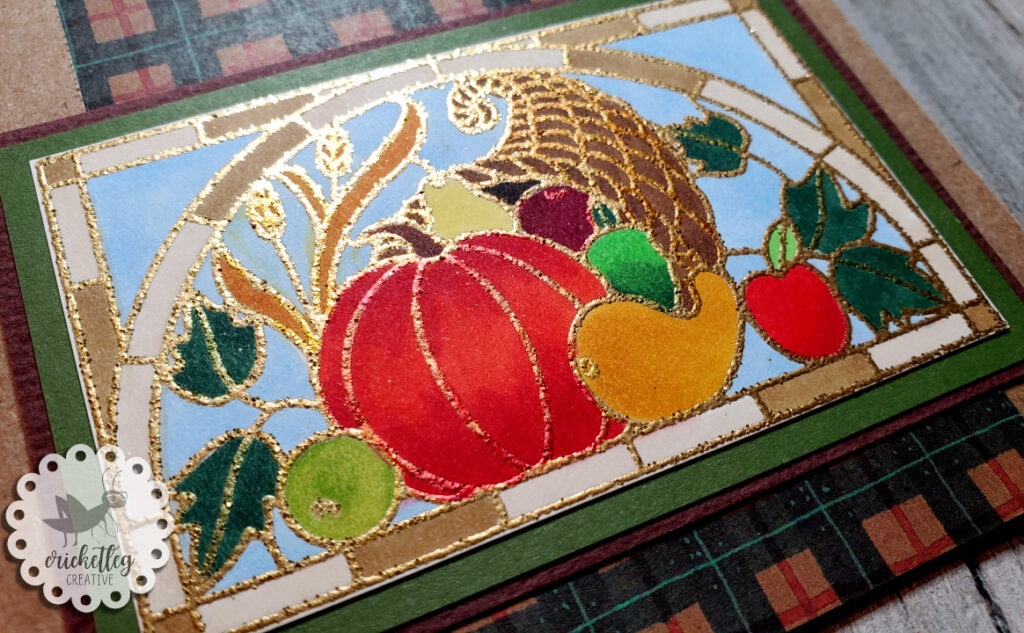
breakfast

Fruits

Here’s that old Stampin’ Up! fruit stamp set I mentioned above. There are a couple more stamps in that set than what you see in this card, but these are the big ones!

Just stamped in black, colored with Copics, and filled in the negative space with Copics as well. I did some very subtle shading around the outside edge of each fruit. But it’s still blue on blue. Loving this…I mean, it almost looks like it’s just patterned paper and it came this way!

The scripture is printed out using Canva.
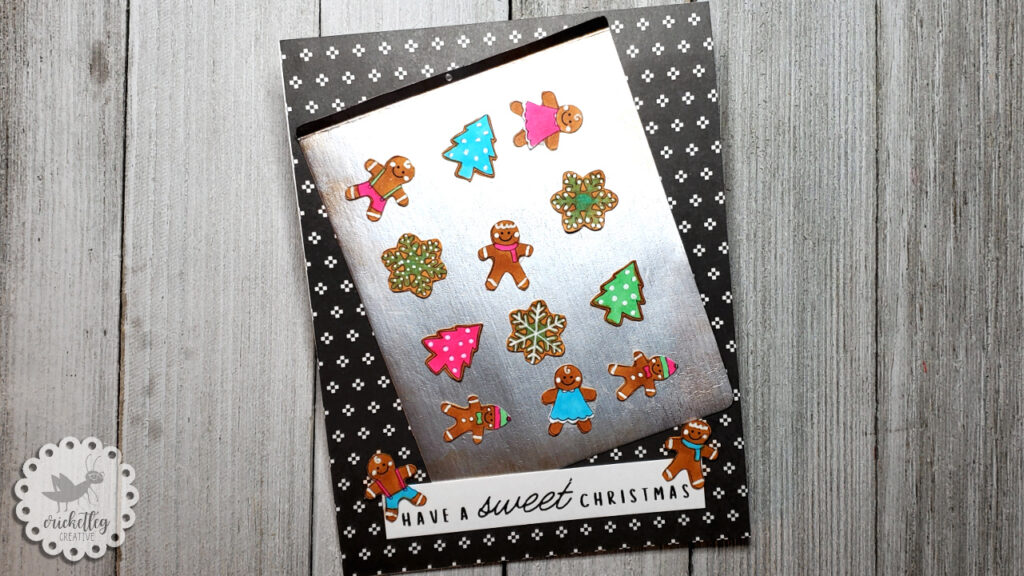
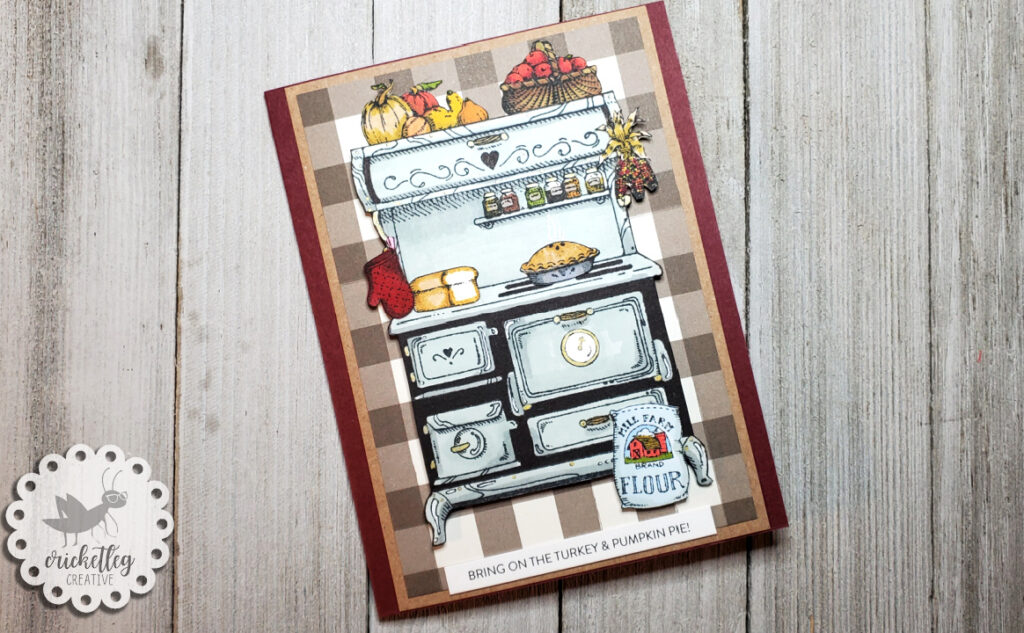
fruits

Cookie Sheet

I think this one is my favorite because I had fun making the cookie sheet. I tried to make it look like my cookie sheets….kinda hammered and discolored. But I don’t know that the look translates well on camera.

I cut out some metallic paper and made a score line near the top edge to simulate the slanted edge of a cookie sheet. Using a mini hole punch, I made the hole (I’ve never used that hole on a cookie sheet IRL!). Using brown, rust, and golden stamp pads and sponge daubers I tried to layer some color to give the look of age to the paper.

Now, I don’t have any suitable sized gingerbread men or cookie stamps so I bought some digital stamps on Etsy. I bought a couple of sets….this one and this one. Digital stamps are kind of fun because they can be resized or tweaked before you print them out. I colored them and fussy cut them out and then glued them to the cookie sheet.

Leftover cookies got glued to the, yes, Canva-made sentiment. All items then were adhered to patterned paper on the card front.

cookie sheet
cookie sheet close up

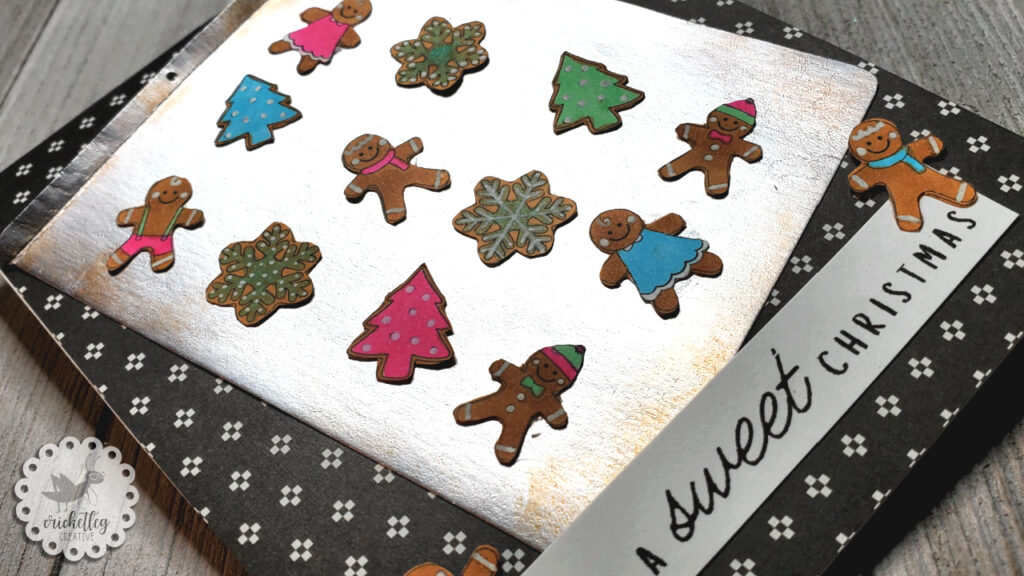
You can kind of see the “aging” coloring on the edges in this pic. My cookie sheets are way more, um, aged than this one.

So. The Food and/or Drink Challenge entries are done! What is your favorite one? And if you can’t answer that….what’s your favorite food and/or drink? 😉

Y’all take care!

Leave a Comment Categories: Challenge Cards, Handcrafted Cards
Share :

Explosion Card Tutorial

November 25, 2020 Handcrafted Cards, Quick Tips

Learn an easy paper folding technique to make fun explosion card inserts in this tutorial.

explosion card tutorial

Don’t be fooled by the calm exterior. The inside of this card has a lot going on! (The lovely fall floral paper and deer image are from the most recent Simon Says Stamp monthly kit.)

I don’t remember when I learned this paper folding technique to make explosion cards. I just know that once I learned it, I never forgot it. It’s quite simple after you’ve done it a few times. And it can be sized up or down depending on what card size you are making.

For the A2 size card (closed measurements of 4 1/4″ by 5 1/2″), you can use an 8 3/8″ or 8 1/4″ square piece of paper.

Make sure it’s paper, not cardstock. If you can find a glossy paper, that’s fun to work with too.

I usually prefer to decorate my paper before folding as the folds often prevent stamps from leaving a clean image.

Check out the tutorial below.

Have you ever made an explosion card? Do you know another cool folding insert for cards? Leave me a comment below and let me know.

If you liked this explosion card tutorial and you’re in the mood for another tutorial type card, check this post out.

That’s it for now. Y’all take care!

Leave a Comment Categories: Handcrafted Cards, Quick Tips
Share :

“Christmas” Challenge

November 24, 2020 Challenge Cards, Handcrafted Cards, Holiday Cards

Simon Says Stamp Wednesday challenge entries for the “Christmas” theme

christmas challenge

Well, hi!

Another Wednesday happens, another Simon Says Stamp Wednesday challenge! Y’all I don’t know what I’m gonna do once the holidays are over because making Christmas cards is my literal favorite. And the challenges have been lining up pretty well with that lately!

But enough about the holiday obsession, let’s get on with this challenge’s entries, shall we?

Popcorn Strings

I used a popcorn stamp, stamped it with white pigment ink, and also used white embossing powder. Then I used what I think is probably a blueberry stamp for the cranberry! I added some shading around the edges.

The sentiment is an old Printworks (now defunct) stamp. I trimmed the cut-out sentiment with metallic red tape. The whole thing is mounted onto kraft cardstock.

Christmas challenge

Winter Stencil

Recently I purchased this Carta Bella Winter stencil and have been itching to use it. Initially I figured I would use red, green, or blue ink onto white cardstock but at the last second I opted for white pigment ink on red cardstock. Oh what fun!! I love it. And it kind of has a pinkish hue.

On top of that background I mounted three layers of a Merry Christmas Wreath die cut from Sissix. I have to admit that it looks better in person; looks a little busy in the photo.

winter stencil

Christmas Bell

When I saw this stamp set in action I was amazed at how realistic the bell stamps! I mean, it totally looks metallic! This is due to stamp layering. This bell is stamped using three layering stamps and three ink colors. The results are so much fun!

This is a simple card; I really wanted the bell to be the focus. All the images you see are from this stamp set by Sunny Studios.

christmas challenge bell

Forest Snowman

This card features another stencil that I recently acquired, but this one is from Crafters Workshop. I’ve been in search of an inexpensive Aspen tree stencil or stamp or die to use. I see so many amazing cards that have these beautiful trees and I just wanted to make that look a reality in my cards.

So I used a pink, a purple, and a blue ink pad along with these amazing blending brushes to create a lovely winter sky behind the trees. Then I stamped this Stampin’ Up! snowman (from 1997, y’all!), colored him with Copic markers, and fussy cut him out. He’s mounted just in front of the trees, which I also die cut using a Waffle Flower stitched rectangle die.

The sentiment was made using my computer!

forest snowman

Christmas Beach

Can I go here for Christmas? I mean, we don’t get white Christmases here anyway so I might as well just go to a tropical island right?

Okay, well, anyway….this is my favorite of my Christmas Challenge entries. The water and Hello! stamps are from a Hero Arts stamp set (the water is made using three layering stamps in three different colors) and the palm trees are from some random stamp I bought many moons ago.

I used a white pen to add the foam to the water and sand. The sky was made using ink blending. The Christmas lights? Well, those took a little more thinking. There are no string lights in my stamp collection, sadly. So I drew a string line between the palm trees with a black felt tip pen and used a super fine brush to apply little dabs of acrylic craft paint for the bulbs.

Gosh, I love a good tropical Christmas scene!

christmas beach

Here’s a close up of the sea foam:

beach

So, there they are…all my Christmas Challenge entries! I hope that one of these will win the random drawing or the a designer spotlight! Did I tell you that I won one of the random drawings the other day? Yep. And I love me some free merch!

Y’all take care!

Leave a Comment Categories: Challenge Cards, Handcrafted Cards, Holiday Cards
Share :

“Happy Holidays” Challenge

November 20, 2020 Challenge Cards, Handcrafted Cards, Holiday Cards

Monday Challenge from Simon Says Stamp this time is “Happy Holidays”

happy holidays challenge

Well hi!

Welcome to another edition of Julie Enters Card Challenges! This time the challenge is creating anything with the theme of Happy Holidays!

As luck would have it, I was already working on this theme so I’m able to crank out some entries really, really fast!

Ready to see? Let’s go!

Baby, It’s Cold Outside!

I’ve been really wanting to use my new blending brushes because up till now, I’ve been using the wooden handled, foam circle ink blending tools. I have to say the blending brushes are just so comfortable to use and it feels easier to get a smooth blend. Making that blue shading around was so much easier than the other tools I have.

Stamps are from Stampin’ Up!, except for the snowflake stamp which is Posh Impressions.

happy holidays challenge

Merry Christmas Wreath

This card is the first of two I’m sharing in this challenge that use glitter and double stick tape backgrounds. Check out my most recent blog post to see how those backgrounds come together.

Finishing off the card is a die cut with just the greeting and berries colored in. I love the simple color scheme but kind of blingy look!

Merry christmas glitter stripes

Christmas Letterboard

As I was perusing other papercrafters’ entries into a recent challenge, I saw that someone had an entry featuring a letterboard die set. Not knowing this even existed, I got so excited and immediately went and bought it!

It’s really fun to use, although a bit time consuming to place the letters. Pretty quickly I figured out that placing the letters upside down and in reverse order on some temporary tape helped tremendously with placement! I could just finish an entire line on the tape, apply liquid adhesive carefully to the letter backs, and carefully place the entire line down on the board. Then I gently removed the tape while holding down the letters.

I have been having so much fun with this die set! So many possibilities!

amazon card

Gift Bags Slimline

I almost labeled these as shopping bags, which I guess they could also be. But they really look more like gift bags I suppose. Once I chose the coordinating papers, the card came together very quickly. I used some of the patterned paper to line the envelope.

I love making slimline cards as it gives me quite a bit of room to spread things out! It’s just the right space for this card.

Candle wick is what I used for the handles. Hey, it’s what I happened to have on hand! I used some washi tape from my most recent Hero Arts monthly card kit.

happy holidays challenge

Red and Pink Stripes

So here’s the second card I’m sharing where I used my glitter and double stick tape trick. It’s pink glitter stripes on red cardstock, which is a striking and nontraditional color combo.

The ornament is stamped from multiple stamps from another Hero Arts kit. I added die cut white “greenery” from another die set and I used red/white baker’s string to “hang” it from the card top.

red and pink stripes

So there you have it! Have you started making or picking out your Christmas cards yet?

Y’all take care!

Leave a Comment Categories: Challenge Cards, Handcrafted Cards, Holiday Cards
Share :

Glitter & Tape Card Backgrounds

November 18, 2020 Handcrafted Cards, Holiday Cards, Quick Tips

Use fine glitter and double stick tape to create interesting backgrounds for your handmade cards! Glitter tape card backgrounds are an easy way to add pizzazz to your cards.

glitter tape backgrounds

If you’re like me, you may not currently have tons of background papers, background dies, or background stamps at your disposal. And, if you’re like me, you may get a little sad when you feel like you can’t create the backgrounds you want.

Well, I have a solution for you. Well, you know….for now. And it’s kind of fun!

The Glitter

Recently, on my weekly Walmart grocery shop, I ran across some super fine glitter on the back aisle of the craft section. I grabbed a couple of colors and brought them home to experiment. I mean, I paid for them first. And then I brought them home.

They really are beautiful, and are just under $3 a jar. They’re stackable, as you can see in the video. But I have them in a single layer in a drawer.

Anyway, I’m not sure how I cooked up the idea (and I’m not saying I’m the only one who’s thought of this) but I thought that double stick tape combined with this superfine glitter would make a great background option. And it’s inexpensive!

The possibilities are endless. Go for tone on tone, with a glitter that matches closely to your paper color. Do stripes–horizontal, vertical, diagonal. Make a plaid design–all one color or multicolored.

Basically, you can just go nuts.

The Tape

In this video I’m only using two tapes. One is from Lawn Fawn….1/8″ double stick tape. I love this tape and use it all the time. The other is just office supply double stick tape on the disposable roll.

The only reason I chose those two is because that’s what I had! Use what you have and have fun with the results.

You could also incorporate metallic tapes like the blue tape I used on this card. I bought that tape from Hobby Lobby and it’s made my The Paper Studio. But I really wanted to exclusively use double stick for this video.

Watch the video below to see how I, on the fly, made a few backgrounds with very little effort.

So there you have it! Glitter tape backgrounds are a fun, easy, and inexpensive card option for birthdays, Christmas, New Year’s, and so on and so forth and what have you!

Hey drop a comment below and tell me how you successfully tame glitter in your card projects. I’m off to clean up the glitter spills on my desk!

Y’all take care!

1 Comment Categories: Handcrafted Cards, Holiday Cards, Quick Tips
Share :

Thanksgiving Challenge

November 17, 2020 Challenge Cards, Handcrafted Cards, Holiday Cards

Simon Says Stamp has offered the Thanks/Thanksgiving theme for the most recent Wednesday Challenge.

Because I’ve done a bunch of “thanks” cards lately, I chose to focus on Thanksgiving for the theme. I typically don’t make Thanksgiving specific cards.

I’m still working on building up my supply of stamps, dies, and supplies from a loooooong cardmaking break. And one of the challenges for me with these, um, challenges is that I have to be extra creative to figure out how to use what I already have. Or use what little I have recently accumulated.

So this week’s entries are a combo of old and new. Old and new papers, stamps, and supplies.

Autumn Thanks Stacked Card

So this one was posted earlier this week (which is why it’s not in the group pic above) along with more info and a YouTube video. I’ll post the picture here, but to learn more about the card, check out the blog post.

I used paper and stamps from Simon Says Stamp.

autumn thanksgiving challenge

Old Fashioned Stove

If you’ve read my About Me page you’ll know that I used to be a Stampin’ Up! demonstrator. Hence, the majority of my stamps are from that company. Not only that, but the majority are from back in the 90s!!

Back then, a cozy country feel was all the rage. I still love looking at this old fashioned stove stamp on my stamp shelves but find that I rarely use it.

But with Thanksgiving and all it’s turkey, dressing, pie, etc., I figured a cooking themed card would fit just right. It’s paired with lots of stamped and cut out accessories and food. A Simon Says Stamp background paper and sentiment complete the card.

old fashioned stove thanksgiving challenge

Stained Glass Cornucopia

One thing that always bothered me about the set of stained glass stamps from Stampin’ Up! was that it wasn’t card sized. But I’ve solved that by pairing the embossed and colored image with some patterned paper and a sentiment.

I’ve shown a close up here so you can see that the gold embossing powder has glitter in it. That powder is still going strong from back in the 90s when I first bought it. It’s called Motherlode. Not sure if there’s an equivalent powder out there now.

stain glassed window

Here’s a close up of that glittery embossed image.

stained glass window

Autumn Scene

Back in my demonstrator days, I would often act as “hostess” for various groups of orders and would consequently earn hostess stamp sets. Sometimes this was great. Other times I was like, meh.

The two stamps used below are from a hostess set that I have NEVER USED. Nope, not even once. I just didn’t think they were very practical.

So–and this is one of the things I love about participating in challenges–I dared myself to use these stamps and make it pretty. Surely I could challenge my creativity here and look beyond the outline image on the stamp.

I have to say, I’m pretty happy with the result. I’d like to do this scene again but for a spring look. Hey, maybe they’ll do a spring challenge in a few months.

The card is framed with some new paper from the monthly Simon Says Stamp kit. I also trimmed it with some bronze metallic tape and a leaf die cut out of bronze metallic cardstock.

autumn scene

Autumn Floral

We’ve come full circle here as I’m using that sunflower and leaves floral stamp from the first card I’ve featured in this post. This is another embossing project. And I decided to do everything embossed in a copper powder.

I used alcohol markers to color in the embossed images. I’ve used a metallic brown and a metallic copper tape at the top and bottom to give some accent. I really love using this stamp but doing completely different color palettes each time. It’s a fun challenge in and of itself.

If I could start this card over, I think I would double or even triple emboss the big “thanks” stamp to give it a more even finish. But I think it still looks great.

thanks card
thanksgiving challenge

So there you go! These cards will be sent off soon to some ladies from church to wish them and their families a Happy Thanksgiving!

I’ll see you in the next challenge!

Y’all take care!

Leave a Comment Categories: Challenge Cards, Handcrafted Cards, Holiday Cards
Share :

“Remembrance” Challenge

November 13, 2020 Challenge Cards, Handcrafted Cards

The Monday challenge from Simon Says Stamp is Remembrance.

remembrance challenge

Well, hi!

Welcome to another installment of entries for the Simon Says Stamp Monday Blog Challenge. This week’s theme is Remembrance/Thinking of You.

Because I already did a “Thinking of You” challenge very recently, I decided to lean more into remembrance as the focal point for my challenge entries. And to be more specific, I wanted to work with old photographs.

My Sisters’ Birthdays

Because I have two sisters’ birthdays coming up in December, I figured I’d go ahead and crank out all three sisters birthday cards for this challenge. (The other one is in July, but why not do it now too?)

I found old photos from their birthdays on my computer and built the cards around their photos using similar color palettes for two of them. The other one seemed to have all pink in the photo so I went with all pinks for the card.

For this first one, I just layered paper in the background. Then cut strips of coordinating colored cardstock for the candles and glued them on randomly. The “flames” are a tear drop hole punch that I colored in with markers. The sentiment is perfect!

anna's birthday card remembrance challenge

Here’s that pink themed card. I stamped the cake layers as actual cake layers, but then used them vertically as candles on the envelop flap as well.

bonnie's birthday card

I used dies from Altenew (I have the matching stamps but didn’t use them) for the balloons on this card and envelope. The balloon strings are baker’s twine. Also, look at my gorgeous Mama! More on her later.

amy's birthday card

My Beloved Rosie

Unfortunately, on Easter Sunday this year we lost our beloved Rosie girl. She was hit by a car and passed away from her injuries. It was a shock and we all miss her terribly. She was the sweetest dog.

Each morning when I walk our other dogs, I pass the spot where we found her and spent our last moments stroking her and telling her it was going to be okay. Each morning, I see that spot and my heart just aches.

So I decided to make a sweet little remembrance to keep in my craft studio. It’s not a card, just a sweet little display of my Rosie…my shadow…my girl. Just to keep near me. It features two of my favorite pictures of her.

Rosie

My Mother

My mother lost her battle with Alzheimer’s in June of 2016. If you’ve lost a loved one you know that you can go for periods of time and remember fondly with no longing. But then suddenly you get triggered by something, and you just have an intense longing to be with them.

This happened to me just a few days ago. I was having a rough, hormonal kind of day already. But I decided that, to help me get going into the holiday spirit for Christmas card making, I would listen to an old Christmas album that I grew up with. I listen to this album ALL THE TIME. But as soon as it started play, I just started balling.

I began to think of my mother and my childhood and how much simpler things were then. And I just felt that intense longing.

So when remembrance was chosen as a challenge topic, I knew I had to make something around my mother. She was just such an amazing woman and I miss her so much. Plus, I mean, she was just gorgeous!!

Mom

So these are my entries. And now I have two beautiful and touching mini memorials to keep in plain sight in my craft studio.

I’m off to work on some more projects.

Y’all take care!

Leave a Comment Categories: Challenge Cards, Handcrafted Cards
Share :

Autumn Thanks Stacked Card

November 12, 2020 Handcrafted Cards, Holiday Cards, Quick Tips

Easy technique to create an interesting card by using stacked cards–a card on a card. This Autumn Thanks Stacked Card was created using stamps from Simon Says Stamp.

autumn thanks stacked card

Well, hi!

Hey, guess what? I have a new card video and it’s not a Christmas card! I know, right?

The thing I love about this type of card is that you don’t need any special tools to make it. No dies or mechanisms. Heck, you don’t even really have to measure! Just make a smaller card to stick on top.

I really love the large autumn floral stamp. It came in the Simon Says Stamp card kit this month. Currently, I receive monthly kits from Hero Arts and Spellbinders as well. Monthly kits are a fun way to build your collection and also to challenge your creativity! I admit that I sometimes turn up my nose at some kits but then quickly have to repent when I see what amazing things people create!

I’m trying to do shorter video posts on Thursdays (as opposed to my Monday posts) so take a few minutes and check out this video to watch the Autumn Thanks Stacked Card come together.

Also, someone please tell me how you avoid smudging your cards with ink! It seems to be my mistake of choice lately as I have done it here and here.

There you go! And happy fall to you all!

Y’all take care!

Leave a Comment Categories: Handcrafted Cards, Holiday Cards, Quick Tips
Share :

“Thinking of You” Challenge

November 10, 2020 Challenge Cards, Handcrafted Cards

Simon Says Stamp Wednesday Challenge last week is the theme of Thinking of You.

thinking of you cards

Well, hi!

Here’s a new batch of challenge cards from the Simon Says Stamp Wednesday Challenge blog. The theme from the most recent posting is “Thinking of You.”

I don’t have a ton of stamps that imply that sentiment. In fact, I believe you are seeing all of them in the image above. The one on the truck is printed from my computer.

All of this challenge’s cards are pretty simple, and that was by design. I wanted to focus more on the sentiment so I kept everything else pretty clean.

I’ll list a close up image of each of the cards below, going from least to most favorite.

Thinking of You at Christmas

Using a greenery stamp from Sunny Studio and an ornament stamp from Stampin’ Up!, I created a simple layout. However, there was so much white space that seemed very empty. So I used an ink blending tool to create shading around the edges of the card. The sentiment stamp is also from Stampin’ Up!

thinking of you at christmas

Fall Tree

Four stamps make up this design and are all from the same Stampin’ Up! set (I have lots of Stampin’ Up! as I used to be a demonstrator). Patterned paper and metallic tape complete the design.

Fall Tree with Baker’s Twine

Same tree, stamped with darker leaves. And I added more patterned paper behind. The very simple design is completed with brown and white baker’s twine.

Pick Up Truck

This stamp comes from an inexpensive stamp set I bought on Amazon. It comes with various items that can go in the back. I figured the class blue truck with pumpkins would look nice. I used ink blending to create a ground of grass, and also added light blue shading for a hint of sky.

As stated previously, I printed this sentiment from my computer.

Watercolor Flowers

Another Stampin’ Up! stamp set and the sentiment is from them as well (although from a different set). I stamped the flowers using Memento Tuxedo Black ink onto watercolor paper. I then used a very loose watercolor technique to color in the flowers and leaves.

This is my favorite of all the cards because the technique itself is so liberating. I love painting outside the lines and allowing the paintbrush to go…just….wherever. It’s a thoroughly enjoyable process for me!

Okay, there you go! A few more cards to add to my collection, ready to be sent to a friend or loved one who needs a little boost!

Make sure you check out my other challenge cards. I try to post entries twice a week on the blog, so keep checking back.

Y’all take care!

Leave a Comment Categories: Challenge Cards, Handcrafted Cards
Share :

Snowy Lamp Post Card

November 9, 2020 Handcrafted Cards, Holiday Cards

This card features a solitary lamp post against a snowy background

Yes. Yes, another Christmasy card. Sorry, I can’t help it. Plus, I haven’t used this die set since buying it and I really want to play with it.

I also wanted to try something just a little different than what I normally do for a snowy background. Typically, I try for something blended. I’m either using ink blending tools with stamp pads for a soft blended sky or I’m using Copic markers to make a more bold sky but still with a soft transition between colors.

For this Snowy Lamp Post Card I wanted to do something less realistic and that would draw the focus right to the lamp atop the post. I achieved this with a die cut circle as the “glow” for the lamp candle.

Watch the video to see how I made the snowy background as well as how I finished the glowing circle.

I’d love to hear from you so let me know what your favorite way to make snow for cards is. And feel free to check out my most recent Christmas card here.

Oh, and if you want to know how to get my hi-tech splatter and spray box, make sure you check out Simon Says Stamp’s monthly kit which comes with a free hi-tech splatter and spray box. (I’m being sarcastic…it’s just the box y’all, but you should still check out getting monthly kits.)

That’s it! Y’all take care!

Leave a Comment Categories: Handcrafted Cards, Holiday Cards
Share :
  • 1
  • 2
  • Next Page »

Get My Latest Posts via Email!

Name

Email


designer spotlight
SSS Monday Challenge Winner

Recent Posts

  • Cards for Ukraine
  • Simple One-Layer Cards
  • Using Airtable to Inventory Your Stamps
  • Catching Up
  • “Beautiful Blossoms” Challenge

Categories

follow me on instagram

Follow on Instagram

Archives

  • March 2022
  • February 2022
  • May 2021
  • March 2021
  • February 2021
  • January 2021
  • December 2020
  • November 2020
  • October 2020

Meta

  • Log in
  • Entries feed
  • Comments feed
  • WordPress.org
Cricketleg Creative. All Rights Reserved.Design by SkyandStars.co
Back Top

Copyright © 2025 · LoveYourself on Genesis Framework · WordPress · Log in