• Home
  • Handcrafted Cards
    • Challenge Cards
    • Quick Tips
  • About Me
  • Shop
  • More Creative Stuff
    • 3D Printing
    • Home Decor
    • Model Railroading
    • Preparedness
    • Sims 4 Builds
  • Recognition

Cricketleg Creative

“Beautiful Blossoms” Challenge

March 9, 2021 Challenge Cards, Handcrafted Cards

Look what’s blooming in the latest Simon Says Stamp challenge with “Beautiful Blossoms”!
beautiful blossoms challenge

Well, hi!

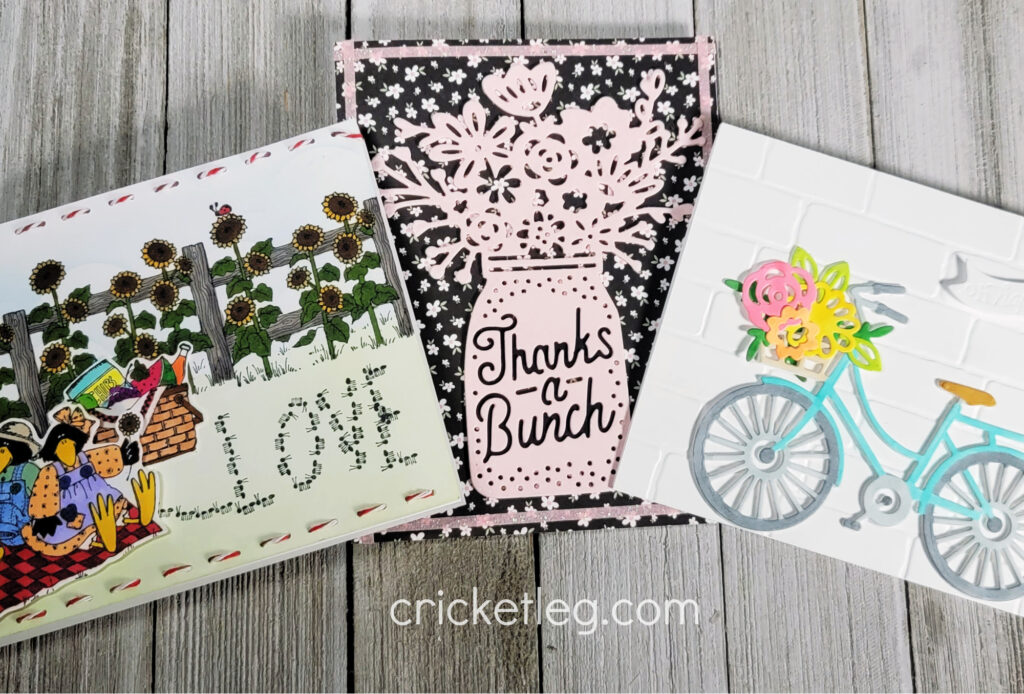
Spring is just around the corner (thank, goodness) so I’m grateful for some bright, floral fun with this “Beautiful Blossoms” card challenge. I used some new and some old to make three very different cards to enter the challenge.

Let’s take a closer look, shall we?

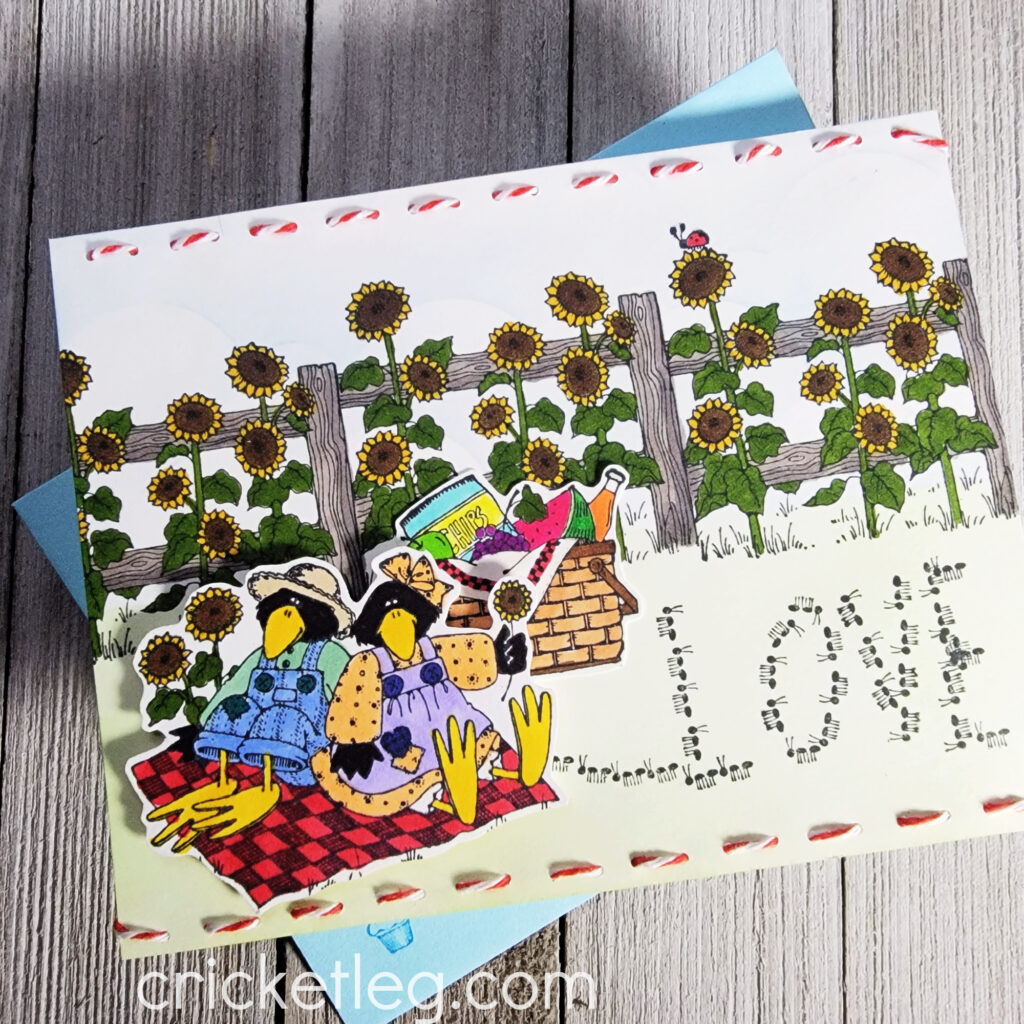
Crow Picnic Card

For this “Beautiful Blossoms” Challenge entry I dove into my old Stampin’ Up! stash of stamps for this crow and sunflower set. I remember making tons of cards using this set back in the day. But I always used colored pencils. Now that I have Copic markers I find I use them as much or even more than colored pencils!

This is an anniversary card for a family member so I decided to use the ant stamp to stamp the word “LOVE” in the grass. It’s a little wonky, but hey, they’re ants…they’re not perfect!

I also used some red and white baker’s twine to add some interest at the top and bottom.
beautiful blossoms picnic card

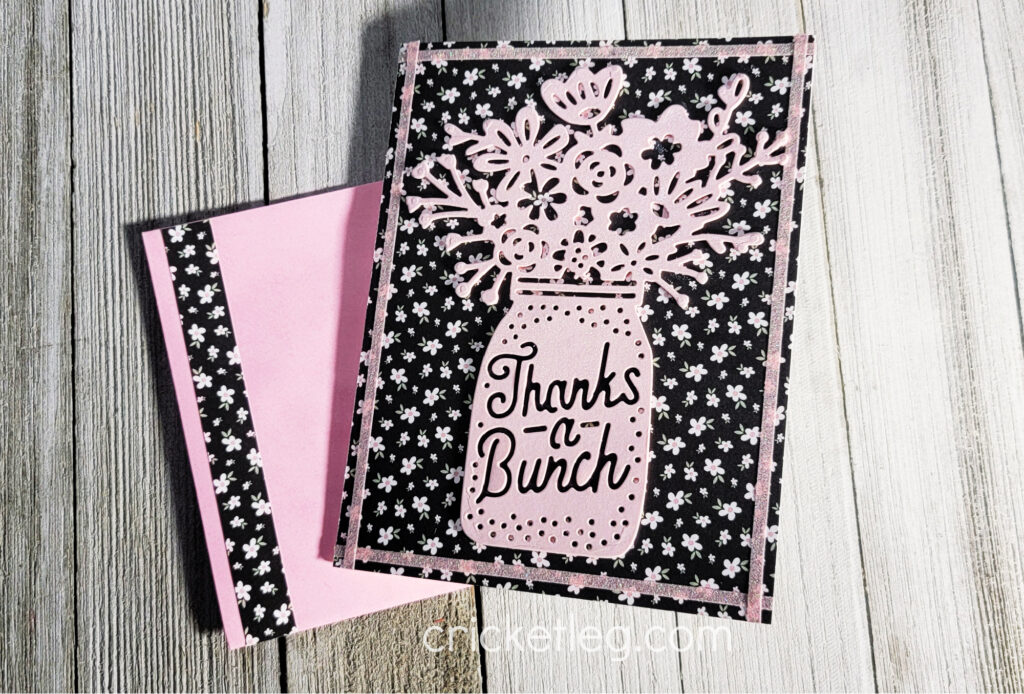
Thanks a Bunch Card

While I do love stamping, sometimes I just want to crank out a card with only paper and no stamps. So I used this Sizzix die cut in pink (four layers) to create the main focus of the card.

The background paper is from a Simon Says Stamp card kit. I used my Spectrum Noir glitter brush to cover the entire front of the jar of flowers. You can’t see it in the picture, and no matter how I angled the camera I just couldn’t capture the shimmer. But it’s there! You can see how it looks on another one of my pink/black floral cards here.

I love pink and black together!
pink and black card

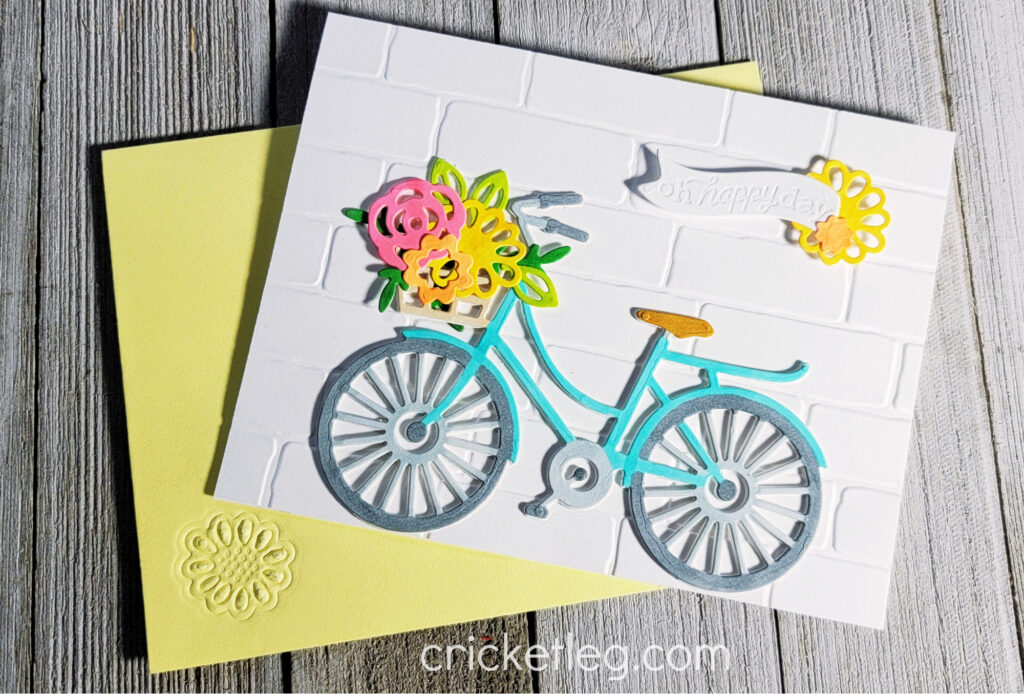
Floral Bike Card

I’ve been wanting to use this die set from Sizzix since my daughter gave it to me recently as a gift. (The floral jar in the Thanks a Bunch Card is also from her! Thanks, dear!) What is it about bikes and flowers?

Anyway, everything was die cut in white cardstock. The bike has four layers for dimension. I used Copic markers to color in the bike and flowers. The background is made using an embossing folder.

I used an embossing mat in my Big Shot to press a flower image onto the matching envelope. Loving the look of this clean and bright card!
floral bike card

Alright, spring. I’m ready. You can come now. I guess while I wait I’ll just have to hope that Simon Says Stamp will do more spring-y challenges!

Y’all take care!
Leave a Comment Categories: Challenge Cards, Handcrafted Cards
Share :

Glitter & Tape Card Backgrounds

November 18, 2020 Handcrafted Cards, Holiday Cards, Quick Tips

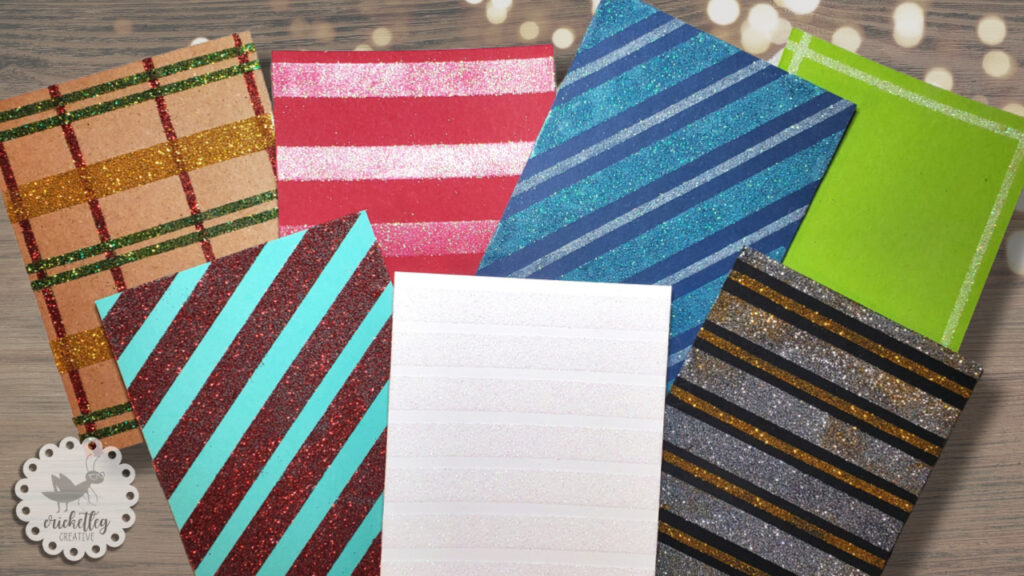
Use fine glitter and double stick tape to create interesting backgrounds for your handmade cards! Glitter tape card backgrounds are an easy way to add pizzazz to your cards.

glitter tape backgrounds

If you’re like me, you may not currently have tons of background papers, background dies, or background stamps at your disposal. And, if you’re like me, you may get a little sad when you feel like you can’t create the backgrounds you want.

Well, I have a solution for you. Well, you know….for now. And it’s kind of fun!

The Glitter

Recently, on my weekly Walmart grocery shop, I ran across some super fine glitter on the back aisle of the craft section. I grabbed a couple of colors and brought them home to experiment. I mean, I paid for them first. And then I brought them home.

They really are beautiful, and are just under $3 a jar. They’re stackable, as you can see in the video. But I have them in a single layer in a drawer.

Anyway, I’m not sure how I cooked up the idea (and I’m not saying I’m the only one who’s thought of this) but I thought that double stick tape combined with this superfine glitter would make a great background option. And it’s inexpensive!

The possibilities are endless. Go for tone on tone, with a glitter that matches closely to your paper color. Do stripes–horizontal, vertical, diagonal. Make a plaid design–all one color or multicolored.

Basically, you can just go nuts.

The Tape

In this video I’m only using two tapes. One is from Lawn Fawn….1/8″ double stick tape. I love this tape and use it all the time. The other is just office supply double stick tape on the disposable roll.

The only reason I chose those two is because that’s what I had! Use what you have and have fun with the results.

You could also incorporate metallic tapes like the blue tape I used on this card. I bought that tape from Hobby Lobby and it’s made my The Paper Studio. But I really wanted to exclusively use double stick for this video.

Watch the video below to see how I, on the fly, made a few backgrounds with very little effort.

So there you have it! Glitter tape backgrounds are a fun, easy, and inexpensive card option for birthdays, Christmas, New Year’s, and so on and so forth and what have you!

Hey drop a comment below and tell me how you successfully tame glitter in your card projects. I’m off to clean up the glitter spills on my desk!

Y’all take care!

1 Comment Categories: Handcrafted Cards, Holiday Cards, Quick Tips
Share :

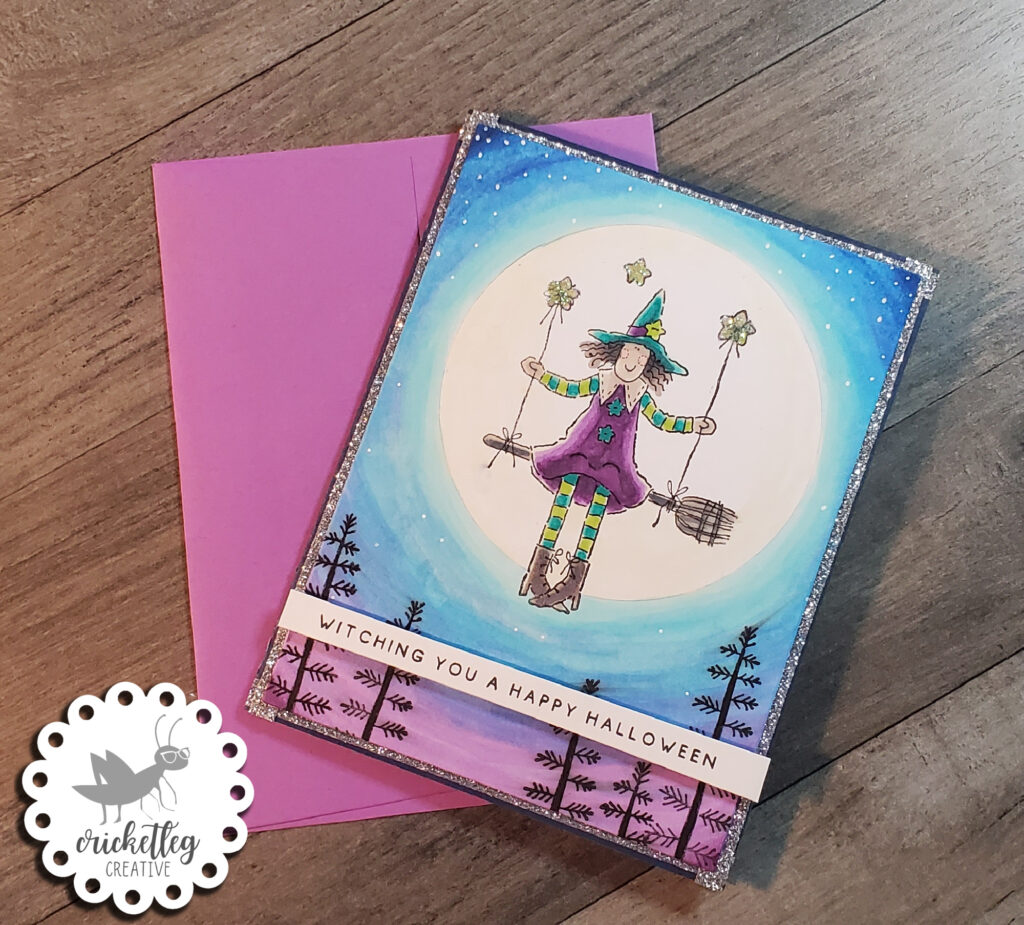
Halloween Moon Witch Card

October 6, 2020 Handcrafted Cards, Holiday Cards, Uncategorized

Making a card using “Copic” markers to create a moonlit sky around this cute little Halloween witch!

Why the quotation marks?

Because I don’t actually own Copic markers (if someone would like to be my wealthy benefactor here, I’m all in). I do use alcohol-based markers but I find most people are familiar with the word “Copic” more than the phrase “alcohol-based markers.” Moreover, if you’re into the whole manifesting idea, then why not just go ahead and say the word?

COPIC. There, I said it.

My Mentors

Having been recently inspired by my never-met-mentor, Sandy Allnock, I embarked on the slightly intimidating task of creating a background using only markers.

As you’ll see from the time lapse video below, I stamped only a witch and some trees. The rest is all marker.

I have to admit that I absolutely adored using non-traditional colors for this Halloween card. It was so fun to do something different!

Oh, and my other never-met-mentor, Jennifer McGuire, gave a great idea in one of her videos recently. She has oh-so-many stamps and gadgets that I just drool over. I’ve been fairly jealous of how many sentiment stamps she has.

Having only just recently returned to the stamping scene from a long hiatus, I seem to have a lot of, well, dated stamps. I really want some of those simple yet awesome sentiments.

Yeah, so anyway, Jennifer mentioned casually that you can “just print them out on your printer” if you don’t have a sentiment you want.

DUH.

Consequently, that opened up a whole new world for me, I can tell you! So I’ve been playing with that a LOT.

Please take a look at the time lapse video below to see how my card came together. Someday the blending will be much more smooth when I have those real Copics. But for now, I can be content with what I have.

Mostly.

Leave a Comment Categories: Handcrafted Cards, Holiday Cards, Uncategorized
Share :

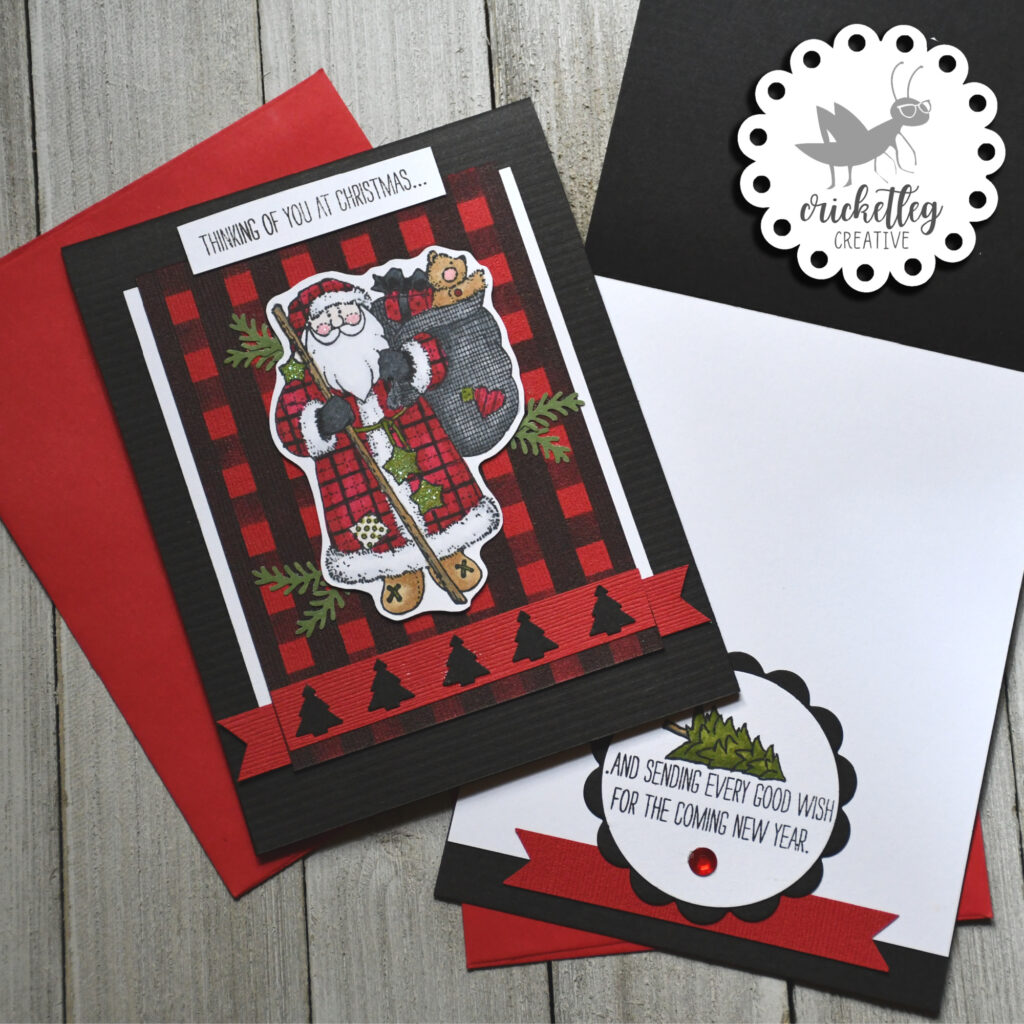
Buffalo Check Santa Card

October 6, 2020 Handcrafted Cards, Holiday Cards, Uncategorized

This Santa card with his Buffalo check background was really fun to make and fun to video!

Forgive the vertical orientation for this time lapse video. Having never ever shot one, I really wasn’t sure which way to orient it. I’m fairly techie, but I’m not super current on the best ways to set things up for social sharing. And at the time, I had no intention of sharing to YouTube.

Also, still figuring out the whole overhead camera rig thing. Needs to be more close-up for sure!

Anyhoo…

Much as I would love to have all the bells and whistles that many of my modern card-making mentors have, I am left with what I have on hand. And that’s somewhat dated.

I’ve had this Santa from STAMPIN’ UP! for ages and really just wanted to make a cute and cozy card. I used a vertical lines stencil from Printworks (out of business now, I believe) to create a gingham or buffalo check for the background. The greenery and black trees are made from paper punches, and not the good kind that are easy to punch. No, these are the ones that you get a workout using!

The sentiments and tree are also from SU! but are definitely more timely. I think the black and red cardstock really set things off.

Coloring with “Copics”

I colored the Santa and tree with my Ohuhu markers, and they’re….um…okay. For now. Eventually, I want to have Copic markers which are the gold standard for alcohol-based markers. My Ohuhu’s are not as wet (from what I can tell from other videos) and so the blending is more challenging. Still, I have really enjoyed using them and would recommend them to beginners who need a more budget-friendly alternative.

Since making this card, I’ve had a chance to binge-watch (and I do mean binge!) a true master in the Copic craft: Sandy Allnock. I highly recommend checking out her Copic videos. She also has watercolor, colored pencil, and other videos. I’m just so inspired by how she can take just a couple of stamped images and create a world around them with markers! Amazing!

Anyway, watching her videos has inspired me to be a little more daring in how I color. So I’m much more proud of some of my later cards. Still, this one still gives me all the cozy feels, so I still love it!

Here’s the time lapse of the card creation:

Thanks for watching! Now go create something!

Leave a Comment Categories: Handcrafted Cards, Holiday Cards, Uncategorized
Share :

Get My Latest Posts via Email!

Name

Email


designer spotlight
SSS Monday Challenge Winner

Recent Posts

  • Cards for Ukraine
  • Simple One-Layer Cards
  • Using Airtable to Inventory Your Stamps
  • Catching Up
  • “Beautiful Blossoms” Challenge

Categories

follow me on instagram

Follow on Instagram

Archives

  • March 2022
  • February 2022
  • May 2021
  • March 2021
  • February 2021
  • January 2021
  • December 2020
  • November 2020
  • October 2020

Meta

  • Log in
  • Entries feed
  • Comments feed
  • WordPress.org
Cricketleg Creative. All Rights Reserved.Design by SkyandStars.co
Back Top

Copyright © 2025 · LoveYourself on Genesis Framework · WordPress · Log in