• Home
  • Handcrafted Cards
    • Challenge Cards
    • Quick Tips
  • About Me
  • Shop
  • More Creative Stuff
    • 3D Printing
    • Home Decor
    • Model Railroading
    • Preparedness
    • Sims 4 Builds
  • Recognition

Cricketleg Creative

Favorite Technique Challenge

December 11, 2020 Challenge Cards, Handcrafted Cards, Holiday Cards

This week’s Monday challenge from Simon Says Stamp is to make entries using your favorite technique.
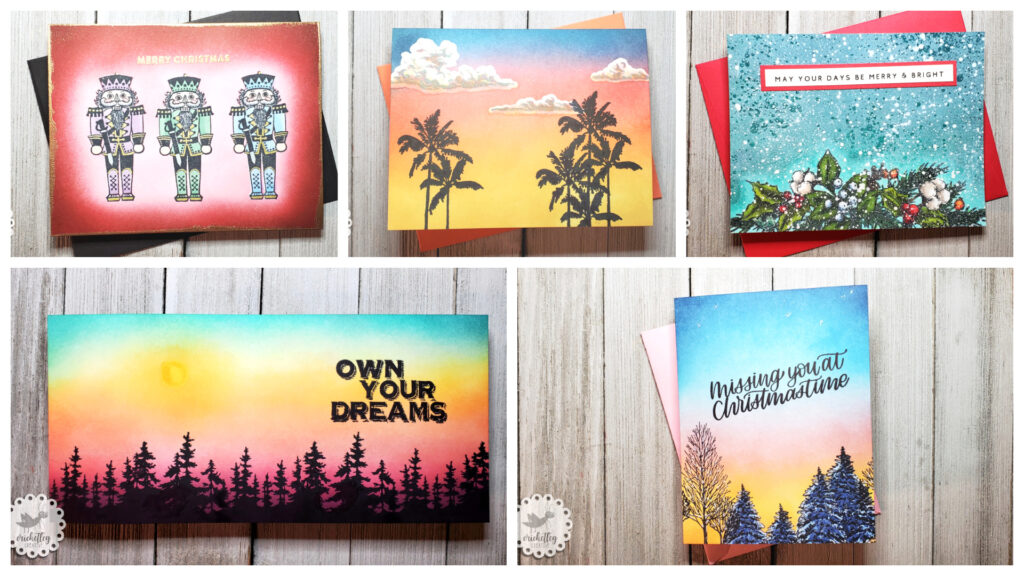
favorite technique challenge

Well, hi!

Okay, this one was quite a, um, challenge. Not necessarily making the cards. Just trying to pick a favorite technique! I really had to think about this one.

What is my favorite technique?

In all fairness, I believe that this is something that will change with time and with new stamps, products, etc. So FOR NOW my favorite technique is ink blending. Especially for creating skies.

So here are my entries into the challenge, from least to most favorite. My most favorite really surprised me and reinforced a lesson I have learned this fall. More on that at the end.

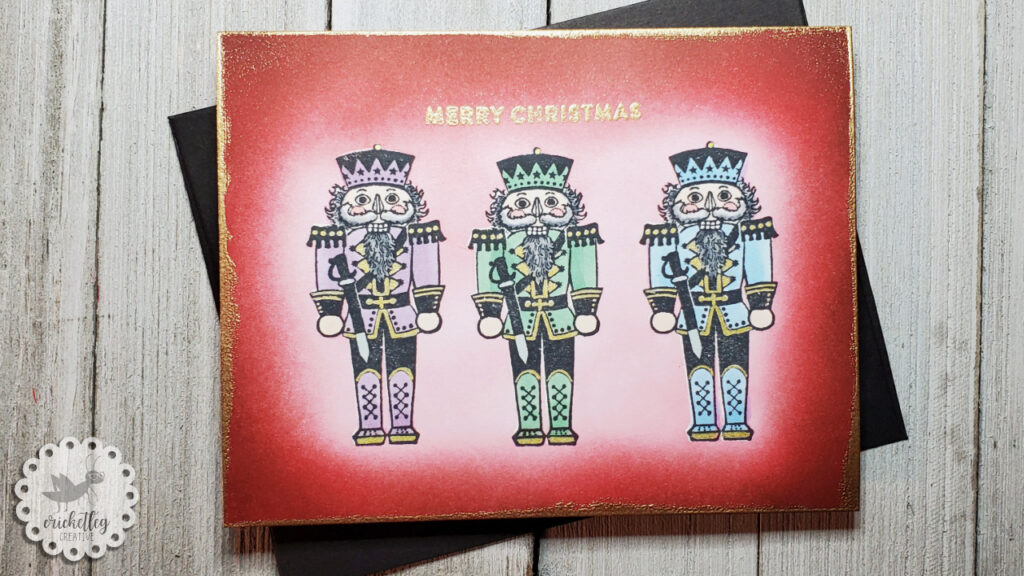
Nutcrackers

Yes, I do love making skies but I figured if I made five entries with five skies that could get redundant. So I thought I would just use my favorite blending brushes to create a monochromatic background for my nutcrackers.

So first, I had to stamp the nutcrackers and mask them. Then I used a red, a cherry, and a dark green stamp pad to create the red background. Yes, green. Adding green just around the edges, and adding it gently, really deepened the shading.

After that, I added some metallic accents to the nutcrackers with a gold gel pen. I chose muted pastels to color each one in. An embossed Merry Christmas sentiment finishes the card, as well as embossed edges.
nutcrackers

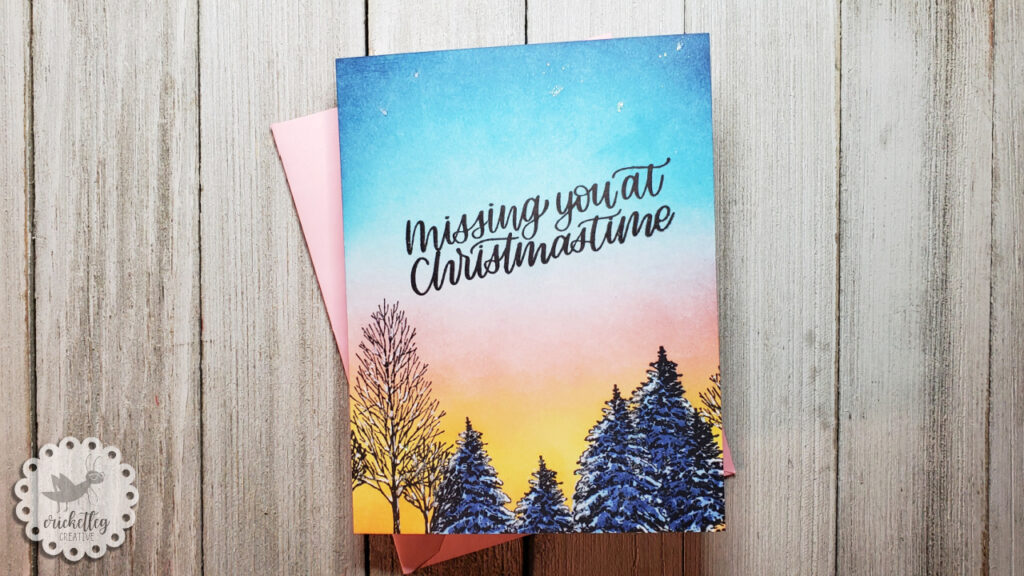
Snowy Trees Sunrise

Sunrise or sunset? It could be either!

Recently I purchased a set of winter tree stamps from Inkadinkadoo so I used a few of them on this card. I did mask some of the snowy evergreens before doing the ink blending with the brushes.

When I make skies I try to reference a real photo, so the Google comes in handy for that. Helps me figure out how to order the colors.

I wanted this to look like a snowy morning and since the light is behind the trees, I used gray blue Copic markers to put most of the snow clumps in shadow.

A sentiment from the most recent Simon Says Stamp card kit (which just came today!) finishes the card.
Tropical Sunset

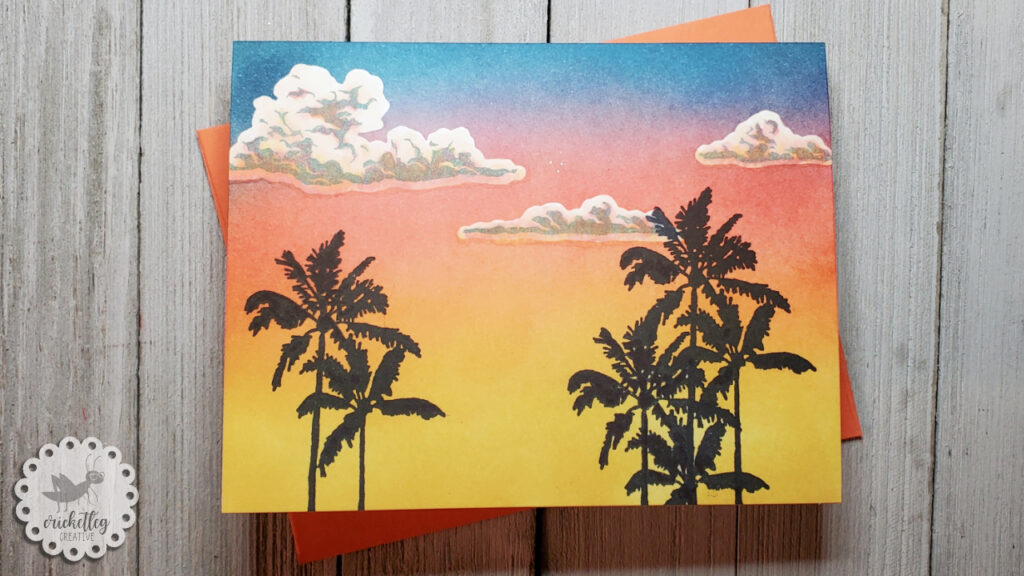
Next year is my 30th wedding anniversary! Husband and I are planning a trip (crossing fingers for no Covid complications) to the U.S. Virgin Islands. And right now, I’m loving any reminder of that upcoming trip!

In a recent challenge, I used this same palm tree stamp for my scene. I just love the look of palm trees in silhouette. But this time I added some clouds using stamps and dies from a Hero Arts set. I used the cloud dies to create masked areas that I could ink blend over. Then, once the ink blending was done, I used the cloud shadow stamps to create dimension. Adding in some Copic marker shading helps the clouds look like they are reflecting some of the sunset colors.
tropical sunset

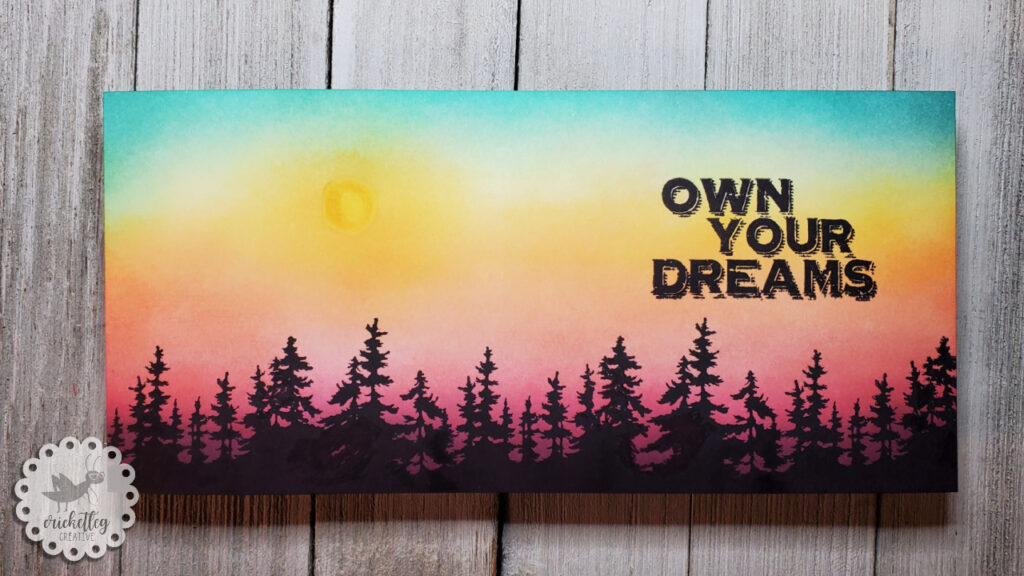
Forest Sunrise

Or sunset. Again, who knows?

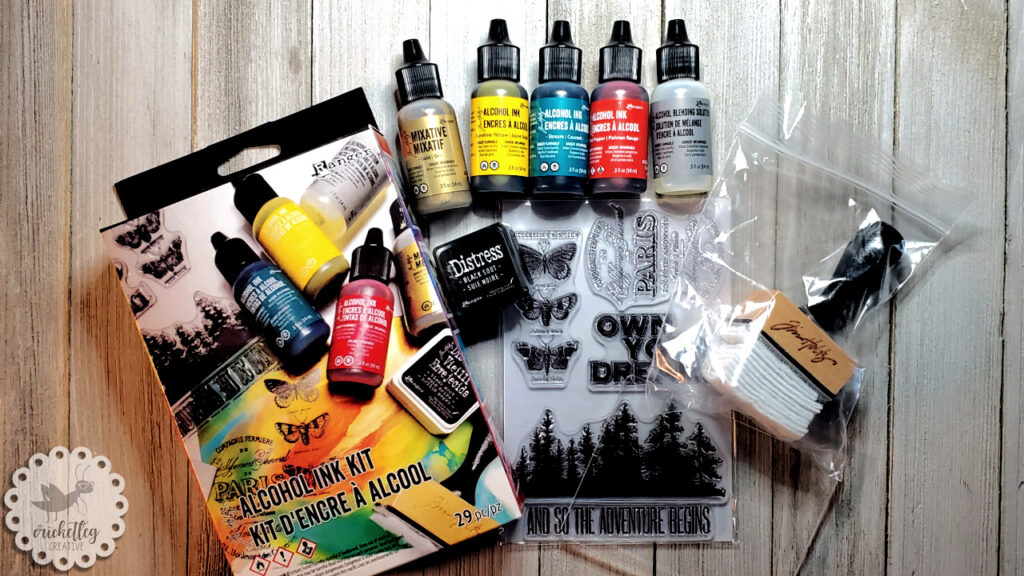
To create this slimline card I used stamps from the set that came with my alcohol inks kit. I was excited to use these as I’m always on the lookout for tree stamps!
alcohol inks

Unfortunately, the quality of these stamps appears to be less than great. When inked up, the tree line (which I love!) does not stamp well and leaves a big “ink hole” where it would not stamp no matter how hard I pressed! The “And So The Adventure Begins” sentiment stamp is crooked. I had to yank them off the plastic and they don’t stick well to acrylic blocks.

So, I had to fill in the ink hole with a Sharpie. That worked since I stamped in black for a silhouette effect. But what if I wanted to stamp in green? Sigh. Oh well.

Once I filled in all the holes (I stamped it three times across the bottom of the slimline card) I did my ink blending. Okay, that’s a lie, I did do a sun shape first. I die cut a small circle from a Post-It note and used that as a stencil to color in the sun with Copic markers. Then I ink blended from the sun outward.

Luckily, the other sentiment stamp in the set stamped fairly well. Still, disappointed in this stamp set.
forest sunrise

Snowy Greenery

This one almost did not make the cut. Seriously. It almost went in the trash.

Here’s the 411…

I started by stamping the beautiful greenery stamp in this month’s Simon Says Stamp card kit. Such a great kit this month! I colored it in with Copics and then decided that for this background I would do some Copic blending! (FYI…I don’t know what that pom-pom like plant is in the stamp but this Southern girl thinks it looks like cotton….so it’s cotton. I mean, why not?)

Silly me, most of my markers are Ohuhu which are great for the price, but many are already too dry for blending (I haven’t had them very long!). I knew I wanted a kind of teal blend and once I started I just had to keep going even though a couple of my teal family markers were dying.

Hmmm. The blend was sucking pretty bad. So I thought I’d try a new product that I *thought* was for after inking. Um, no. It’s for before. So after I sprayed and it dried (and did nothing but add shiny blobs all over) I just about quit.

But, as I have learned in the last few months, you can often make lemonade out of lemons when it comes to card “fails” so I soldiered on. I tried ink blending white pigment ink over the blogs. Nope. That looked weird.

Well, I can always add snow splatter and see what happens.

And that did it. I watered down some white goache and splattered it liberally over the entire card surface. Sure enough, it covered my many sins and I think it looks great!

A computer printed sentiment mounted onto red cardstock finishes the card.
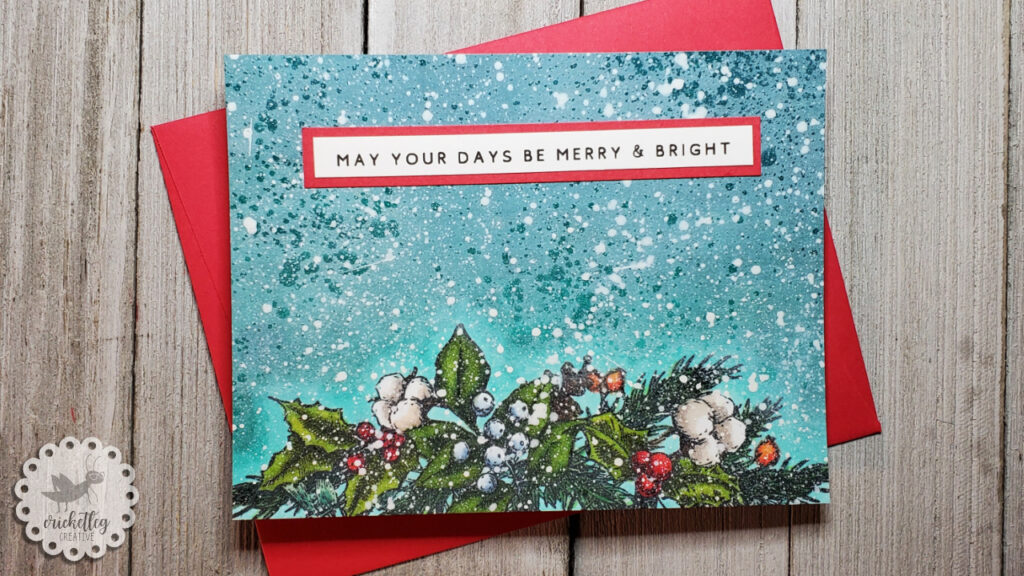
snowy greenery

And that’s a wrap!

Just a heads up, Mr. Snowy Greenery Card will be doing double duty by appearing in the Simon Says Stamp Wednesday Challenge theme, Let It Snow. He’s so beautiful how can I not use him twice?!

Y’all take care!
Leave a Comment Categories: Challenge Cards, Handcrafted Cards, Holiday Cards
Share :

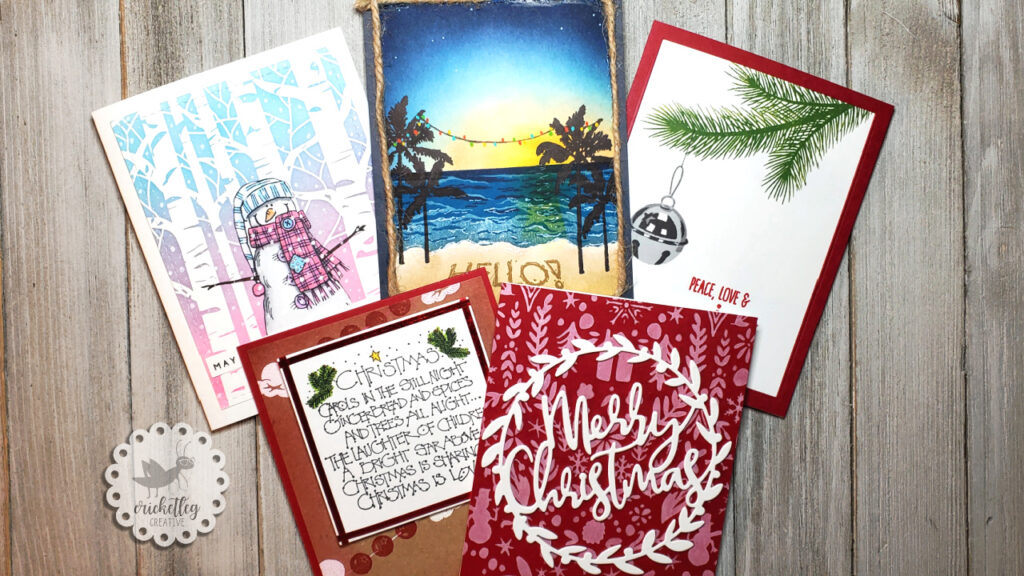
“Christmas” Challenge

November 24, 2020 Challenge Cards, Handcrafted Cards, Holiday Cards

Simon Says Stamp Wednesday challenge entries for the “Christmas” theme

christmas challenge

Well, hi!

Another Wednesday happens, another Simon Says Stamp Wednesday challenge! Y’all I don’t know what I’m gonna do once the holidays are over because making Christmas cards is my literal favorite. And the challenges have been lining up pretty well with that lately!

But enough about the holiday obsession, let’s get on with this challenge’s entries, shall we?

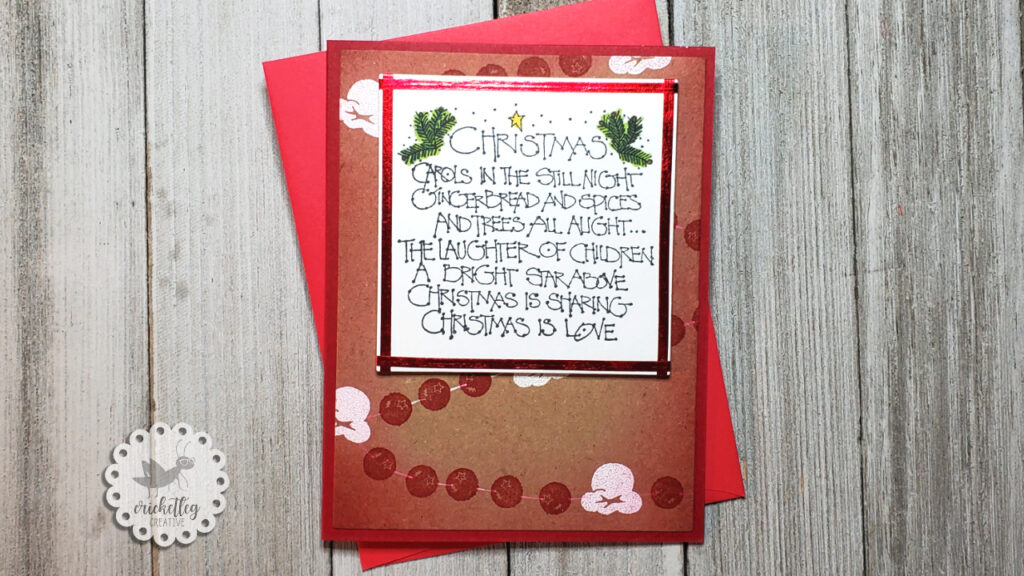
Popcorn Strings

I used a popcorn stamp, stamped it with white pigment ink, and also used white embossing powder. Then I used what I think is probably a blueberry stamp for the cranberry! I added some shading around the edges.

The sentiment is an old Printworks (now defunct) stamp. I trimmed the cut-out sentiment with metallic red tape. The whole thing is mounted onto kraft cardstock.

Christmas challenge

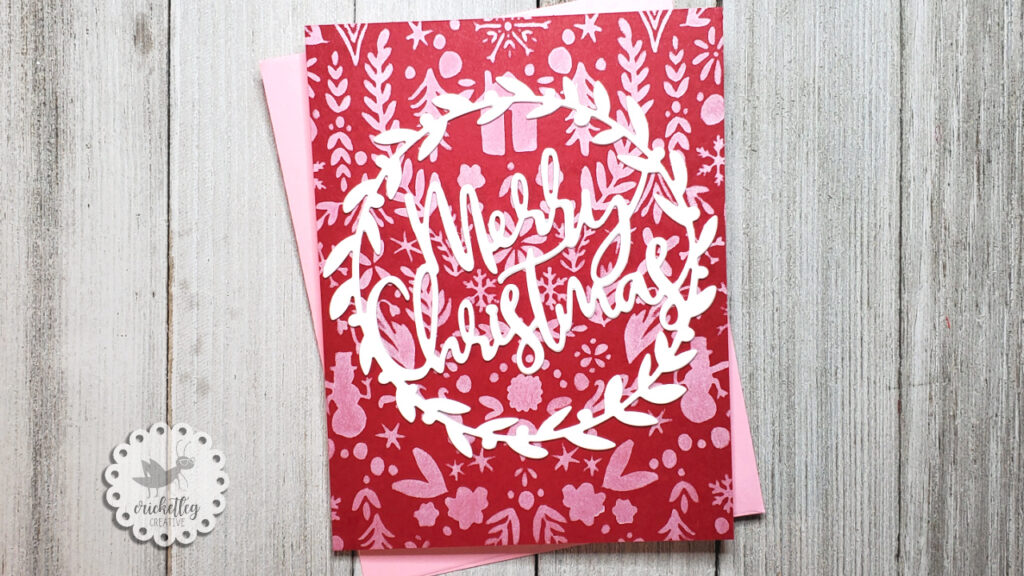
Winter Stencil

Recently I purchased this Carta Bella Winter stencil and have been itching to use it. Initially I figured I would use red, green, or blue ink onto white cardstock but at the last second I opted for white pigment ink on red cardstock. Oh what fun!! I love it. And it kind of has a pinkish hue.

On top of that background I mounted three layers of a Merry Christmas Wreath die cut from Sissix. I have to admit that it looks better in person; looks a little busy in the photo.

winter stencil

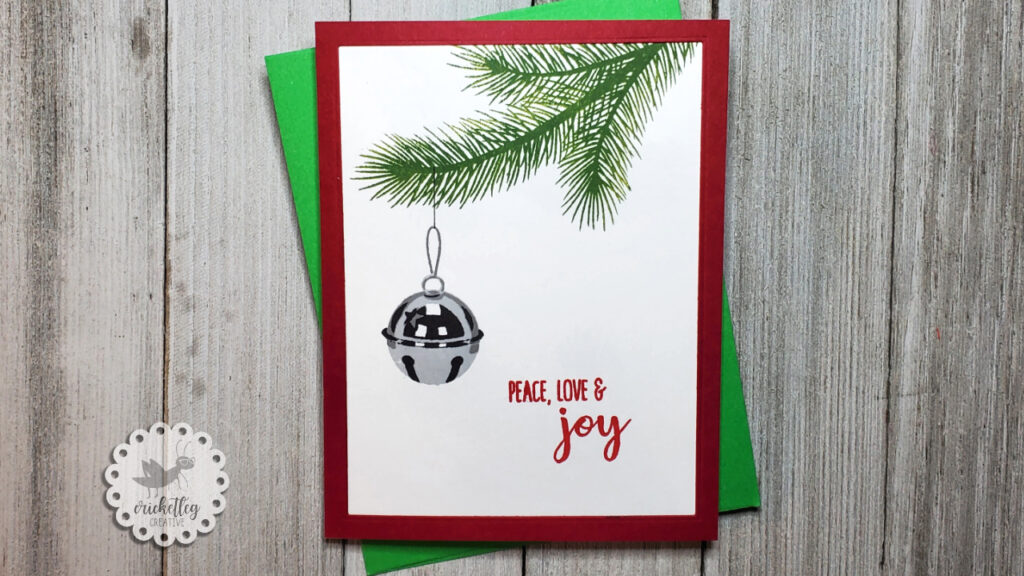
Christmas Bell

When I saw this stamp set in action I was amazed at how realistic the bell stamps! I mean, it totally looks metallic! This is due to stamp layering. This bell is stamped using three layering stamps and three ink colors. The results are so much fun!

This is a simple card; I really wanted the bell to be the focus. All the images you see are from this stamp set by Sunny Studios.

christmas challenge bell

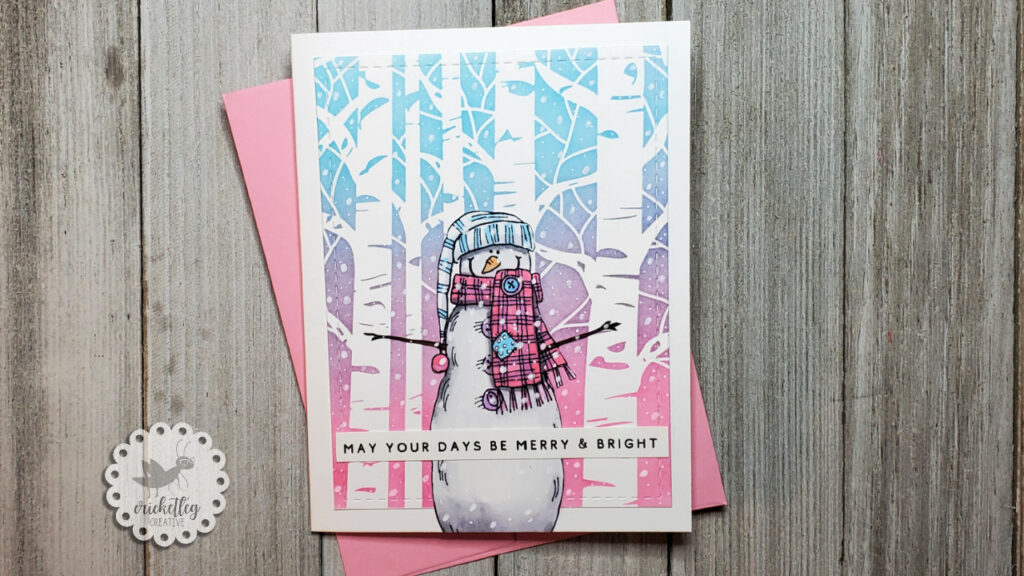
Forest Snowman

This card features another stencil that I recently acquired, but this one is from Crafters Workshop. I’ve been in search of an inexpensive Aspen tree stencil or stamp or die to use. I see so many amazing cards that have these beautiful trees and I just wanted to make that look a reality in my cards.

So I used a pink, a purple, and a blue ink pad along with these amazing blending brushes to create a lovely winter sky behind the trees. Then I stamped this Stampin’ Up! snowman (from 1997, y’all!), colored him with Copic markers, and fussy cut him out. He’s mounted just in front of the trees, which I also die cut using a Waffle Flower stitched rectangle die.

The sentiment was made using my computer!

forest snowman

Christmas Beach

Can I go here for Christmas? I mean, we don’t get white Christmases here anyway so I might as well just go to a tropical island right?

Okay, well, anyway….this is my favorite of my Christmas Challenge entries. The water and Hello! stamps are from a Hero Arts stamp set (the water is made using three layering stamps in three different colors) and the palm trees are from some random stamp I bought many moons ago.

I used a white pen to add the foam to the water and sand. The sky was made using ink blending. The Christmas lights? Well, those took a little more thinking. There are no string lights in my stamp collection, sadly. So I drew a string line between the palm trees with a black felt tip pen and used a super fine brush to apply little dabs of acrylic craft paint for the bulbs.

Gosh, I love a good tropical Christmas scene!

christmas beach

Here’s a close up of the sea foam:

beach

So, there they are…all my Christmas Challenge entries! I hope that one of these will win the random drawing or the a designer spotlight! Did I tell you that I won one of the random drawings the other day? Yep. And I love me some free merch!

Y’all take care!

Leave a Comment Categories: Challenge Cards, Handcrafted Cards, Holiday Cards
Share :

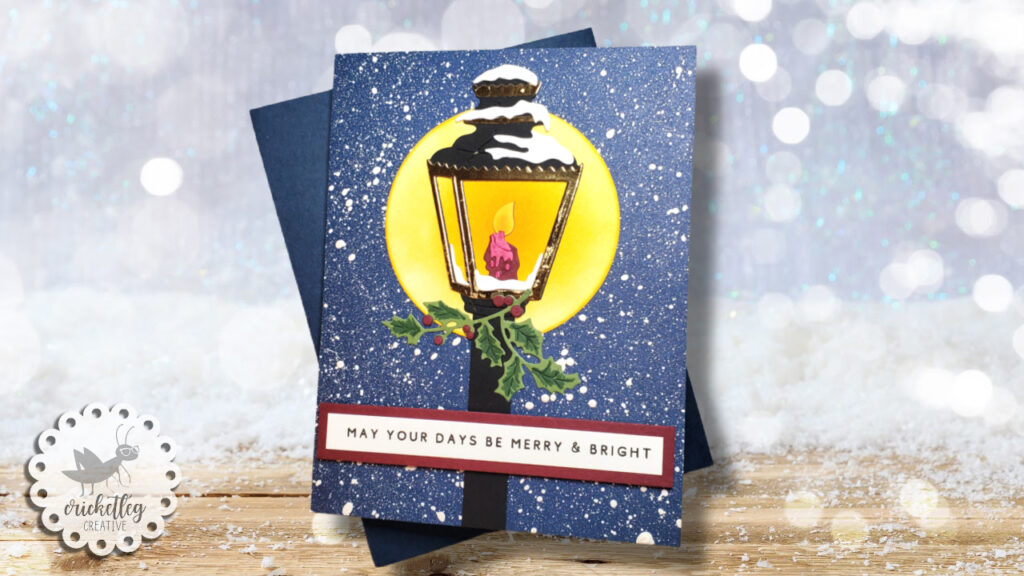
Snowy Lamp Post Card

November 9, 2020 Handcrafted Cards, Holiday Cards

This card features a solitary lamp post against a snowy background

Yes. Yes, another Christmasy card. Sorry, I can’t help it. Plus, I haven’t used this die set since buying it and I really want to play with it.

I also wanted to try something just a little different than what I normally do for a snowy background. Typically, I try for something blended. I’m either using ink blending tools with stamp pads for a soft blended sky or I’m using Copic markers to make a more bold sky but still with a soft transition between colors.

For this Snowy Lamp Post Card I wanted to do something less realistic and that would draw the focus right to the lamp atop the post. I achieved this with a die cut circle as the “glow” for the lamp candle.

Watch the video to see how I made the snowy background as well as how I finished the glowing circle.

I’d love to hear from you so let me know what your favorite way to make snow for cards is. And feel free to check out my most recent Christmas card here.

Oh, and if you want to know how to get my hi-tech splatter and spray box, make sure you check out Simon Says Stamp’s monthly kit which comes with a free hi-tech splatter and spray box. (I’m being sarcastic…it’s just the box y’all, but you should still check out getting monthly kits.)

That’s it! Y’all take care!

Leave a Comment Categories: Handcrafted Cards, Holiday Cards
Share :

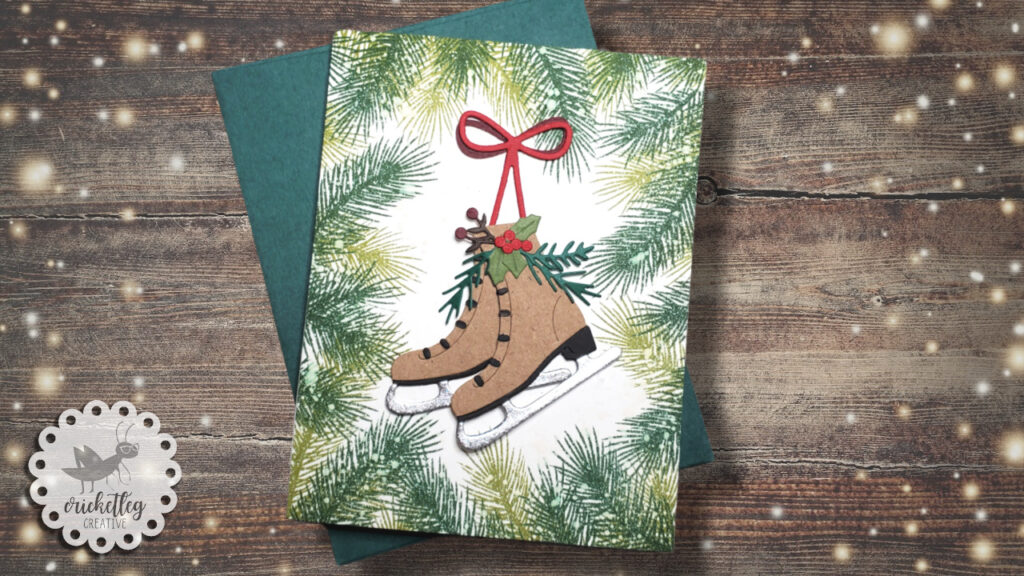
Holiday Ice Skates Card

November 5, 2020 Handcrafted Cards, Holiday Cards

Lovely ice skates bordered by snowy greenery for a beautiful holiday card!

holiday ice skates card

My favorite cards to make are holiday cards, specifically Halloween, Thanksgiving, and Christmas. But my all-time favorite is Christmas. I’ve loved Christmas since I was a small child! Creating a whole mood with a Christmas card is just so satisfying!

When I thought up the design for this card, I got so excited to make it! I’m not an ice skater, but I love ice skating. In fact, one of my very favorite Christmas movies, The Bishop’s Wife, features an ice skating scene that I just adore! (I just tried to find a link to that scene, but no luck…sorry.)

Anyway, I love the look of ice skates hanging with greenery. So cozy and vintage feeling. So I was very excited to shoot a video featuring that on this card. Other than the tiny laces and berries, everything went together very quickly.

Another beautiful look for this card would be to switch the card base to kraft paper and the ice skates to white cardstock. That would be beautiful and the snowy splatter would show up even more. Hmmm….I think I have something to go do right now.

Enjoy the video, and please leave me a comment and let me know your favorite Christmas movie!

Check out some of my other Christmas cards here and here.

Y’all take care!

Leave a Comment Categories: Handcrafted Cards, Holiday Cards
Share :

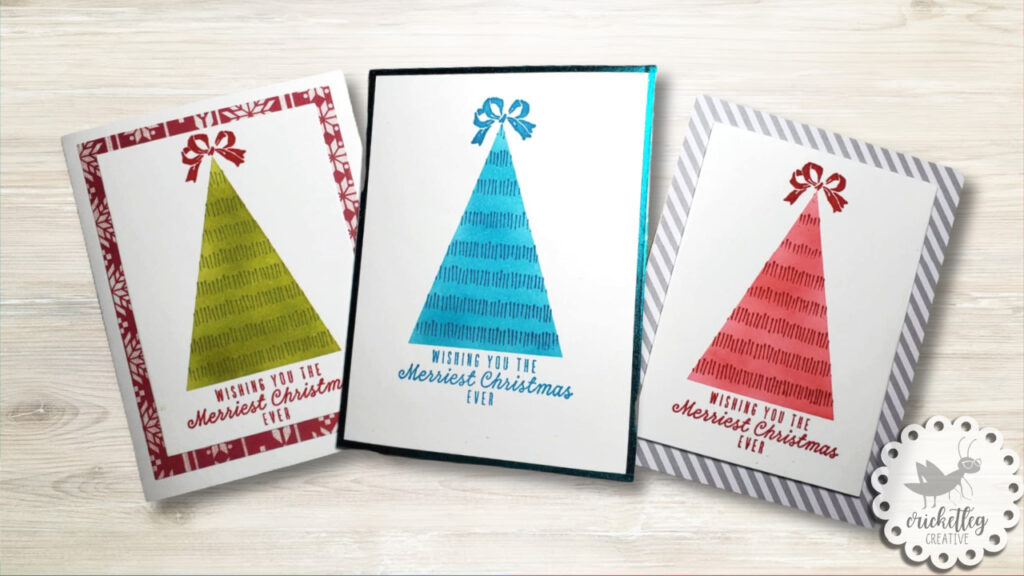
Quick & Simple Christmas Cards: Masked Trees

October 29, 2020 Handcrafted Cards, Holiday Cards

This quick and simple Christmas card technique of masked trees might be just the ticket for your holiday cards this year!

quick simple christmas cards masked trees

Well, hi!

Welcome back to the blog, and welcome to an idea that has literally been years in the making.

Okay, maybe that’s too dramatic. But I really have been itching to try this technique. Well, my version of it anyway.

The Idea

I saw someone on social media mask off some watercolor paper in a triangle tree shape and make cool droplets of color inside the mask. Once the water/paint droplets had dried, there was this cool effect! I figured I’d try it with stamping.

When I started to look through my stamps I realized that the stamp I was envisioning was not in my possession. Dang it! Oh well, regroup and recalculate.

What I Ended Up Doing Instead

What I ended up on turned out great! I used ink blending and a single, repeated stamp with tone on tone colors. The idea and technique is so simple I figured why not try it with more than one color scheme.

Once I chose the tone on tone color, I knew I wanted to keep the rest of it simple too. There are only three stamps total used. One sentiment, one tree topper bow, and the border stamp that gets repeated on the tree.

These cards went together so fast I’m actually rethinking my original 2020 Christmas card design idea.

Watch for yourself in the video below. Leave a comment and let me know which color scheme you like best. Personally, I was surprised by my preferences!

If simple is not your style, check out a more detailed Christmas card here.

Y’all take care!

Leave a Comment Categories: Handcrafted Cards, Holiday Cards
Share :

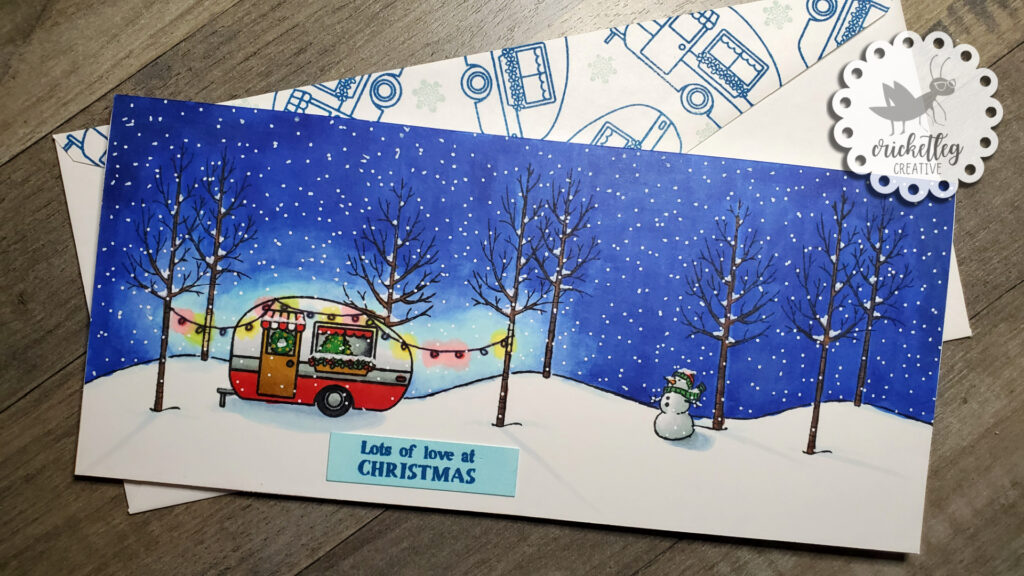
Winter Camper Slimline Card

October 26, 2020 Handcrafted Cards, Holiday Cards

This Winter Camper Slimline Card will make you a happy camper!

winter camper slimline card

Well, hi!

I’ve only recently begun experimenting with slimline cards. If you don’t know what slimline cards are, they are simply cards that will fit into a legal size envelope. That’s the basic shape.

You can make them horizontal/landscape orientation, like the one above. Or you can make a really tall card by orienting it vertically/portrait.

One of the things I love about slimline cards is the freedom it can give you! I have alphabet dies, for example, that I love but I can only fit four letters across a landscape A2 sized card. With a slimline card, I have a lot more word options.

With my Winter Camper Slimline Card, I had the space to make a nice, wide scene. No crowding the images! Had I done an A2 sized card, I likely would have left out the snowman entirely. I really wanted space in this snow scene.

My experiment with making glowing Christmas lights worked out pretty well, I think. They look glow-y to me anyway!

Although I could stand to do more in the way of shadow and light, I’m learning! And the practicing has been really fun. You can see some earlier examples of me working on night skies here and here.

So check out the whole video below! I hope you enjoy it!

Y’all take care!

4 Comments Categories: Handcrafted Cards, Holiday Cards
Share :

Matching Card & Envelope Challenge

October 21, 2020 Challenge Cards, Handcrafted Cards

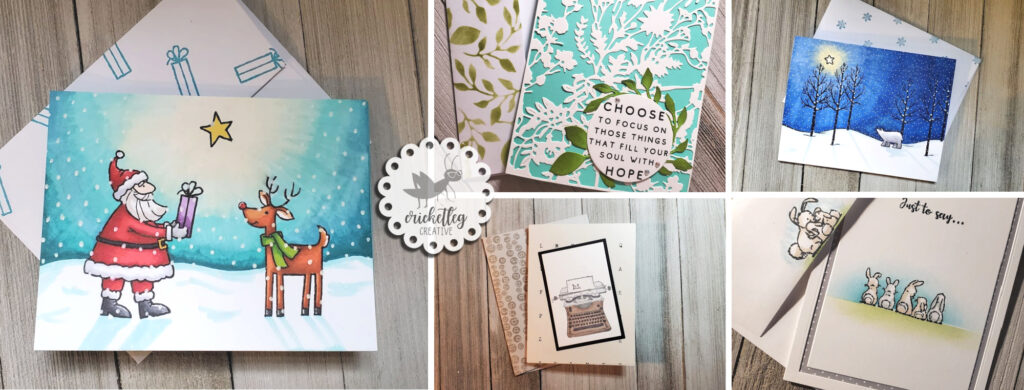
My examples for the Simon Says Stamp Matching Card & Envelope Challenge

challenge cards collage

Well, hi!

Simon Says Stamp runs two weekly challenges. One is on Monday. The other on Wednesday. I’m going to try to make examples for those and post them here on the blog. You can link up to five entries for each challenge, and I think that’s a great way to get creative and have some fun! Plus, winning a $25 gift card is a pretty sweet incentive.

Last Wednesday’s challenge was to make cards with matching envelopes! Since I needed to add some inventory to my Etsy shop anyway, I figured this fit my needs pretty well!

My recent post on the We Go Together Wheel Card qualifies for the challenge as well. You can go read about it here. Shoot, I guess that makes six cards! Someone is gonna get left out! Oh well.

All these cards, minus the We Go Together card and the Bunny Love card, are currently in my Etsy shop!

Bunny Love

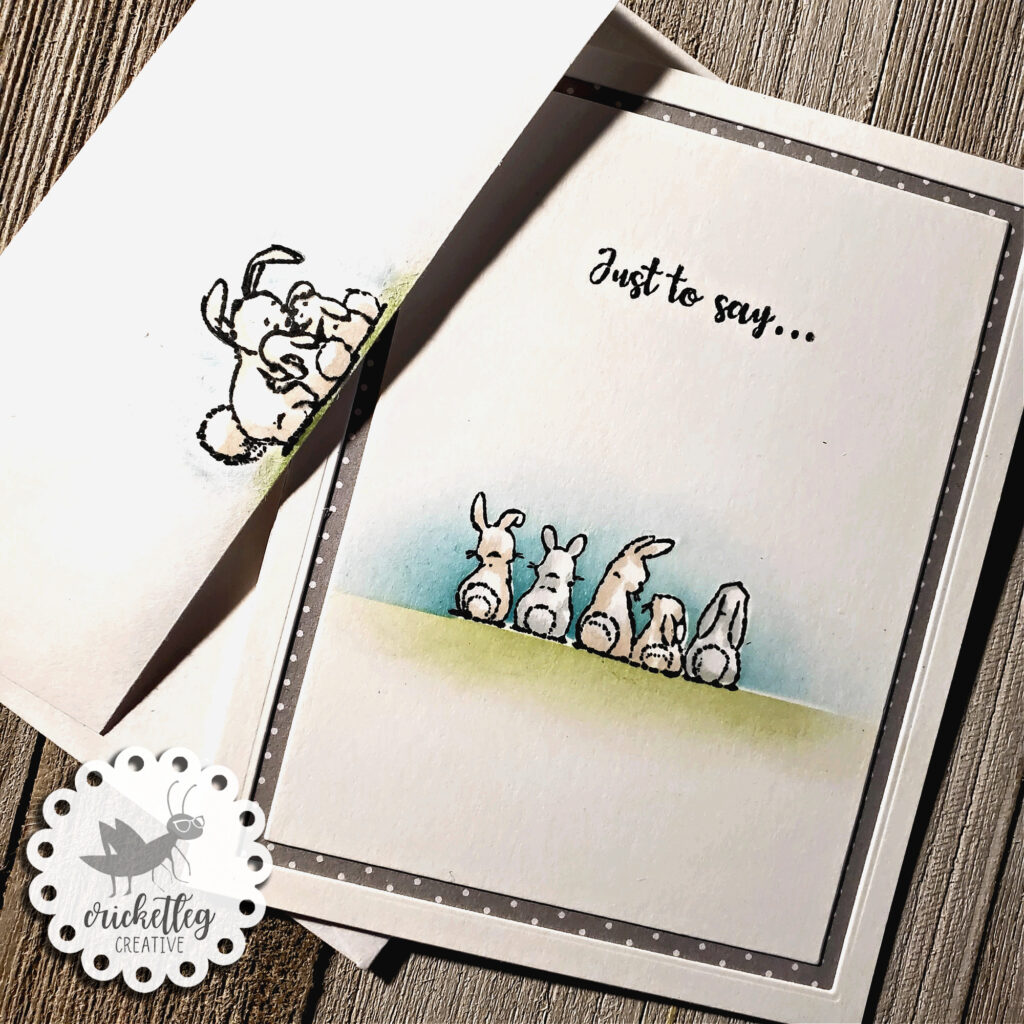
The first card to show you is a simple one that uses some…well…some cheap stamps I found on Amazon (see note below). The bunnies are a cute little grouping and I love doing simple shading above and below just to give a hint of a scene. A coordinating bunny stamped on the envelope flap completes the challenge! The inside sentiment says, “Somebunny loves you.”

(Side note: I don’t recommend the off-brand photopolymer stamps and dies on Amazon because they are not great quality. It was an experiment purchasing a few sets…an experiment I won’t repeat. I can use these stamps, but they have ZERO stick, so they won’t stick on their own to a block or stamp tool. The dies are not super accurate either.)

Bunny Love

Typewriter Hi

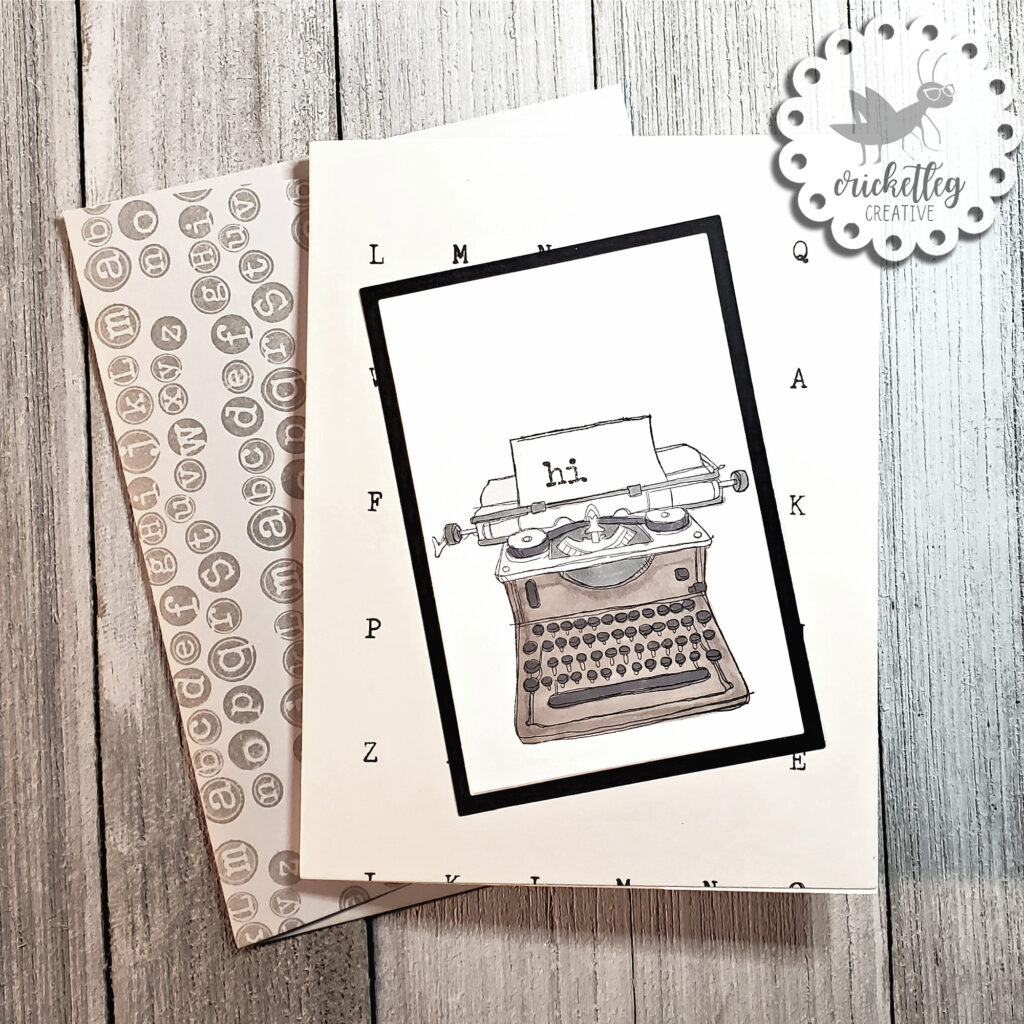
The second card to share with you is this simple but very clean Typewriter “Hi” card. I worried when coloring this image that it would be boring, but I have to say that I love the open white space around the typewriter. And the way the black cardstock behind it sets it off against the patterned letter paper. The stamps are from Stampin’ Up!…all from the same set.

It makes a nice, clean lines card.

Floral Quote

Next I’ll share this more inspirational card. One of my sisters recently requested that I stock my Etsy shop with some cards she could send people at church. So I thought I’d take a spin in that direction.

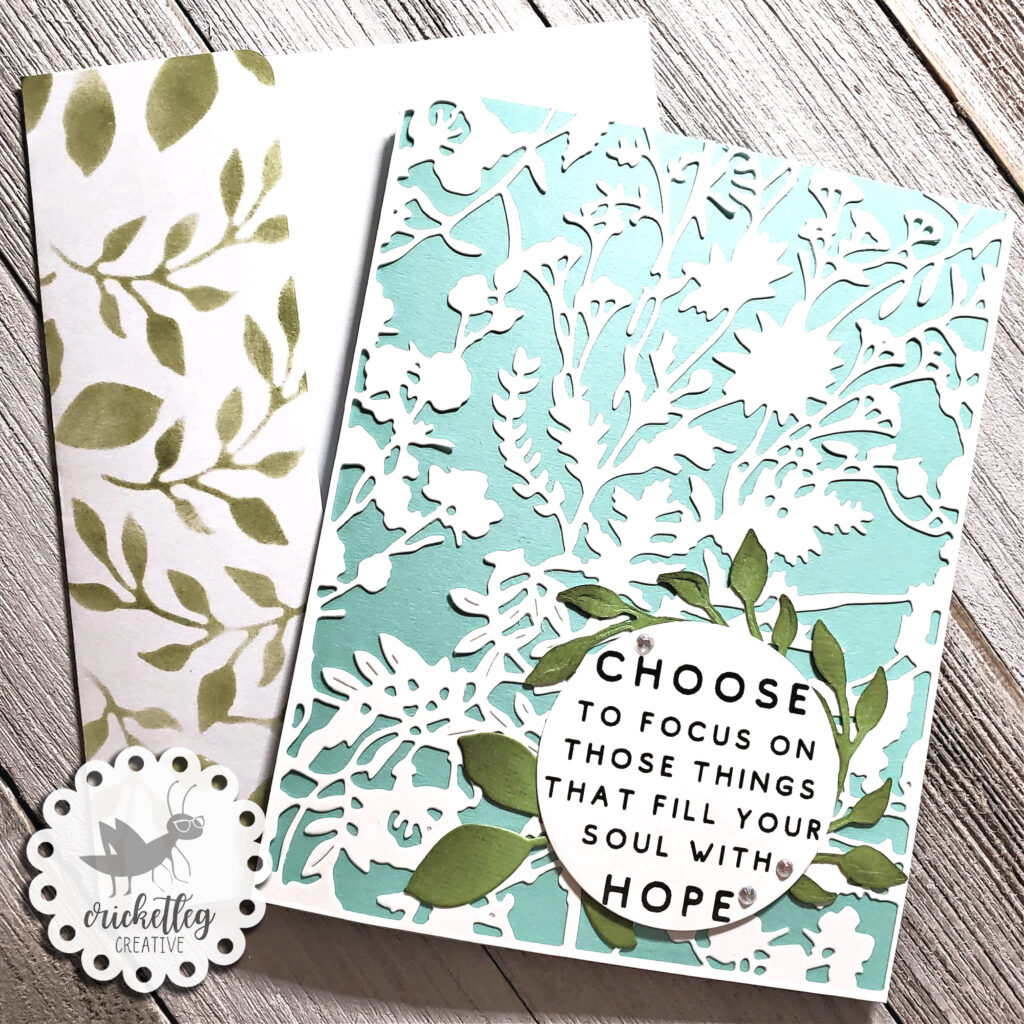
To make this encouragement quote card, I used a very intricate die from Tim Holtz. It was a bit time-consuming to punch out all the negative space, and a challenge to glue down. But I really like the effect of the white on blue cardstock. I die cut some leaves and used sponge daubers to add some shading with a dark green ink pad. The quote is just printed onto cardstock from my computer.

I used the green cardstock that I die cut the leaves from as a stencil for making the coordinating envelope back. I used the sponge dauber and that same dark green ink pad to lightly swirl over the stencil.

I’m looking forward to making more of these, incorporating quotes from spiritual leaders as well as scriptures.

Santa and Reindeer

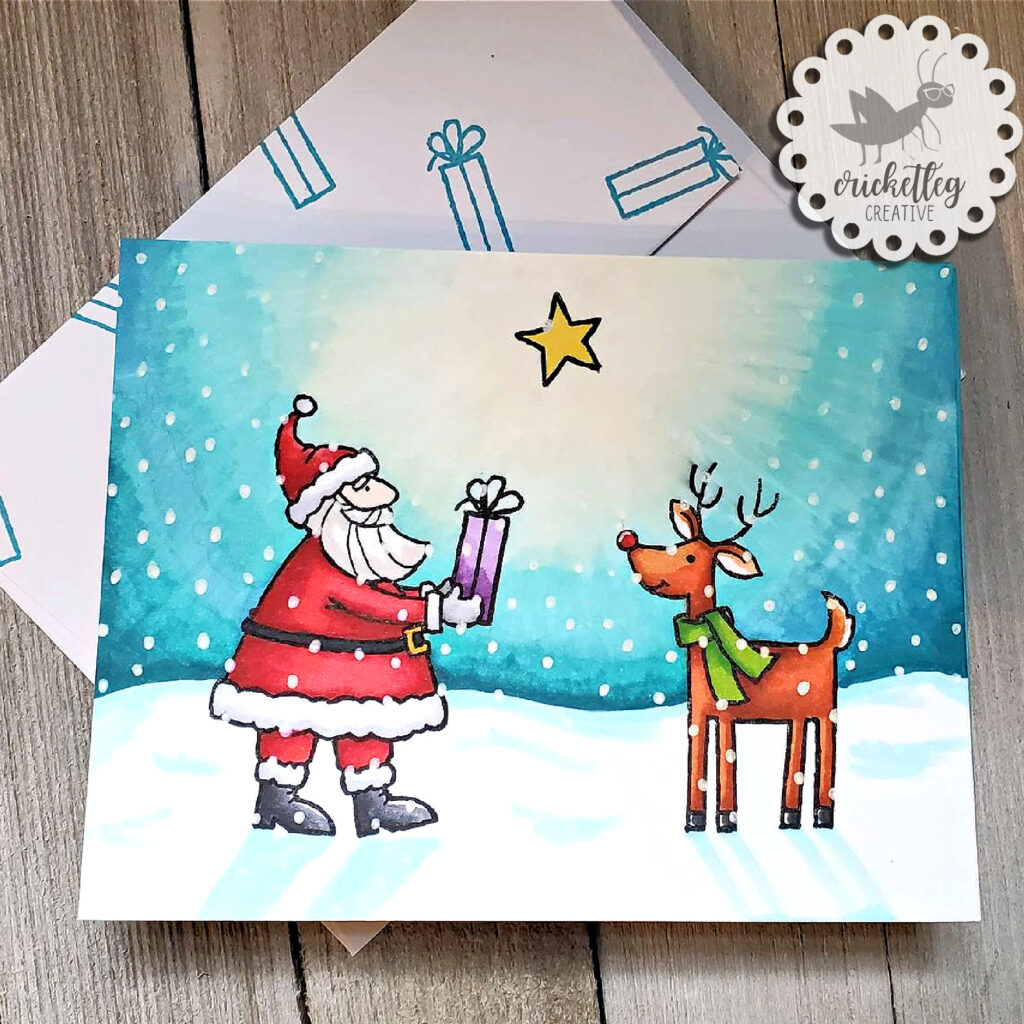
I saved my favorite two for last. I love the bright sky behind this Santa and reindeer card. I’ve really been enjoying using my alcohol markers to work with blending color. While I’m still learning, I find that each time I work with the markers, I’m willing to be a little more daring and use more and more contrast. I just signed up to take the Copic Jumpstart class from Sandy Allnock’s Art Classes site, and can’t wait to level up my skills with all her amazing classes!

The stamps for this card are from Stampin’ Up!.

Polar Night

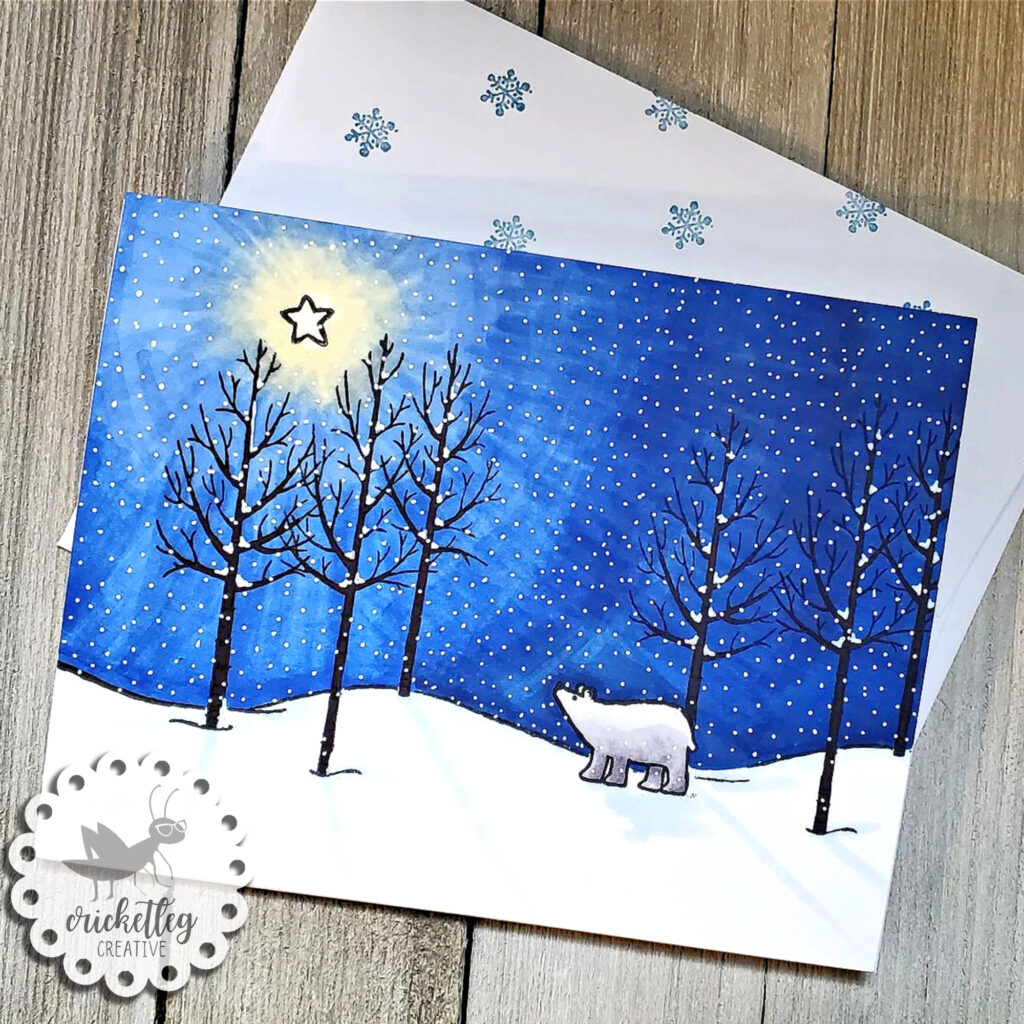
Night scenes seem to have become a favorite for me with my markers. This night time polar bear scene was fun to create. When I look at it, I totally get the cold, snowy mood going! Simple masking for the bear helped created some depth in the scene. And using a white gel pen for snow in the air and on the trees really makes the whole thing pop!

The Matching Card and Envelope Challenge was fun to do and helped me get some inventory into my shop!

Thanks for stopping by! I hope you got some card inspiration. I’d love to hear your comments on your own favorite ways to coordinate your envelopes with your cards! Or maybe you can do your own Matching Card & Envelope Challenge.

Y’all take care!

Leave a Comment Categories: Challenge Cards, Handcrafted Cards
Share :

Get My Latest Posts via Email!

Name

Email


designer spotlight
SSS Monday Challenge Winner

Recent Posts

  • Cards for Ukraine
  • Simple One-Layer Cards
  • Using Airtable to Inventory Your Stamps
  • Catching Up
  • “Beautiful Blossoms” Challenge

Categories

follow me on instagram

Follow on Instagram

Archives

  • March 2022
  • February 2022
  • May 2021
  • March 2021
  • February 2021
  • January 2021
  • December 2020
  • November 2020
  • October 2020

Meta

  • Log in
  • Entries feed
  • Comments feed
  • WordPress.org
Cricketleg Creative. All Rights Reserved.Design by SkyandStars.co
Back Top

Copyright © 2023 · LoveYourself on Genesis Framework · WordPress · Log in