• Home
  • Handcrafted Cards
    • Challenge Cards
    • Quick Tips
  • About Me
  • Shop
  • More Creative Stuff
    • 3D Printing
    • Home Decor
    • Model Railroading
    • Preparedness
    • Sims 4 Builds
  • Recognition

Cricketleg Creative

Search Results for: simple

Simple One-Layer Cards

March 2, 2022 Handcrafted Cards, Quick Tips

You can make really sweet and simple one-layer cards with very few stamps.
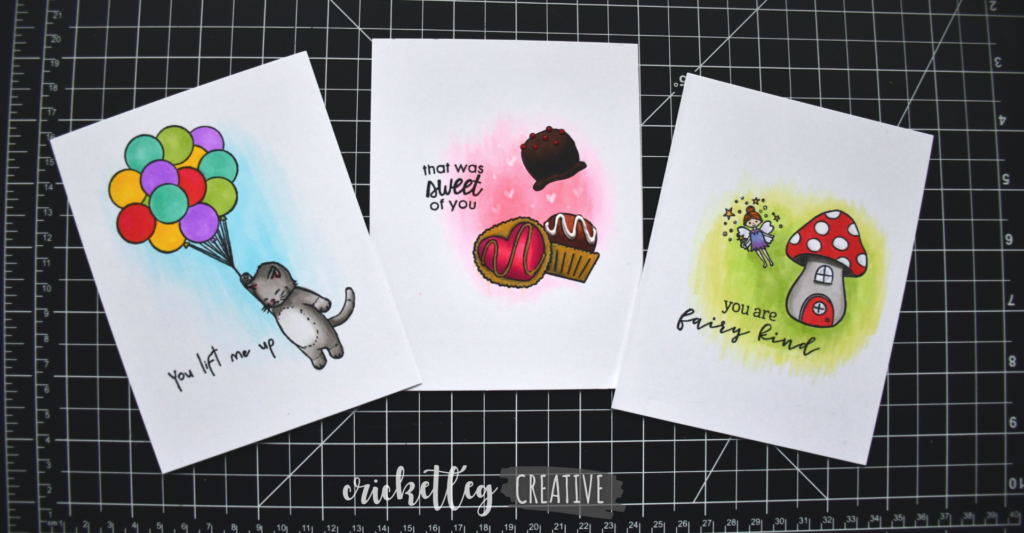
simple one layer cards

I love a really juicy intricate card. They usually take a while, but when you look at the final product you’re super satisfied with the results.

Here’s the thing though….you can actually make a beautiful, sweet card with a simple design. It can take less time and effort but it’s just as nice to look at when you’re done.

And, to be honest, sometimes I like a little empty white space on a card.

This type of design piqued my interest recently when I watched my mentor, Sandy Allnock, feature her Copic Coloring vignette cards on YouTube. I was convinced that this was one of the next projects I needed to try.

Why This Design Is Easy

Whether you call them “simple one-layer cards” or “vignette cards” the design idea in this case is the same: pick 2-3 smaller stamps that go together and pair them with a small sentiment.

In Sandy’s video, for example, she featured a very cute sea themed card with 3 sea critter stamps paired with “you’re turtley awesome.” Very simple, but very cute.

One benefit to this type of design is that it is very likely that, even with a small stamp inventory, you are will have something that works.

I very quickly looked through my clear stamp sets and found ideas right away. You can see below the pairings I came up with. I stamped the designs with Memento Tuxedo Black ink (so it wouldn’t run with the alcohol ink from the Copic markers).
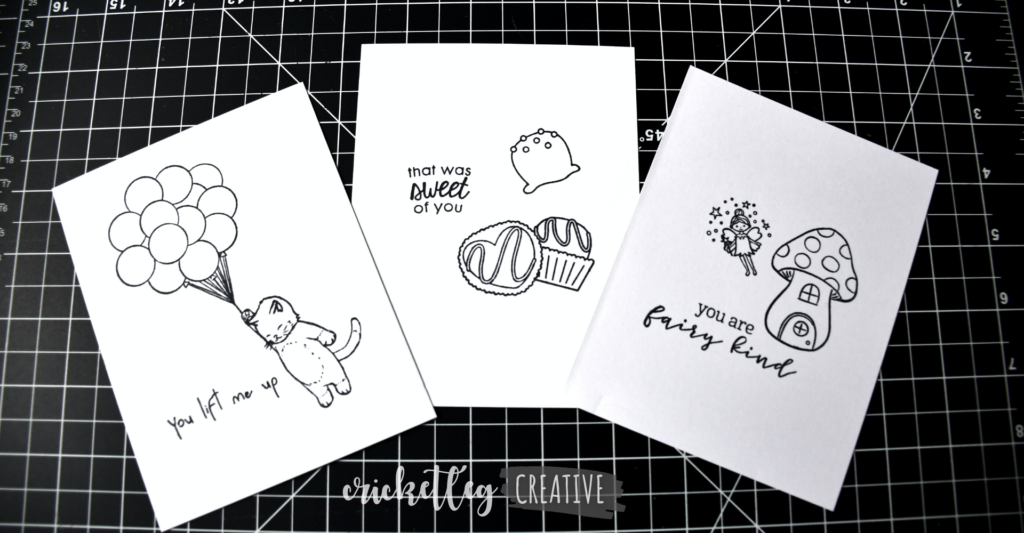
simple one layer cards

Very few supplies are needed for this type of design. As I mentioned above, if you are using Copics you need to make sure the stamp pad you are using won’t bleed when you color the image in. But considering what all can go into making a card, using a stamp pad, a few stamps and something to color with is a pretty small supply list!

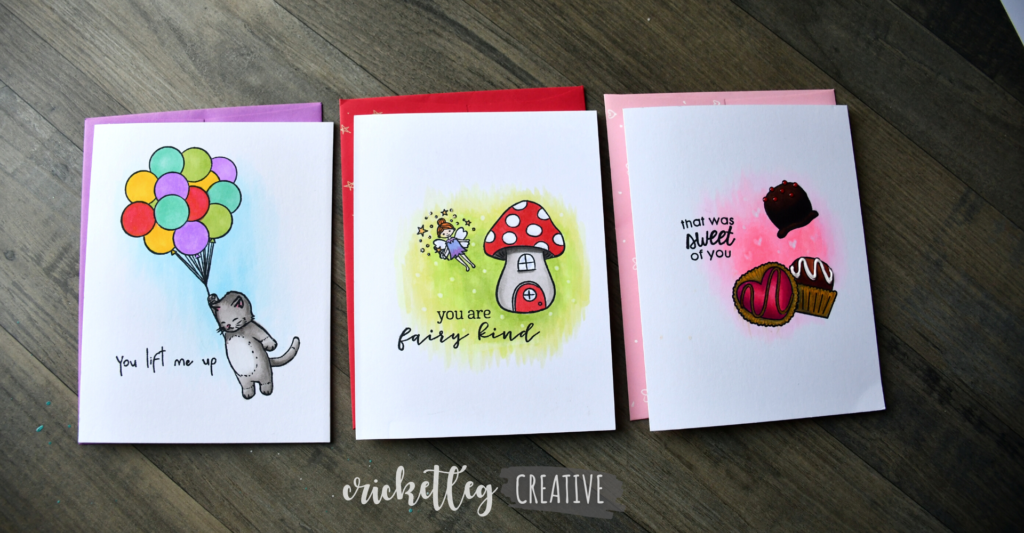
That Was Sweet of You

When I was planning out which stamps I wanted to use, I knew I wanted to do three. And I knew I wanted each one to have a different background color, just so I could try it out. The stamps I chose to use worked perfectly for this.

The first card I planned used some candy stamps from the Sweet Truffles set from Simon Says Stamp. I masked one of them so it would look like one was in front of the other. I paired these sweet stamps with a sentiment from the Hero Arts You’re Top Tier set.

After coloring in the truffles, I used some light pinks to color a bit in and around the images, fading out with a lighter pink marker on the edges.

I finished off the design by adding some gold accents with a metallic gold gel pen. And I used Nuvo Crystal Drops in red and white to add some dimension to the truffles.

And I took a tip from Sandy and used my Copic colorless blending marker in the pink shaded area. I drew small hearts.

You Are Fairy Kind

All three stamped images came from the Hero Arts My Monthly Hero Kit from July 2021. This is such a cute set–full of gnomes and mushrooms and woodland accents. Just adorable.

Though I really, really, really wanted to do a gnome card, I just couldn’t get past the sentiment “you are fairy kind.” I wanted all these cards to be thank-you cards so I focused on the sentiment.

I used the mushroom house, the fairy, and the sentiment. Once they were colored in, I used light greens to do the background color…fading out again so that the green faded softly.

I added some Stickles clear glittery accents on the fairy dust. The colorless blender also added some dot texture to the background.

You Lift Me Up

For my last simple one-layer card, I chose to use stamps from another My Monthly Hero Kit. This one from June of 2021.

Another simple design, with just the balloon stamp, the cat stamp, and the sentiment. After coloring in the cat and balloons, I used light blues to fade out on the background.
As one last reminder, I recommend using high quality, heavy cardstock for your coloring. You’ll get much better results. I use 110 lb. Neenah white cardstock.

And you don’t have to have Copics. I’ve used cheaper alcohol markers than Copics (but I upgraded last year). You could also try using colored pencils.

And that’s it folks. Simple one-layer cards that can be made very quickly but are very sweet. If you have not yet tried simple designs like these, I invite you to give it a try.

Here are a few other simple card designs you might enjoy trying.
Leave a Comment Categories: Handcrafted Cards, Quick Tips
Share :

Simple & Sweet Donut Card

February 3, 2021 Handcrafted Cards

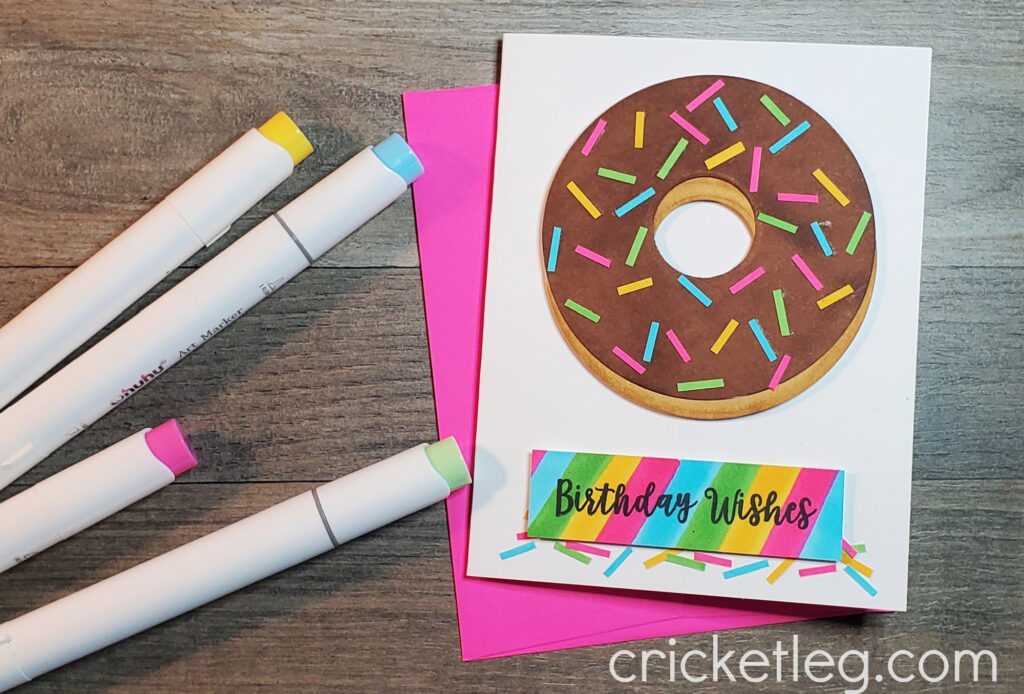
This simple and sweet donut card uses minimal supplies to make a clean but fun design!

simple and sweet donut card

Well, hi!

Recently I shared a donut card I made and I promised a video to show the basic technique. It’s a little late, but I have delivered nonetheless!

The card design for this video is not exactly that of my recent post, but the basic concept is exactly the same. You can arrange the final card any way you like. I’m pretty much just showing you how to make the donut and the sprinkles!

I think the original inspiration for this card was from something I saw on Pinterest. I see all kinds of ideas on Instagram, Pinterest, and YouTube for beautiful cards. But, as I explain in the video, I’ve only just recently re-entered the card making world. The supplies I kept from the 90s are not always up to snuff. And I don’t have the budget to run out and get every stamp and die that I want. (Man, would that not be awesome?!)

Anyway, this card is an attempt at making something fun with what I already have. It’s a challenge to make something from the basic supplies that already exist in my little craft studio. I already had the circle dies and the markers and just about everyone who stamps has some kind of sentiment stamp that will work.

I think it turned out great! And it’s a wonderful way to get into card making if you’re new to it.

So watch and enjoy! Y’all take care!

Leave a Comment Categories: Handcrafted Cards
Share :

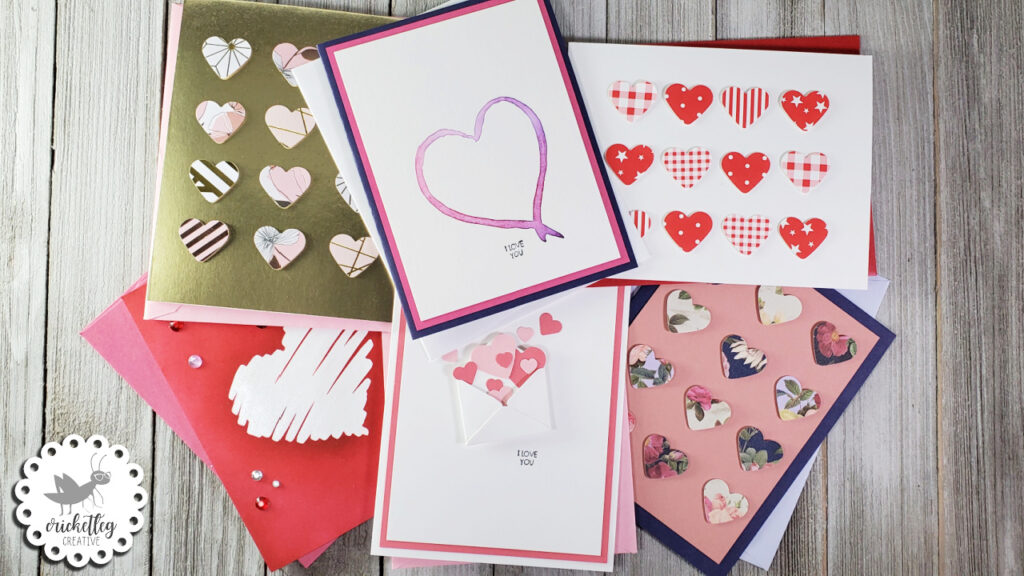
4 Simple Valentine Card Designs

January 13, 2021 Handcrafted Cards

Watch the video to see four simple Valentine card designs you can do with minimal supplies.

Well, hi! Guess who’s back making YouTube videos? Yay, me!

Really though, after a holiday break I’m having a bit of a hard time getting back into routine. So this week I’m bribing myself with little rewards each day. Hopefully this gets my butt back in full swing. It’s been a while since my last video.

Here’s the end result of one of those bribes: my video showing four simple Valentine card ideas. These designs require minimal supplies and come together fairly quickly too. You’re sure to find a design that appeals to you.

My cousin recently asked me how to get started in card making and I’ve been thinking about that a lot. What kinds of cards could be made if you only had a few supplies? Not everyone will have everything in this video, but hopefully there’s a card design that will accommodate what you do have.

Please watch, and comment to let me know which of these four simple valentine card designs is your favorite! Also, if you have a request for techniques to learn or projects you’d like to see, please let me know.

Also, if you are new to card making and are interested in seeing more videos and ideas for beginners, I’d love to hear your thoughts. I’m always looking for new video content ideas. And I’m playing around with the idea of making some instructional videos for those just starting out.

Check out my other YouTube videos here.

Y’all take care!

Leave a Comment Categories: Handcrafted Cards
Share :

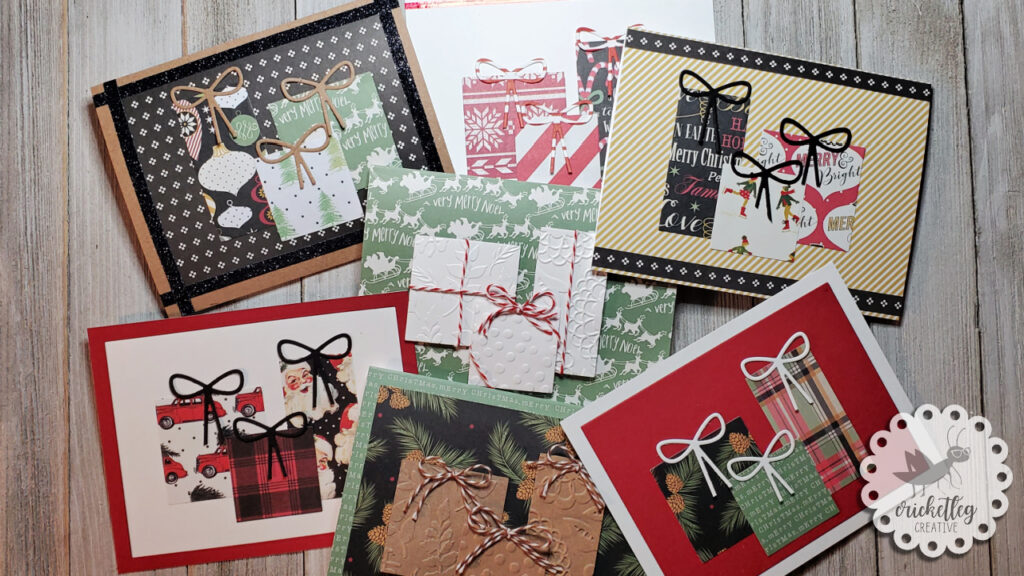
Clean and Simple Christmas Cards

December 9, 2020 Handcrafted Cards, Holiday Cards, Quick Tips

This week’s video shows an easy way to create cute but clean and simple Christmas cards.

clean and simple Christmas cards

Well, hi!

Welcome to this week’s video post. I’m just barely getting this one in under the wire for my normal Wednesday video posts. I’ve been trying to get the voiceover and final edits done but between my alcohol inks adventure, lack of sleep, and a cold that keeps attempting to take me out, I’m only just getting this finished TOday.

But, hey, it’s done and it’s cute.

Have you heard of CAS cards? It just means Clean And Simple. They are usually pretty easy to crank out and are also usually fast. The Christmas cards in this video came together pretty quickly.

Products used in this video? Patterned paper, baker’s twine, embossing folders (on some of them), gift shaped dies (square and rectangle), a bow die (on some of them), and a few embellishments on some like metallic or glitter tape.

CAS cards are a good way to get into cardmaking. They usually don’t require many materials and, like I said, they come together quickly.

I still prefer a more complex design myself because I enjoy the process. But it’s nice to know that if you need a card in a hurry or if you need to make cards en masse, CAS cards can be a good go-to.

Watch the video below to see my clean and simple Christmas cards. And please visit my channel and subscribe. You can click on the little bell there to be notified when I upload new videos (currently on Wednesdays).

I hope you’re having a merry Christmas season so far!

Y’all take care!

Leave a Comment Categories: Handcrafted Cards, Holiday Cards, Quick Tips
Share :

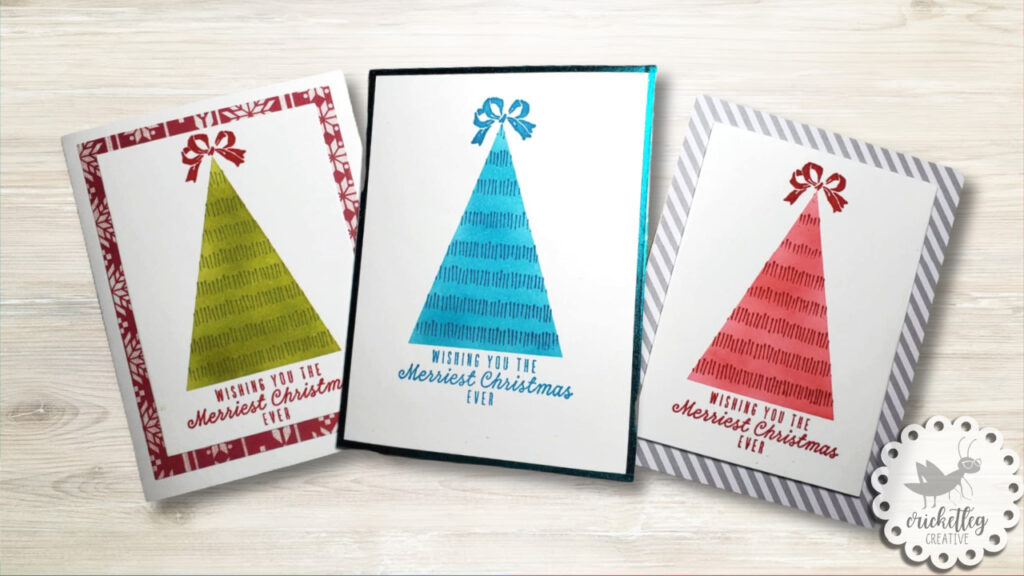
Quick & Simple Christmas Cards: Masked Trees

October 29, 2020 Handcrafted Cards, Holiday Cards

This quick and simple Christmas card technique of masked trees might be just the ticket for your holiday cards this year!

quick simple christmas cards masked trees

Well, hi!

Welcome back to the blog, and welcome to an idea that has literally been years in the making.

Okay, maybe that’s too dramatic. But I really have been itching to try this technique. Well, my version of it anyway.

The Idea

I saw someone on social media mask off some watercolor paper in a triangle tree shape and make cool droplets of color inside the mask. Once the water/paint droplets had dried, there was this cool effect! I figured I’d try it with stamping.

When I started to look through my stamps I realized that the stamp I was envisioning was not in my possession. Dang it! Oh well, regroup and recalculate.

What I Ended Up Doing Instead

What I ended up on turned out great! I used ink blending and a single, repeated stamp with tone on tone colors. The idea and technique is so simple I figured why not try it with more than one color scheme.

Once I chose the tone on tone color, I knew I wanted to keep the rest of it simple too. There are only three stamps total used. One sentiment, one tree topper bow, and the border stamp that gets repeated on the tree.

These cards went together so fast I’m actually rethinking my original 2020 Christmas card design idea.

Watch for yourself in the video below. Leave a comment and let me know which color scheme you like best. Personally, I was surprised by my preferences!

If simple is not your style, check out a more detailed Christmas card here.

Y’all take care!

Leave a Comment Categories: Handcrafted Cards, Holiday Cards
Share :

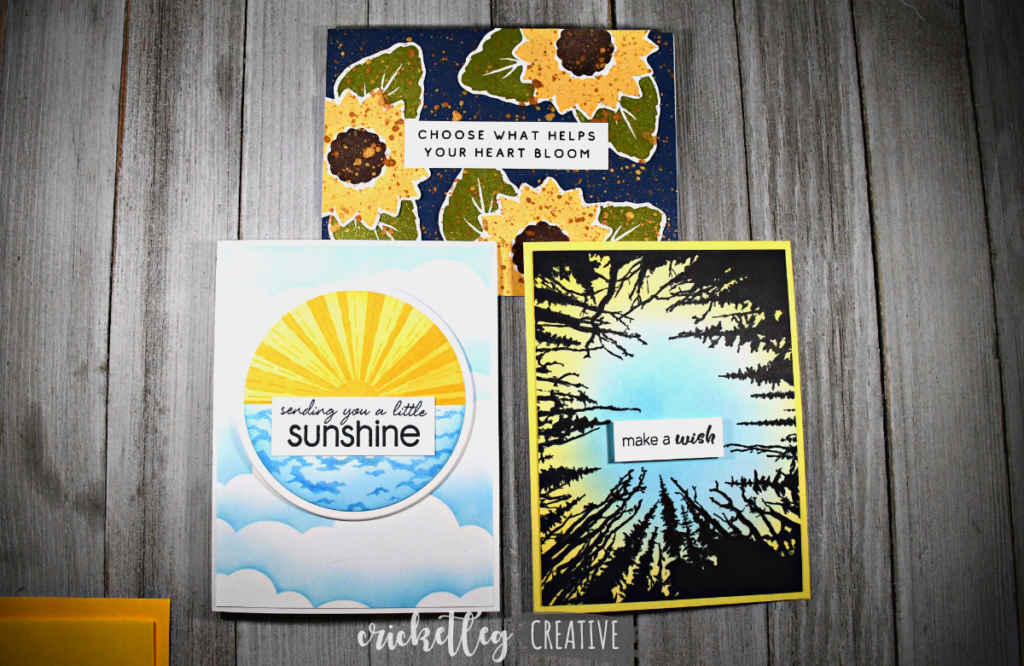
Cards for Ukraine

March 9, 2022 Handcrafted Cards

Cards for Ukraine–a movement in the papercrafting world to show support for the Ukraine.

cards for ukraine

As we watch the horror that is happening in the Ukraine, we all feel heartbroken. And helpless to change anything. Many in the cardmaking world have spoken of Ukrainian cardmaking friends who are either in Ukraine or have family there.

Personally, I don’t actually know anyone in or from Ukraine. But I have followed a miniature crafter on Instagram for quite some time who is in Ukraine. I’ve watched with sadness her Instagram posts as she and her family have huddled in the bathroom for safety while the bombs go off outside, watched her flee to an underground shelter with few belongings. And felt for her as she talks about how cold the shelter is and how scared they all are.

There is little I can do, though I pray for peace and an end to this madness.

#cardsforukraine

Many in the papercrafting and cardmaking world have turned to cards as a way to express support and love for our Ukrainian brothers and sisters. The call has gone out, for those who would like to participate, to make cards in the colors of the Ukrainian flag and post them to social media.

So, I wanted to join in too. Will my cards solve anything? Likely, no. But as with all cards, they are meant to bring a little bit of joy into the world. So here is what I share–my #cardsforukraine.

Sunflower Card

Did you know that the sunflower is the national flower of Ukraine? I didn’t until the Cards for Ukraine movement began. I read somewhere that throughout the history of Ukraine, the sunflower as been a symbol of peace.

This card was made last year using stamps from a Stampin’ Up! set. I printed the sentiment from my computer. Gold metallic watercolor across the flowers and the dark blue background complete the card.

Make A Wish Card

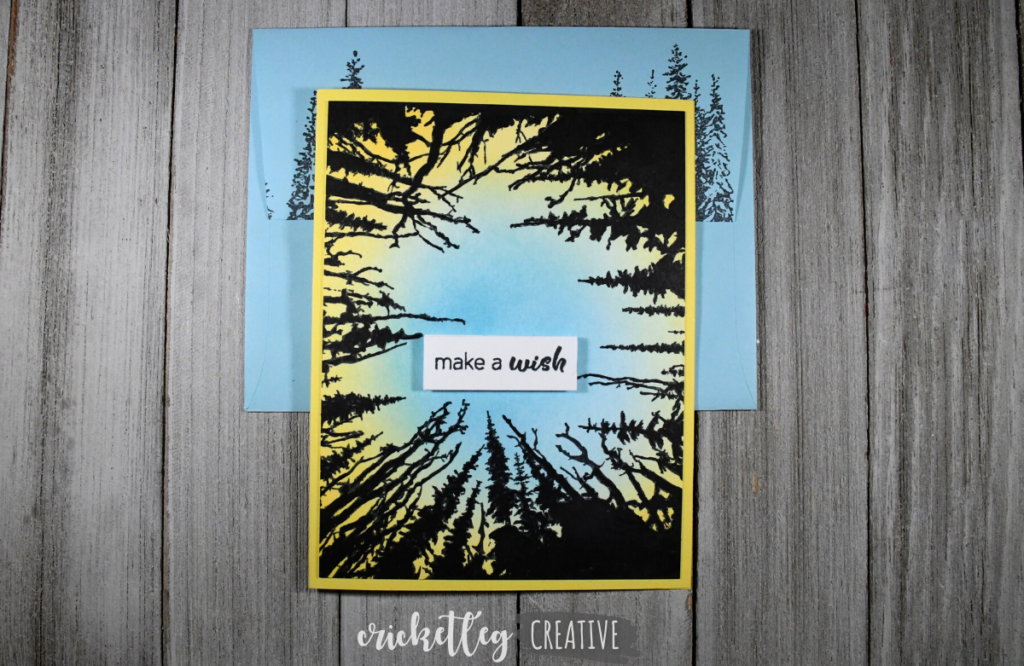
I have had this Hero Arts Cathedral of Trees stamp for quite some time, but finally put it to use on this simple card. Ink blending for the sky, in the Ukrainian flag colors and a Hero Arts sentiment from one of last year’s monthly kits complete the card.

Sunshine Card

Of the three, this is my favorite. And I so wish I could send some sunshine to all the people suffering in Ukraine right now.

I used a stencil from the Simon Says Stamp to create the background. Then used stamps from a 2020 Hero Arts monthly kit to make the center image (on a circle die cut).


Praying for peace. молиться за мир.

Leave a Comment Categories: Handcrafted Cards
Share :

Catching Up

May 21, 2021 Handcrafted Cards

After a break, I’m catching up on family event cards this week!

catching up cards

Well, hi!

Unfortunately, it’s been about a month and a half since I’ve posted to the blog. Wow, had no idea it was that long! I’ve been busy. Jumping rope, going on an amazing anniversary trip (30 years, woohoo!), starting a new business, surviving!

As a result, I completely spaced on keeping up with family birthdays and anniversaries! It just completely slipped my mind. And I am bound and determined to keep my commitment of doing all the family birthdays and anniversaries in 2021!

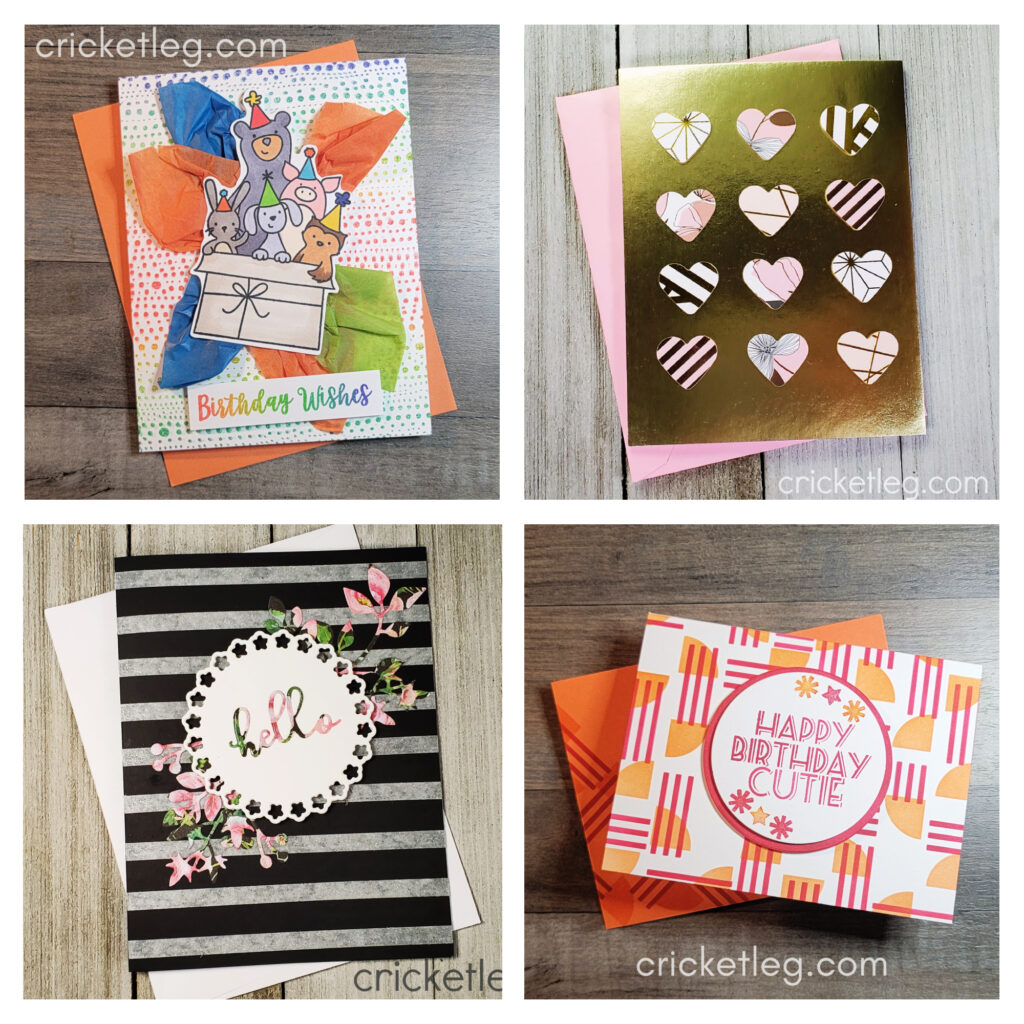
Therefore, this week, in an effort to catch up, I’ve made a couple of simple cards and looked through my stash of already-made cards to see what I can do to get all of May taken care of. I have four cards to share with you this week.

The striped “hello” card and the heart punch card are from previous challenges, and you can see more about them here and here.

The birthday wishes card is made using a Hero Arts background stamp with a rainbow stamp pad from the same company. The birthday sentiment and animals is from an Avery Elle stamp set. The tissue paper accents add a punch of color and tie everything together. And it’s fun!

The Cutie card is made using stamps and stencils from a My Monthly Hero kit. Because I’ve always loved the color combo of orange and pink this was a fun card for me to make.

Now, if you’ll excuse me, I have some June cards to get to!

Happy Crafting! Y’all take care!

Leave a Comment Categories: Handcrafted Cards
Share :

“Anything Goes” Challenge

March 2, 2021 Challenge Cards, Handcrafted Cards

Simon Says Stamp “Anything Goes” Challenge with a few cards and a journaling entry.

anything goes challenge

Well, hi!

Sometimes it’s nice to have a specified direction, but sometimes I do love when I can just do whatever I want!

So this latest challenge from Simon Says Stamp being “Anything Goes” is just want I was in the mood for!

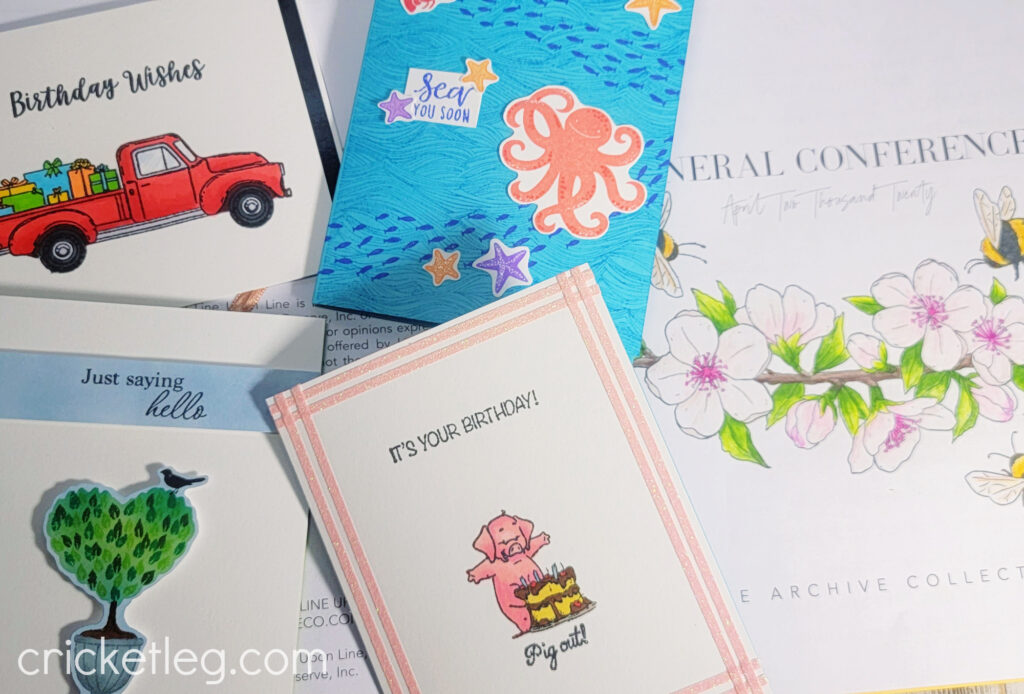
Welcome to my five entries. Here they are in no particular order.

Bees & Floral Journal

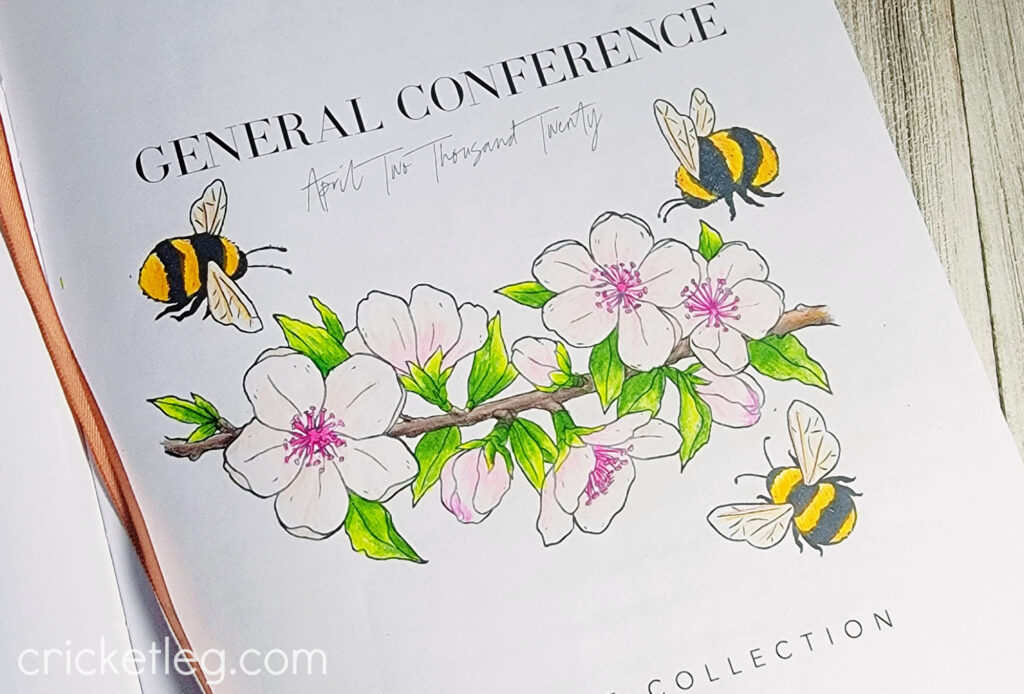
This is the front page to my Line Upon Line General Conference notebook. I’ve been showing some drawings I’ve been doing on my Instagram (on Sundays). But this time I thought I’d mix things up by doing some stamping and coloring.

I chose to use stamps from the Hero Arts January 2021 kit. Can’t believe I haven’t used it yet before now! It’s such a great stamp and die set. I stamped the large floral and the three different bees. Then I colored it in with colored pencils.

anything goes challenge floral

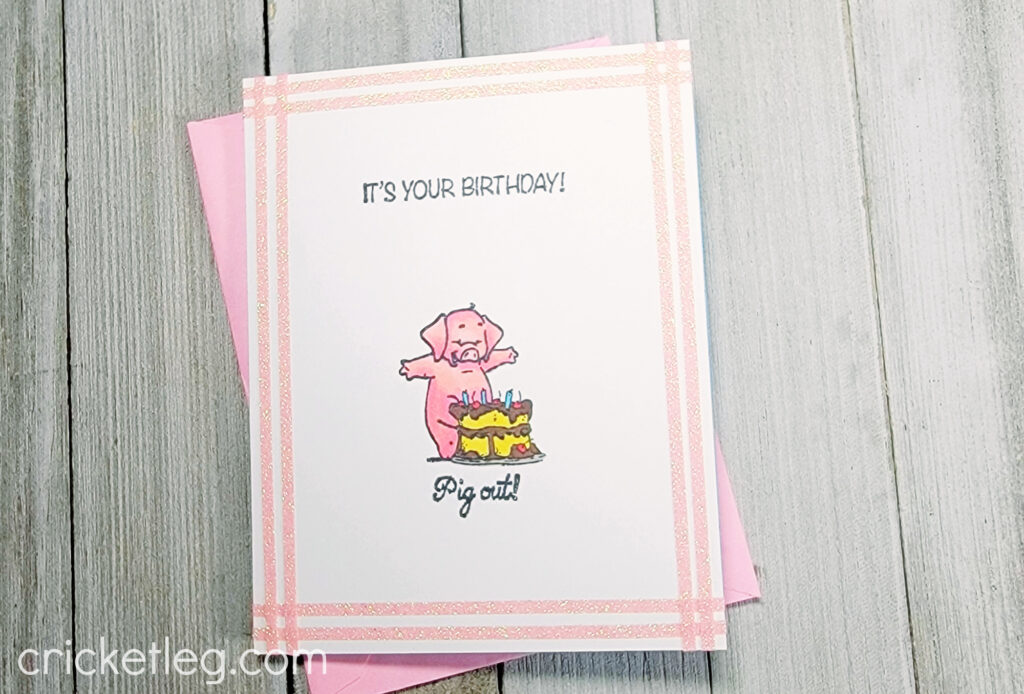
Pig Out!

Okay, here’s a chance to address something. Months ago, in an effort to increase my stamp and die supplies with as little money as possible, I made an Amazon experiment.

I ordered some really cheap clear mount stamps with matching dies. Do they work? Um, mostly. Would I do it again? No.

The quality of the stamps is poor. They do not stamp with very clean lines, but sometimes you can hide this. The dies are not as sharp or exact either. These “cling” stamps do not actually cling very well. Once you manage to pry them off their plastic backing page, there’s no stick left. Not great.

So the lesson is: spend the money and buy from reputable stamp companies. If the price sounds too good to be true, it very likely is.

Still, for a simple card, and since I have the stamps already and might as well use them, this card is pretty cute. Not great lines, but still fun to use.

Stamped using Tuxedo Black Memento Ink and colored in with Copic markers.

pig out anything goes challenge

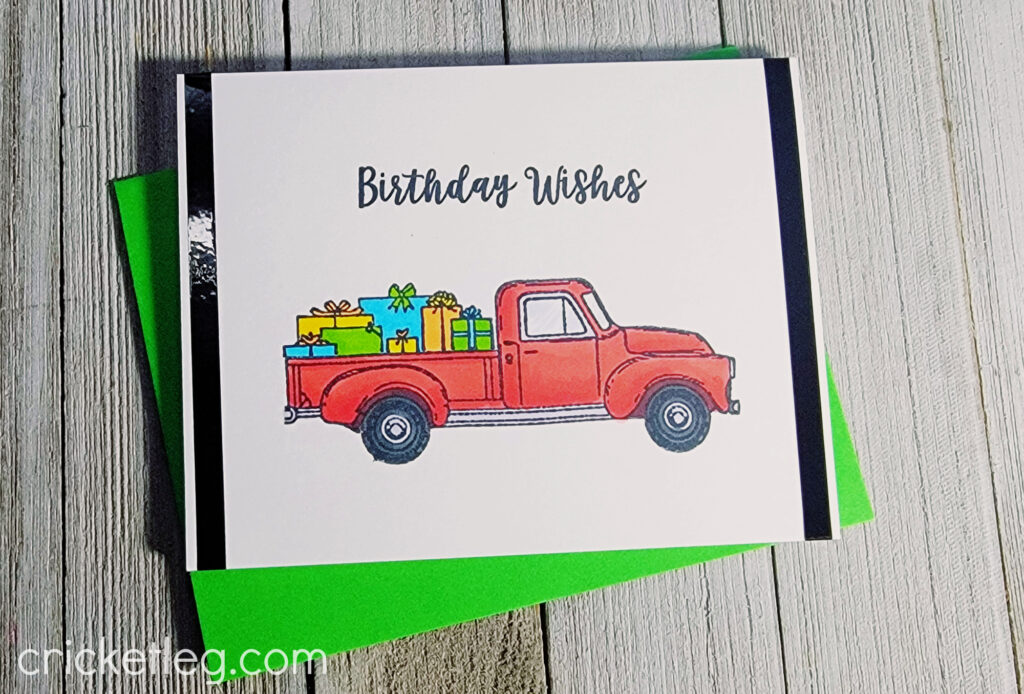
Gift Truck

Speaking of cheap stamps….yeah, here’s another example. I do love me a vintage pickup loaded with stuff in the back! But this set has the same issues as the pig. Blurry lines, dies are meh, and no cling.

But, again, still can be used. So I did. This set comes with gifts, pumpkins, hearts, presents, flowers, apples, leaves, etc.

The sentiment is from an Avery Elle birthday set. You can see the difference in quality between the crispness of the sentiment and the blurriness of the truck. I’ll not be trying the cheap Amazon stamp set experiment again! I mean, when I take on an Anything Goes Challenge, I don’t want the challenge to come from actually getting the stamps to work right!

Stamped using Tuxedo Black Memento Ink and colored in with Copic markers.

truck

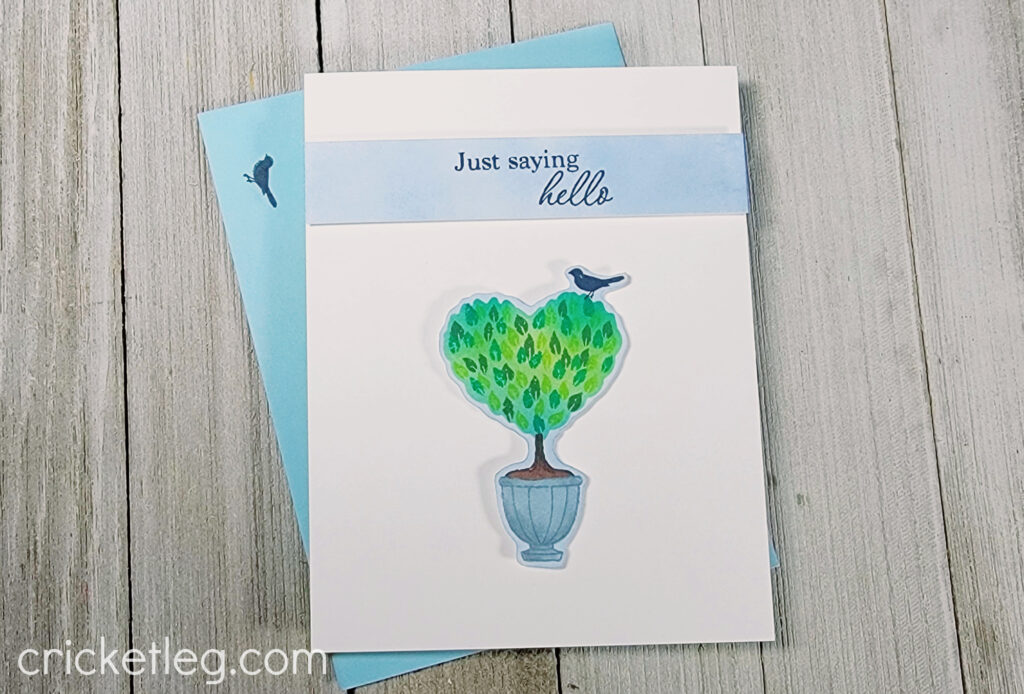
Topiary Hello

Let’s get back to great stamps, shall we?! I love Hero Arts, and this was a surprise freebie in one of my recent orders. I think this simple and sweet topiary makes a lovely card, don’t you?

It came with matching dies. I used the die for the greenery section to make a mask so I could ink blend the leaf area for a softer and more complete look.

The sentiment is also from that set.

Stamped using Ranger Distress Ink pads and colored in partially with Copic markers and ink blending.

topiary

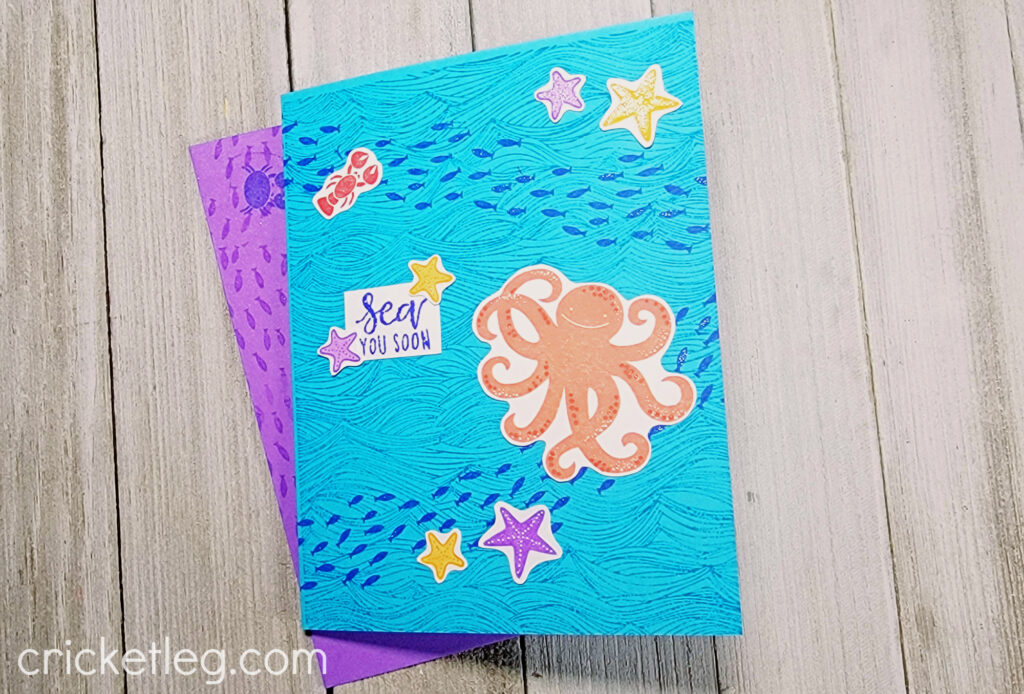
Sea You Soon

Another Hero Arts win here. That watery background stamp is from Hero Arts and I’ve been itching to use it. I love it!

I paired it with an old Stampin’ Up! stamp set that features a school of fish, octopus, starfish, and lobster. The “Sea You Soon” sentiment is from another Hero Arts set.

I just love mixing and matching stamp sets! I can sometimes be too “in the box” and forget to do that.

Stamped with Ranger Distress Ink stamp pads.

anything goes challenge

Alright, all done. Hope you enjoyed this peak at my “Anything Goes” Challenge entries. You can check out other challenges here.

Y’all take care!

Leave a Comment Categories: Challenge Cards, Handcrafted Cards
Share :

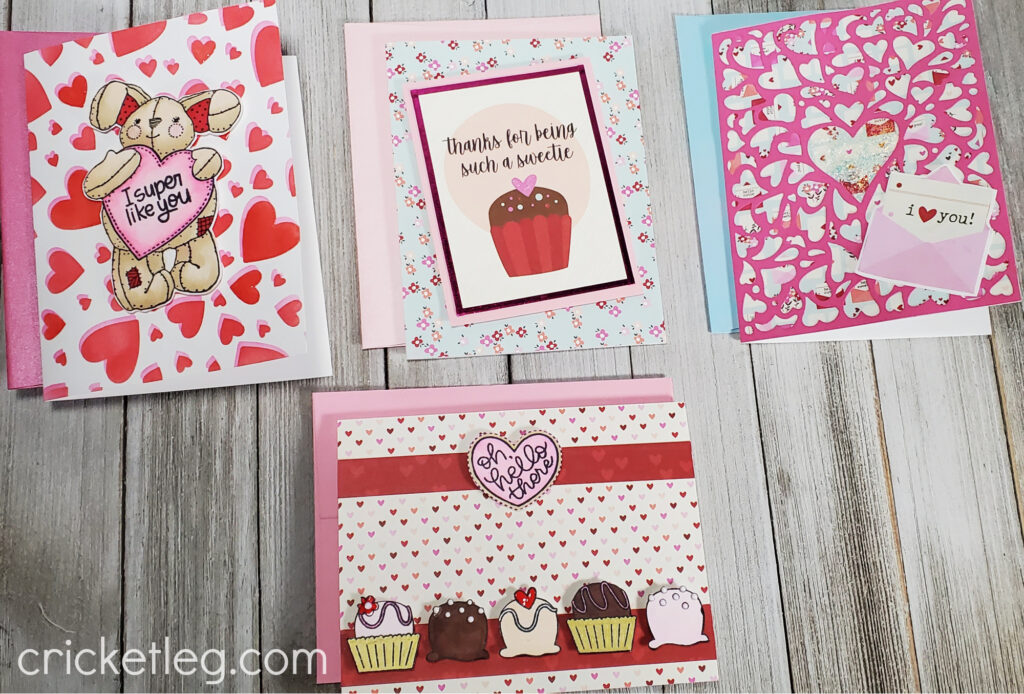
“Love/Hearts” Challenge

February 5, 2021 Challenge Cards, Handcrafted Cards

My entries into the Simon Says Stamp Monday Challenge theme of Love/Hearts

love hearts challenge

Well, hi!

Welcome to another edition of “Julie Makes Challenge Cards.” I do seriously love doing these Simon Says Stamp challenges because it gives me some direction in what cards to make and experiment with.

And, with the recent release of Simon’s February kit, I’ve got lots to play with! I recently was thinking that I wish I had stamps of chocolate truffles and, lo and behold, they show up in the kit! Awesomeness!

So here we go…

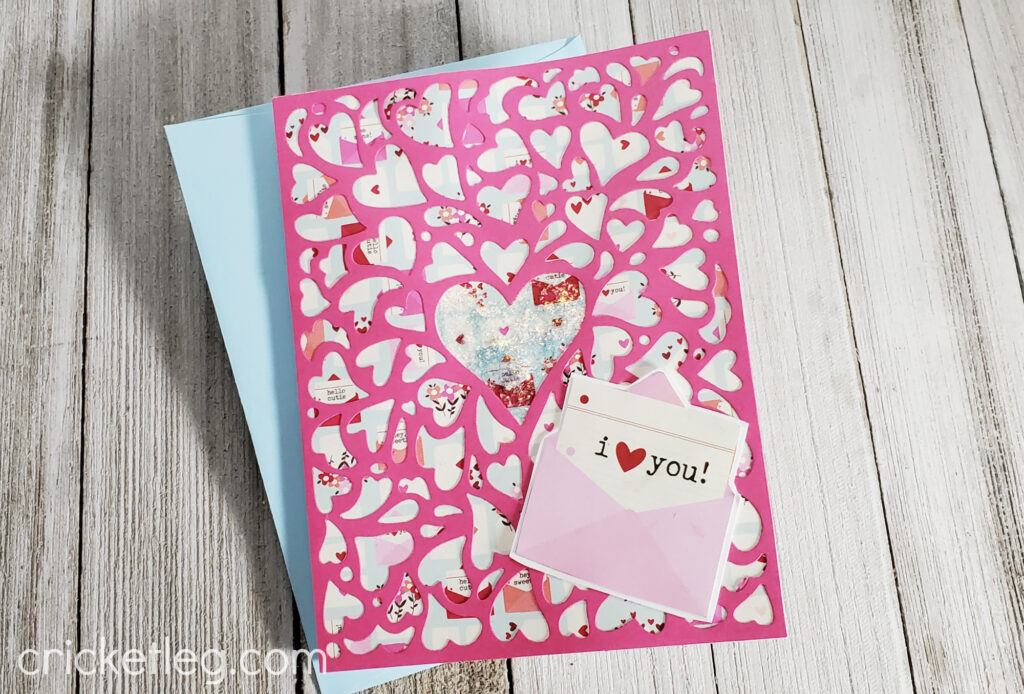
Heart Mail

I used a Hero Arts heart background die to create the pink overlay. This goes over some very cute paper from the Simon February kit. Ranger Stickles glitter glue fills up the center heart. And a “heart mail” image from that Simon paper completes the card.

It’s a little busy, but I’ve been wanting to try out that die. Hmmm, maybe next time I’ll do some ink blending behind it?

love hearts challenge

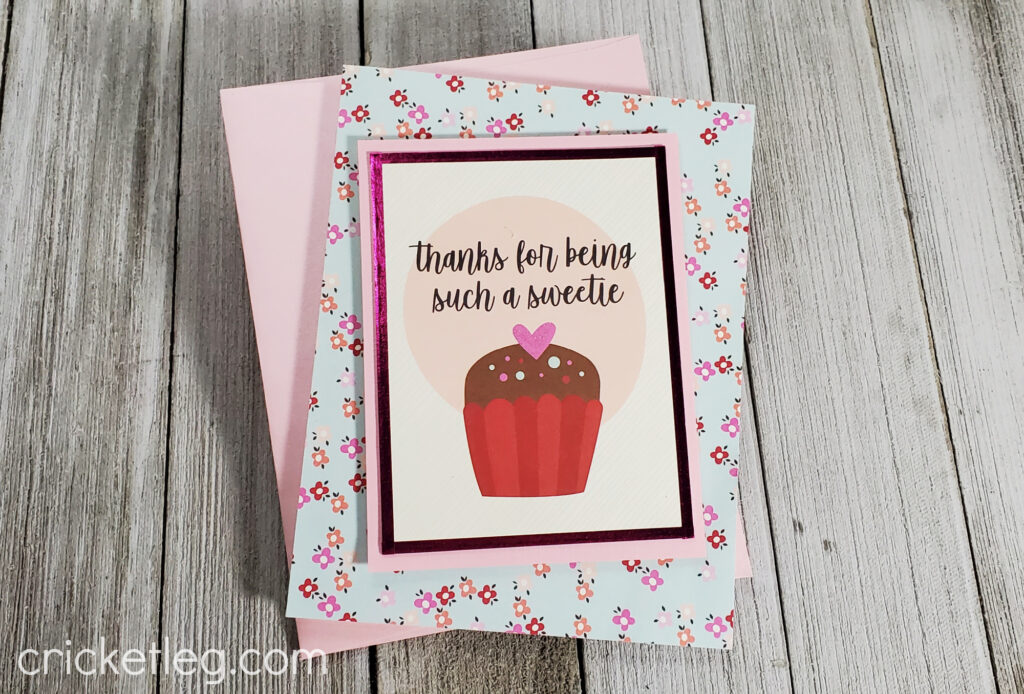
Sweet Thanks

No stamps or dies in this one! It’s kind of fun to just use paper and accessories to create a cute card sometimes.

The patterned paper is all from the Simon February kit. I used some pink cardstock to back the cupcake image. And some pink metallic tape to edge it. I love my Spectrum Noir glitter brush and used it to add some dazzle to the cupcake sprinkles.

sweet thanks

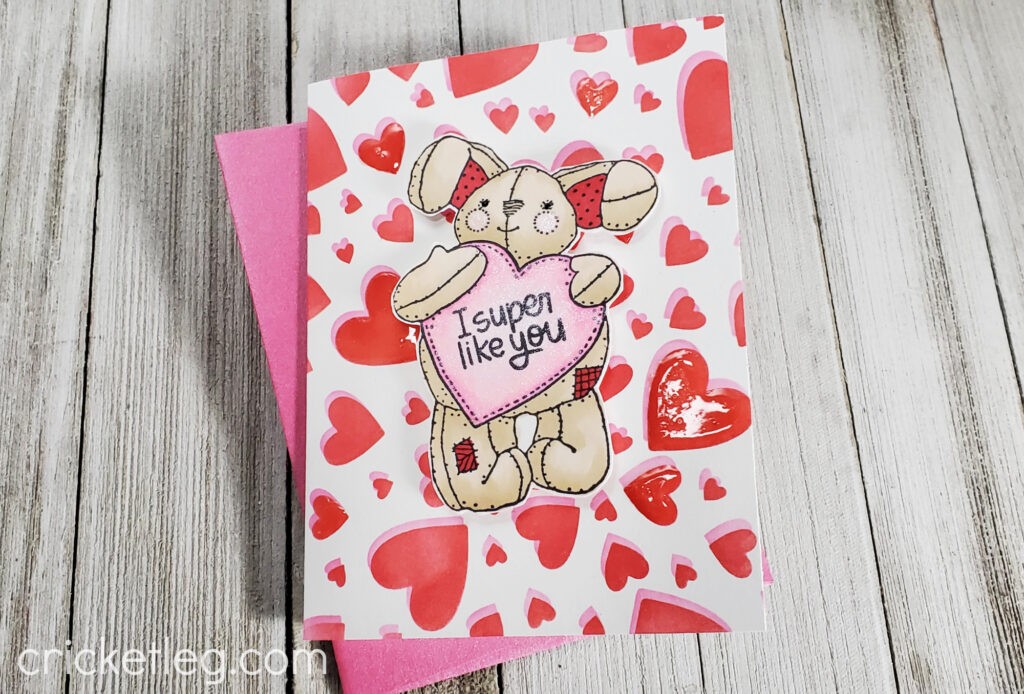
Bunny Heart

That February kit is packed with awesome stuff, like the heart stencil I used for the background of this card. I used blending brushes to create it. First, I used pink. Then, after off-setting the stencil, I used a basic red. Ranger Gloss Accents on a few select hearts gives the background more dimension and some shine.

The bunny is a Printworks (no longer making stamps) stamp. But I did use a stamp from the Simon February kit for the sentiment in the bunny’s heart. After coloring that image in with Copic markers, I mounted the bunny in the center with double stick foam squares.

Oh, and I also used my Spectrum Noir glitter brush for the bunny’s cheeks and the heart he’s holding.

bunny heart

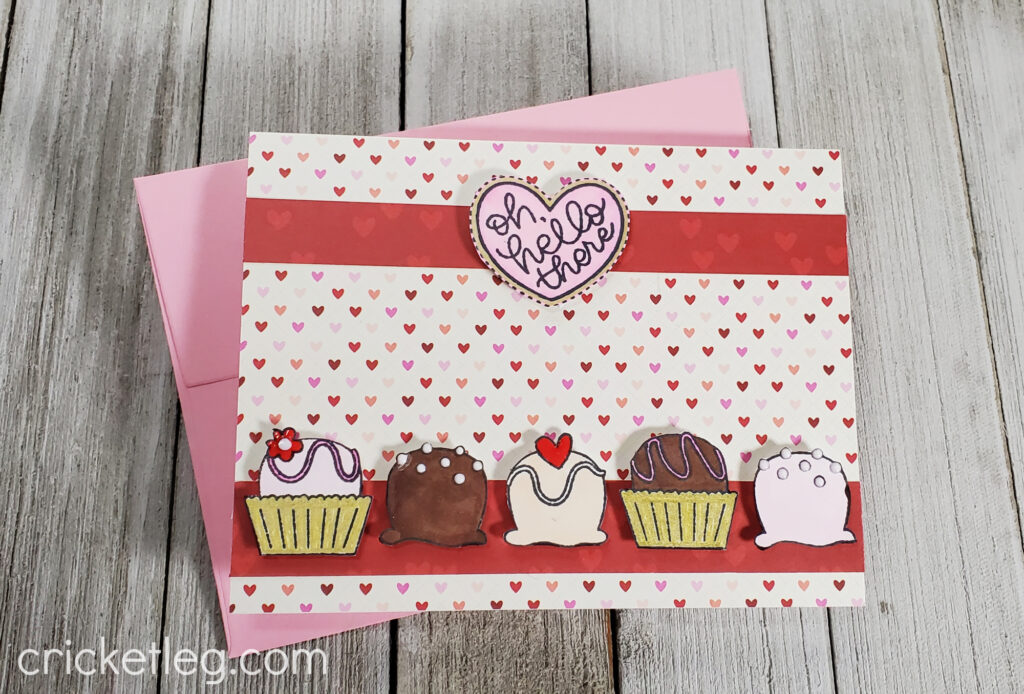
Oh, Hello There

I think this one is my favorite! I love those truffle/candy stamps. I’ve been so eager to use them.

Background papers are from the Simon February kit as well as the “Oh, Hello There” heart. I mounted that one with foam tape.

The candies are also mounted with foam tape. Each candy has something special about it. Some have Nuvo Crystal Drops for dimension. Some have metallic gold colored in for the wrapper. One of them has both! I think they turned out really cute.

love hearts challenge

And now I’m hungry. If you are now craving sweets, sorry…but why not check out this recent donut post?

So there are my entries into the Love/Hearts Challenge. Another challenge, another blog post. There’s another love themed challenge coming soon. So stay tuned.

Y’all take care!

Leave a Comment Categories: Challenge Cards, Handcrafted Cards
Share :

“Anything Goes” Challenge

February 2, 2021 Challenge Cards, Handcrafted Cards

Anything Goes Challenge entries for Simon Says Stamp Wednesday Challenge

anything goes challenge

Well, hi!

Sometimes I love a specific challenge, but the “Anything Goes” Challenge often comes in handy. No rules or guidelines means I can take whatever card needs I have at the moment and have them do double duty for a fun challenge entry!

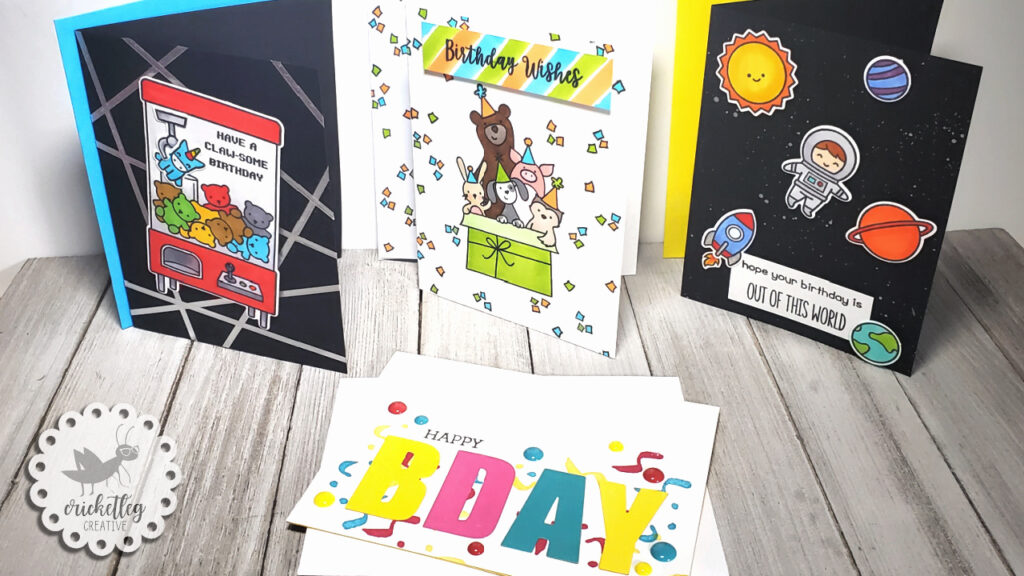
This week I have four cards to share with you for the “Anything Goes” Challenge. All of them are birthday cards…yep, it’s time to make sure my February cards are done!

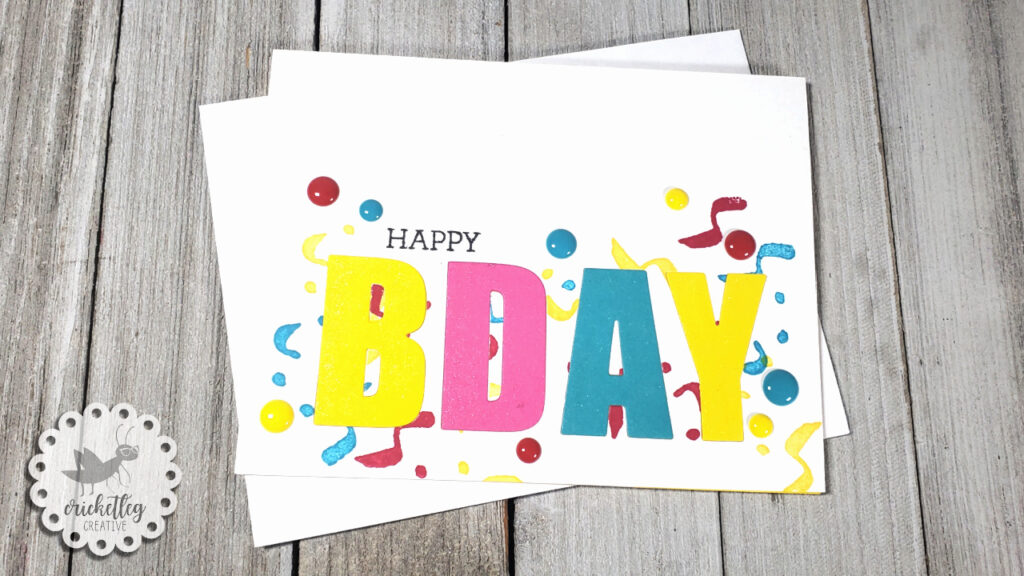
Bold Birthday

I’ve used this basic card design before but this time decided to add some enamel dots to brighten it up and add dimension. I also used the Spectrum Noir Glitter Brush to add some dazzle to the inlaid die cut letters.

It’s a clean and simple card but bold!

bold birthday

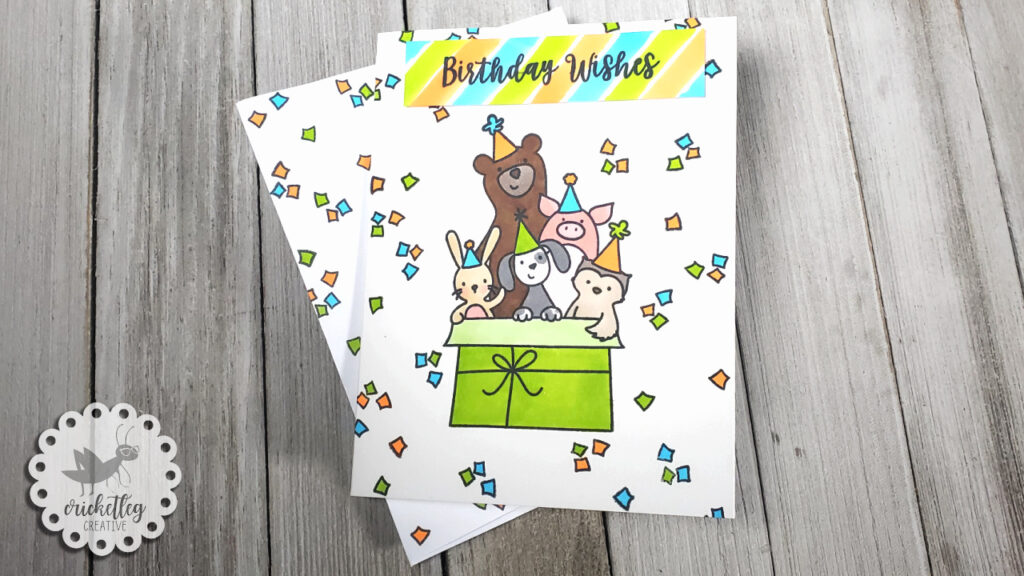
Birthday Wishes

In a recent order with Simon Says Stamp, I picked up this adorable stamp set. It’s a small set, but so cute and I think it’s going to end up being used a LOT.

I simply stamped it in black and colored it in with Copic markers. I used the chisel tip of the markers to make a custom background for the birthday sentiment strip. I love the color combo!

anything goes challenge

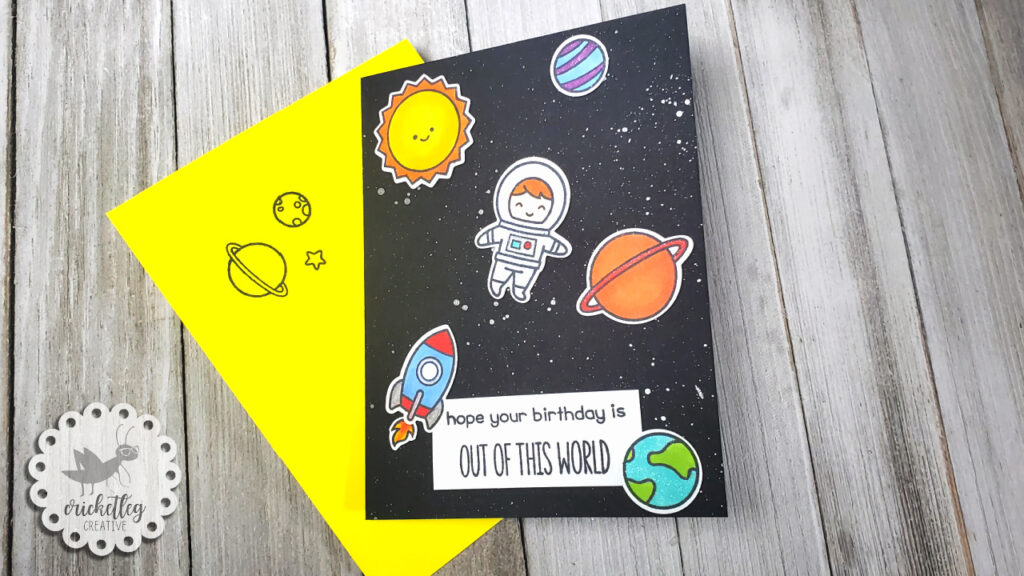
Out of This World Birthday

Here’s a card using a Lawn Fawn stamp and die set I got for Christmas. I love this set! It’s so cute and has a lot of possibilities. In fact, I made another birthday card using it in early January.

This time, though, I decided to use black cardstock and just splatter my stars on with metallic silver watercolor paint. Simple, easy, and effective.

I colored the images with Copic markers and cut them out using dies. They are mounted to the card using double-sided foam tape.

out of this world birthday

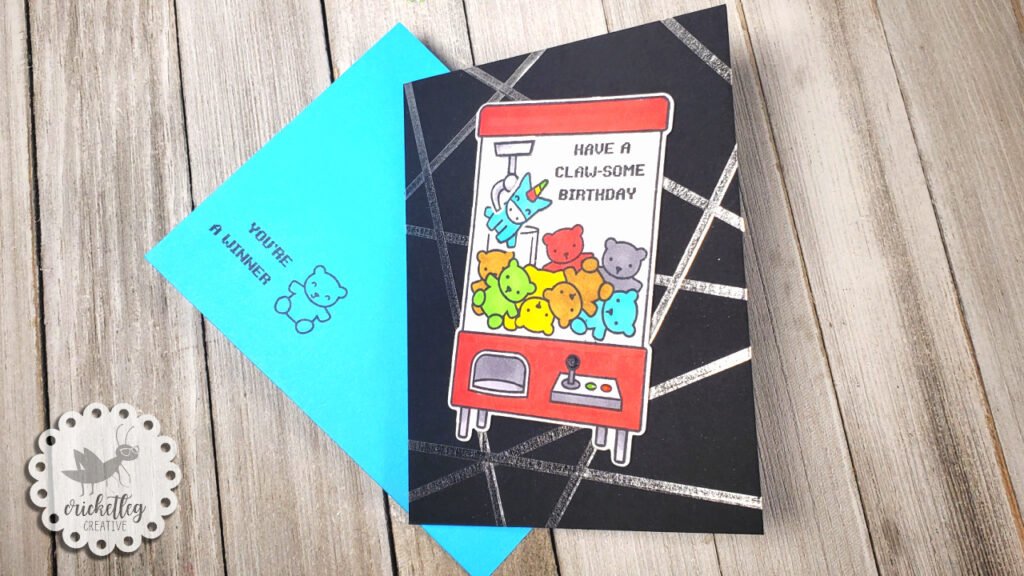
Claw-some Birthday

My last entry into the “Anything Goes” Challenge uses this cool retro-vibe stamp set and die set from Lawn Fawn. (I always try to get the coordinating dies at the same time if I can! So handy!)

I stamped the images onto white cardstock and colored them in with Copic markers. I added metallic silver tape on the black cardstock card as a retro background. It reminds me of the 80s! I can say that because I grew up in the 80s. Just sayin’.

anything goes challenge

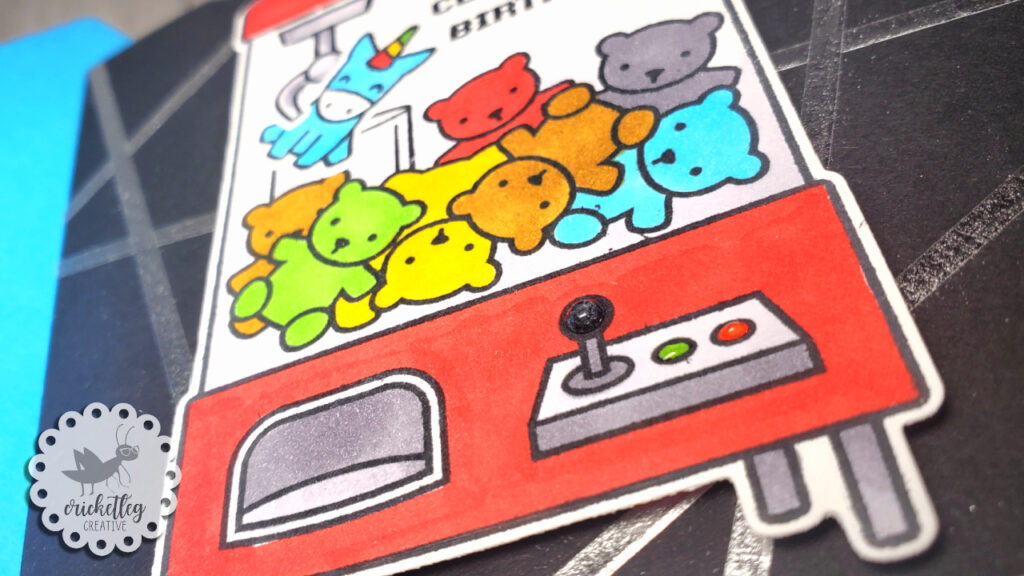
I love the pixel-y lettering on the sentiments! Oh, and I also used Ranger Glossy Accents to add dimension to the joystick and buttons on the machine.

close up glossy accents

Okay, so that’s it for now y’all. This was a fun challenge!

Leave a Comment Categories: Challenge Cards, Handcrafted Cards
Share :
  • 1
  • 2
  • 3
  • Next Page »

Get My Latest Posts via Email!

Name

Email


designer spotlight
SSS Monday Challenge Winner

Recent Posts

  • Cards for Ukraine
  • Simple One-Layer Cards
  • Using Airtable to Inventory Your Stamps
  • Catching Up
  • “Beautiful Blossoms” Challenge

Categories

follow me on instagram

Follow on Instagram

Archives

  • March 2022
  • February 2022
  • May 2021
  • March 2021
  • February 2021
  • January 2021
  • December 2020
  • November 2020
  • October 2020

Meta

  • Log in
  • Entries feed
  • Comments feed
  • WordPress.org
Cricketleg Creative. All Rights Reserved.Design by SkyandStars.co
Back Top

Copyright © 2025 · LoveYourself on Genesis Framework · WordPress · Log in